Qt网络应用----socket通信例子
来源:互联网 发布:单页seo怎么赚钱 编辑:程序博客网 时间:2024/05/21 03:59
1.我们新建Qt4 Gui Application,工程名为“udpone”,选中QtNetwork模块,Base class选择QMainWindow。(说明:如果一些Qt Creator版本没有添加模块一项,我们就需要在工程文件tcpServer.pro中添加一行代码:QT += network)
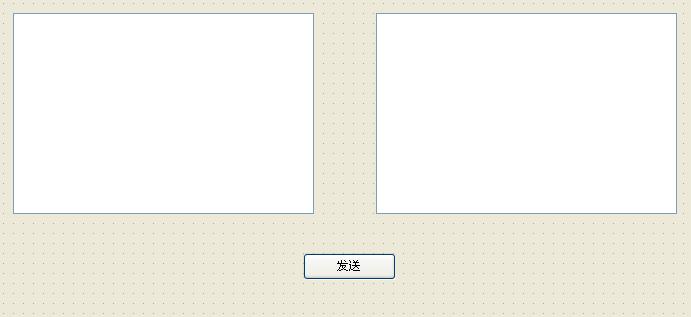
2.在mainwindow.ui中添加2个文本编辑框(Text Edit),左边的那个的objectName改为为textSend,右边的那个的objectName改为textReceive,添加一个按钮,改其objectName为send,如下所示:
3.在mainwindow.h文件中加入#include <QtNetwork>,
添加public变量 QHostAddress *hostaddr1;和 QHostAddress *hostaddr2;
添加private变量 QUdpSocket *udpSocket1;和QUdpSocket *udpSocket2;
添加私有槽函数:
private slots:
void send();
void receive();
4.在mainwindow.cpp文件中,加入如下代码:
(1)在构造函数中添加:
udpSocket1=new QUdpSocket(this);
udpSocket2=new QUdpSocket(this);
hostaddr1 = new QHostAddress("192.168.253.106");
hostaddr2 = new QHostAddress("192.168.253.188");
bool conn=udpSocket1->bind(*hostaddr1,6666,QUdpSocket::ShareAddress);//监听本机上的6666端口,如果有消息到来,就会发送readyRead()信号。
if(!conn){
QMessageBox box;
box.setText(tr("连接错误"));
box.exec();
}else{
connect(udpSocket1,SIGNAL(readyRead()),this,SLOT(receive()));
connect(ui->send,SIGNAL(clicked()),this,SLOT(send()));
}
(2)实现send函数:
void MainWindow::send()
{
QMessageBox box;
QString text=ui->textSend->toPlainText();
if(text.length()==0){
box.setText(tr("请输入发送内容"));
box.exec();
}
udpSocket2->writeDatagram(text.toUtf8(),text.length(),*hostaddr2,6665);//向IP为192.168.253.188的机器的6665端口发送数据
}
(3)实现receive函数:
void MainWindow::receive()
{
while(udpSocket1->hasPendingDatagrams()){
QByteArray data;
data.resize(udpSocket1->pendingDatagramSize());
udpSocket1->readDatagram(data.data(),data.size());
QString str = data.data();
ui->textReceive->insertPlainText(str+"\n");
}
}
OK,完成一半!上面这个程序需要运行在IP为192.168.253.106的机器上!下面将要做的是另外一个工程,需要运行在IP为192.168.253.188的机器上。下面这个工程相对上面那个工程几乎没变化,只是把hostaddr1和hostaddr2的地址掉换了一下,把发送和接受的端口互换了一下。
1.我们新建Qt4 Gui Application,工程名为“udptwo”,选中QtNetwork模块,Base class选择QMainWindow。(说明:如果一些Qt Creator版本没有添加模块一项,我们就需要在工程文件tcpServer.pro中添加一行代码:QT += network)
2.在mainwindow.ui中添加2个文本编辑框(Text Edit),左边的那个的objectName改为为textSend,右边的那个的objectName改为textReceive,添加一个按钮,改其objectName为send,如下所示:
3.在mainwindow.h文件中加入#include <QtNetwork>,
添加public变量 QHostAddress *hostaddr1;和 QHostAddress *hostaddr2;
添加private变量 QUdpSocket *udpSocket1;和QUdpSocket *udpSocket2;
添加私有槽函数:
private slots:
void send();
void receive();
4.在mainwindow.cpp文件中,加入如下代码:
(1)在构造函数中添加:
udpSocket1=new QUdpSocket(this);
udpSocket2=new QUdpSocket(this);
hostaddr1 = new QHostAddress("192.168.253.188");
hostaddr2 = new QHostAddress("192.168.253.106");
bool conn=udpSocket1->bind(*hostaddr1,6665,QUdpSocket::ShareAddress);//监听本机上的6665端口,如果有消息到来,就会发送readyRead()信号。
if(!conn){
QMessageBox box;
box.setText(tr("连接错误"));
box.exec();
}else{
connect(udpSocket1,SIGNAL(readyRead()),this,SLOT(receive()));
connect(ui->send,SIGNAL(clicked()),this,SLOT(send()));
}
(2)实现send函数:
void MainWindow::send()
{
QMessageBox box;
QString text=ui->textSend->toPlainText();
if(text.length()==0){
box.setText(tr("请输入发送内容"));
box.exec();
}
udpSocket2->writeDatagram(text.toUtf8(),text.length(),*hostaddr2,6666);//向IP为192.168.253.106的机器的6666端口发送数据
}
(3)实现receive函数:
void MainWindow::receive()
{
while(udpSocket1->hasPendingDatagrams()){
QByteArray data;
data.resize(udpSocket1->pendingDatagramSize());
udpSocket1->readDatagram(data.data(),data.size());
QString str = data.data();
ui->textReceive->insertPlainText(str+"\n");
}
}
两个机器上同时运行这两个程序,效果如下:

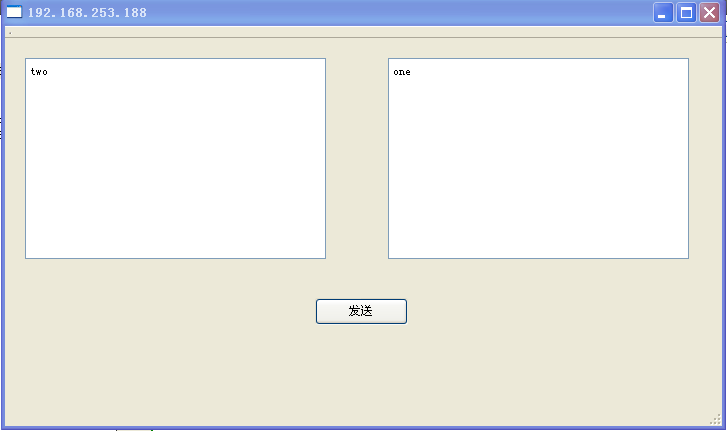
192.168.253.106机器上的程序运行后,输入one,点击发送后,会在192.168.253.188机器上的右边文本编辑框内显示出来。同样,192.168.253.188机器上的程序运行后,输入two,点击发送后,会在192.168.253.106机器上的右边文本编辑框内显示出来。
- Qt网络应用----socket通信例子
- Qt网络应用----socket通信例子
- Qt网络应用----socket通信例子
- Qt网络应用----socket通信例子
- Qt网络应用----socket通信例子
- Socket网络通信例子
- java—网络通信socket的例子
- QT上的socket网络通信编程
- java网络编程基础Socket通信应用
- java学习笔记---Socket应用网络通信
- Qt学习 之 Socket通信(一个简单的例子)
- Android简单的socket网络通信例子--群聊
- socket通信简单例子
- android socket 通信例子
- Android Socket通信例子
- Socket通信编程例子
- Socket通信简单例子
- socket通信代码例子
- HTTP状态码详解
- Qt中socket编程
- windows下mysql提示access denied for user ''@'localhost' to database解决方案
- Producer指定分区
- 79. Word Search
- Qt网络应用----socket通信例子
- Linux 磁盘查询命令 du
- ACdream 1061:郭氏树
- 顺序表和链表的相关热点面试题
- hadoop、zookeeper、hbase集群安装
- PSR-3 日志接口规范
- 洛谷 P1414 又是毕业季II
- 黄阶低级 - 《 Java 核心》- 5.1 类、超类和子类(二) - 修改0次
- 修改topic分区数和副本数