自动化运维之–Cobbler
来源:互联网 发布:oracle查看数据库编码 编辑:程序博客网 时间:2024/04/28 09:30
Cobbler
自动化
Cobbler简介
Cobbler是一个快速网络安装linux的服务,而且在经过调整也可以支持网络安装windows。该工具使用python开发,小巧轻便(才15k行python代码),使用简单的命令即可完成PXE网络安装环境的配置,同时还可以管理DHCP、DNS、TFTP、RSYNC以及yum仓库、构造系统ISO镜像。 Cobbler支持命令行管理,web界面管理,还提供了API接口,可以方便二次开发使用。 Cobbler客户端Koan支持虚拟机安装和操作系统重新安装,同时支持服务器的电源管理,使重装系统更便捷。更多内容可以查看cobbler官方网站!
cobbler官方网站:http://cobbler.github.io/
Cobbler版本
distro 发行版
面对不同的操作系统
面对同一个操作系统不同的版本 profile
核心特性是通过kickstart来部署 system
主要目的配置网络接口
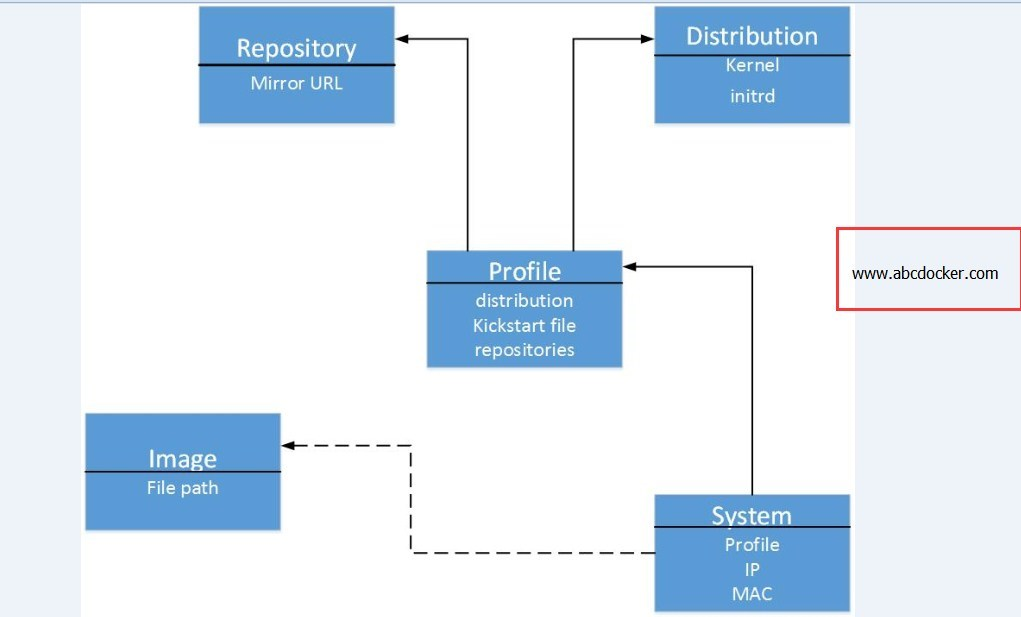
图1 cobbler各主要组件关系图Cobbler环境
我们使用的是Centos7进行安装,如果是Centos6也可以。只是有一些相关的目录不一致,可以查阅Centos6和Centos7的区别来进行设置。
Centos7下载链接 密码:xph6
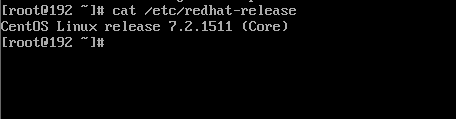
环境查看
[root@localhost ~]# cat /etc/redhat-releaseCentOS Linux release 7.2.1511 (Core)[root@localhost ~]# uname -r3.10.0-327.28.3.el7.x86_64
Cobbler部署
安装EPEL源
[root@localhost ~]# rpm -ivh http://mirrors.aliyun.com/epel/epel-release-latest-7.noarch.rpm
yum安装cobbler
[root@localhost ~]# yum install -y httpd dhcp tftp cobbler cobbler-web pykickstart
cobler是基于Python开发,安装操作界面也是Python写的
cobbler都是通过Apache来提供服务的
启动apache
[root@localhost conf.d]# systemctl start httpd启动cobber[root@localhost conf.d]# systemctl start cobblerd
如果没有需要安装,安装步骤不说了,直接yum就好了
安装cobber_web 产生的2个配置文件
[root@localhost conf.d]# ll /etc/httpd/conf.d/total 36-rw-r--r-- 1 root root 2926 Jul 18 11:30 autoindex.conf-rw-r--r-- 1 root root 1087 Jan 24 2016 cobbler.conf-rw-r--r-- 1 root root 1165 Jan 24 2016 cobbler_web.conf-rw-r--r-- 1 root root 366 Jul 18 11:30 README-rw-r--r-- 1 root root 9438 Jul 18 11:22 ssl.conf-rw-r--r-- 1 root root 1252 Jul 18 11:22 userdir.conf-rw-r--r-- 1 root root 824 Jul 18 11:22 welcome.conf
配置文件说明
[root@localhost conf.d]# cat cobbler.conf# This configuration file allows cobbler data# to be accessed over HTTP.AliasMatch ^/cblr(?!/svc/)(.*)?$ "/var/www/cobbler$1" #别名匹配AliasMatch ^/cobbler_track(.*)?$ "/var/www/cobbler$1"#AliasMatch ^/cobbler(.*)?$ "/var/www/cobbler$1"Alias /cobbler /var/www/cobbler #别名的目录Alias /cobbler_webui_content /var/www/cobbler_webui_contentWSGIScriptAliasMatch ^/cblr/svc/([^/]*) /var/www/cobbler/svc/services.py<Directory "/var/www/cobbler"> #一个虚拟主机SetEnv VIRTUALENVOptions Indexes FollowSymLinksOrder allow,denyAllow from all</Directory>ProxyRequests offProxyPass /cobbler_api http://localhost:25151/ #代理,类似于nginx的代理proxypassProxyPassReverse /cobbler_api http://localhost:25151/BrowserMatch "MSIE" AuthDigestEnableQueryStringHack=On# the webui is now part of the "cobbler-web" package# and is visited at http://.../cobbler_web not this URL.# this is only a pointer to the new page.<Directory "/var/www/cobbler/web/">Options Indexes FollowSymLinksOrder allow,denyAllow from all</Directory><IfVersion >= 2.4><Location /cblr>Require all granted</Location></IfVersion>
执行cobbler check
[root@localhost conf.d]# cobbler check #类似一个使用手册,来告诉我们需要完成以下内容The following are potential configuration items that you may want to fix:1 : The 'server' field in /etc/cobbler/settings must be set to something other than localhost, or kickstarting features will not work. This should be a resolvable hostname or IP for the boot server as reachable by all machines that will use it.2 : For PXE to be functional, the 'next_server' field in /etc/cobbler/settings must be set to something other than 127.0.0.1, and should match the IP of the boot server on the PXE network.3 : change 'disable' to 'no' in /etc/xinetd.d/tftp4 : some network boot-loaders are missing from /var/lib/cobbler/loaders, you may run 'cobbler get-loaders' to download them, or, if you only want to handle x86/x86_64 netbooting, you may ensure that you have installed a *recent* version of the syslinux package installed and can ignore this message entirely. Files in this directory, should you want to support all architectures, should include pxelinux.0, menu.c32, elilo.efi, and yaboot. The 'cobbler get-loaders' command is the easiest way to resolve these requirements.5 : enable and start rsyncd.service with systemctl6 : debmirror package is not installed, it will be required to manage debian deployments and repositories7 : The default password used by the sample templates for newly installed machines (default_password_crypted in /etc/cobbler/settings) is still set to 'cobbler' and should be changed, try: "openssl passwd -1 -salt 'random-phrase-here' 'your-password-here'" to generate new one8 : fencing tools were not found, and are required to use the (optional) power management features. install cman or fence-agents to use themRestart cobblerd and then run 'cobbler sync' to apply changes.
下面是解释:本段参考徐博士博客http://www.xuliangwei.com/xubusi/446.html
1、修改/etc/cobbler/settings文件中的server参数的值为提供cobbler服务的主机相应的IP地址或主机名,如server: 10.0.0.101;[root@cobbler-node1 ~]# sed -i 's/server: 127.0.0.1/server: 10.0.0.101/' /etc/cobbler/settings2、修改/etc/cobbler/settings文件中的next_server参数的值为提供PXE服务的主机相应的IP地址,如next_server: 10.0.0.101;[root@cobbler-node1 ~]# sed -i 's/next_server: 127.0.0.1/next_server: 10.0.0.101/' /etc/cobbler/settings3、修改/etc/xinetd.d/tftp文件中的disable参数修改为 disable = no4、执行 cobbler get-loaders 命令即可;否则,需要安装syslinux程序包,而后复制/usr/share/syslinux/{pxelinux.0,memu.c32}等文件至/var/lib/cobbler/loaders/目录中;5、执行 systemctl enable rsyncd命令即可;6、如果有强迫症可以选择 yum –y install debmirror 然后根据错误进行解决,一般错误如下。注释/etc/dedmirror.conf文件中的 @dists=”sid”; @arches=”i386”;7、[root@cobbler-node1 ~]# openssl passwd -1 -salt '$(openssl rand -hex 4)' 'xuliangwei'$1$$(openss$.wbDUBV/STL0YaNuAcusK/[root@cobbler-node1~]# grep "default_password_crypted" /etc/cobbler/settings #替换/etc/cobbler/setting内的default_password_crypteddefault_password_crypted:"$1$$(openss$.wbDUBV/STL0YaNuAcusK/"8、yum –y install cman fence-agents最后重启Cobbler:systemctl restart cobblerd
以上操作我们可以不根据他说的进行操作
要根据要求进行设置!——————————————
cobbler配置文件
[root@localhost conf.d]# vim /etc/cobbler/settings #cobbler配置文件next_server: 192.168.56.11 #修改成我们本机的IP地址server: 192.168.56.11 #修改成服务的IP地方
设置tftp
[root@localhost conf.d]# vim /etc/xinetd.d/tftp将disable改成no# default: off# description: The tftp server serves files using the trivial file transfer \# protocol. The tftp protocol is often used to boot diskless \# workstations, download configuration files to network-aware printers, \# and to start the installation process for some operating systems.service tftp{socket_type = dgramprotocol = udpwait = yesuser = rootserver = /usr/sbin/in.tftpdserver_args = -s /var/lib/tftpbootdisable = noper_source = 11cps = 100 2flags = IPv4}
启动rsync
[root@localhost conf.d]# systemctl start rsyncd
执行网络安装要下载的相关文件
[root@localhost conf.d]# cobbler get-loaderstask started: 2016-08-23_115402_get_loaderstask started (id=Download Bootloader Content, time=Tue Aug 23 11:54:02 2016)downloading http://cobbler.github.io/loaders/README to /var/lib/cobbler/loaders/READMEdownloading http://cobbler.github.io/loaders/COPYING.elilo to /var/lib/cobbler/loaders/COPYING.elilodownloading http://cobbler.github.io/loaders/COPYING.yaboot to /var/lib/cobbler/loaders/COPYING.yabootdownloading http://cobbler.github.io/loaders/COPYING.syslinux to /var/lib/cobbler/loaders/COPYING.syslinuxdownloading http://cobbler.github.io/loaders/elilo-3.8-ia64.efi to /var/lib/cobbler/loaders/elilo-ia64.efidownloading http://cobbler.github.io/loaders/yaboot-1.3.17 to /var/lib/cobbler/loaders/yabootdownloading http://cobbler.github.io/loaders/pxelinux.0-3.86 to /var/lib/cobbler/loaders/pxelinux.0downloading http://cobbler.github.io/loaders/menu.c32-3.86 to /var/lib/cobbler/loaders/menu.c32downloading http://cobbler.github.io/loaders/grub-0.97-x86.efi to /var/lib/cobbler/loaders/grub-x86.efidownloading http://cobbler.github.io/loaders/grub-0.97-x86_64.efi to /var/lib/cobbler/loaders/grub-x86_64.efi*** TASK COMPLETE ***
设置账号密码
[root@localhost conf.d]# openssl passwd -1 -salt 'cobler' 'cobler' 第一个是掩码,第二个是密码$1$cobler$XJnisBweZJlhL651HxAM00
复制到配置文件中
[root@localhost conf.d]# vim /etc/cobbler/settings
按照上面的说明,我们需要重启一下cobbler
[root@localhost conf.d]# systemctl restart cobblerd
我们在执行cobbler check查看还有什么需要我们继续操作的
[root@localhost conf.d]# cobbler checkThe following are potential configuration items that you may want to fix:1 : enable and start rsyncd.service with systemctl2 : debmirror package is not installed, it will be required to manage debian deployments and repositories3 : fencing tools were not found, and are required to use the (optional) power management features. install cman or fence-agents to use themRestart cobblerd and then run 'cobbler sync' to apply changes.
现在cobbler已经安装完了,现在还缺一个DHCP
cobbler可以管理DHCP,也可以不让他管
[root@localhost ~]# vim /etc/cobbler/settingsmanage_dhcp: 1 #将dhcp 0修改为1表示管理dhcp
我们再修改dhcp模板文件
[root@localhost ~]# vim /etc/cobbler/dhcp.templatesubnet 192.168.56.0 netmask 255.255.255.0 { #网段option routers 192.168.56.2; #网关option domain-name-servers 192.168.56.2; #DMSoption subnet-mask 255.255.255.0; #子网掩码range dynamic-bootp 192.168.56.100 192.168.56.254; #分配的地址段default-lease-time 21600;max-lease-time 43200;next-server $next_server; #这个是cobbler配置文件里面的变量
修改完配置文件之后,重启服务
[root@localhost ~]# systemctl restart cobblerd
使用cobbler sync 生成dhcp模板,自动帮我们重启dhcp cobbler sync 表示刷新,其实就是删除原来的文件,从新进行加载
[root@localhost ~]# cobbler synctask started: 2016-08-23_180604_synctask started (id=Sync, time=Tue Aug 23 18:06:04 2016)running pre-sync triggerscleaning treesremoving: /var/lib/tftpboot/grub/imagescopying bootloaderstrying hardlink /var/lib/cobbler/loaders/pxelinux.0 -> /var/lib/tftpboot/pxelinux.0trying hardlink /var/lib/cobbler/loaders/menu.c32 -> /var/lib/tftpboot/menu.c32trying hardlink /var/lib/cobbler/loaders/yaboot -> /var/lib/tftpboot/yaboottrying hardlink /usr/share/syslinux/memdisk -> /var/lib/tftpboot/memdisktrying hardlink /var/lib/cobbler/loaders/grub-x86.efi -> /var/lib/tftpboot/grub/grub-x86.efitrying hardlink /var/lib/cobbler/loaders/grub-x86_64.efi -> /var/lib/tftpboot/grub/grub-x86_64.eficopying distros to tftpbootcopying imagesgenerating PXE configuration filesgenerating PXE menu structurerendering DHCP filesgenerating /etc/dhcp/dhcpd.confrendering TFTPD filesgenerating /etc/xinetd.d/tftpcleaning link cachesrunning post-sync triggersrunning python triggers from /var/lib/cobbler/triggers/sync/post/*running python trigger cobbler.modules.sync_post_restart_servicesrunning: dhcpd -t -qreceived on stdout:received on stderr:running: service dhcpd restartreceived on stdout:received on stderr: Redirecting to /bin/systemctl restart dhcpd.servicerunning shell triggers from /var/lib/cobbler/triggers/sync/post/*running python triggers from /var/lib/cobbler/triggers/change/*running python trigger cobbler.modules.scm_trackrunning shell triggers from /var/lib/cobbler/triggers/change/**** TASK COMPLETE ***
我们可以查看一下dhcp,查看cobbler是否可以管理dhcp
[root@localhost ~]# cat /etc/dhcp/dhcpd.conf# ******************************************************************# Cobbler managed dhcpd.conf file# generated from cobbler dhcp.conf template (Tue Aug 23 22:06:05 2016)# Do NOT make changes to /etc/dhcpd.conf. Instead, make your changes# in /etc/cobbler/dhcp.template, as /etc/dhcpd.conf will be# overwritten.# ******************************************************************
上述意思是 dhcp是由cobbler进行管理,如果想进行设置 请修改/etc/cobbler/dhcp.template 然后/etc/dhcp/dhcpd.conf会被覆盖
现在我们安装一台操作系统
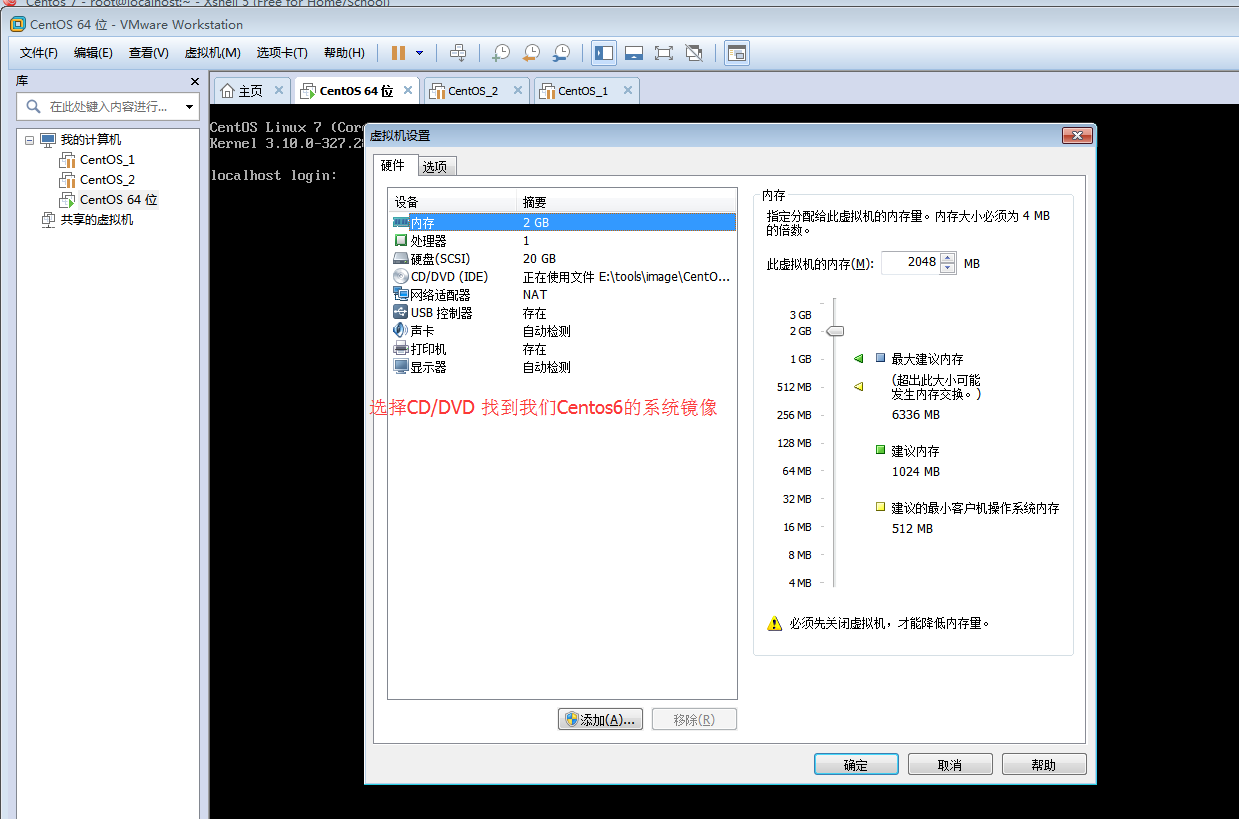
挂载镜像 右击Centos64–>设置>CD/DVD
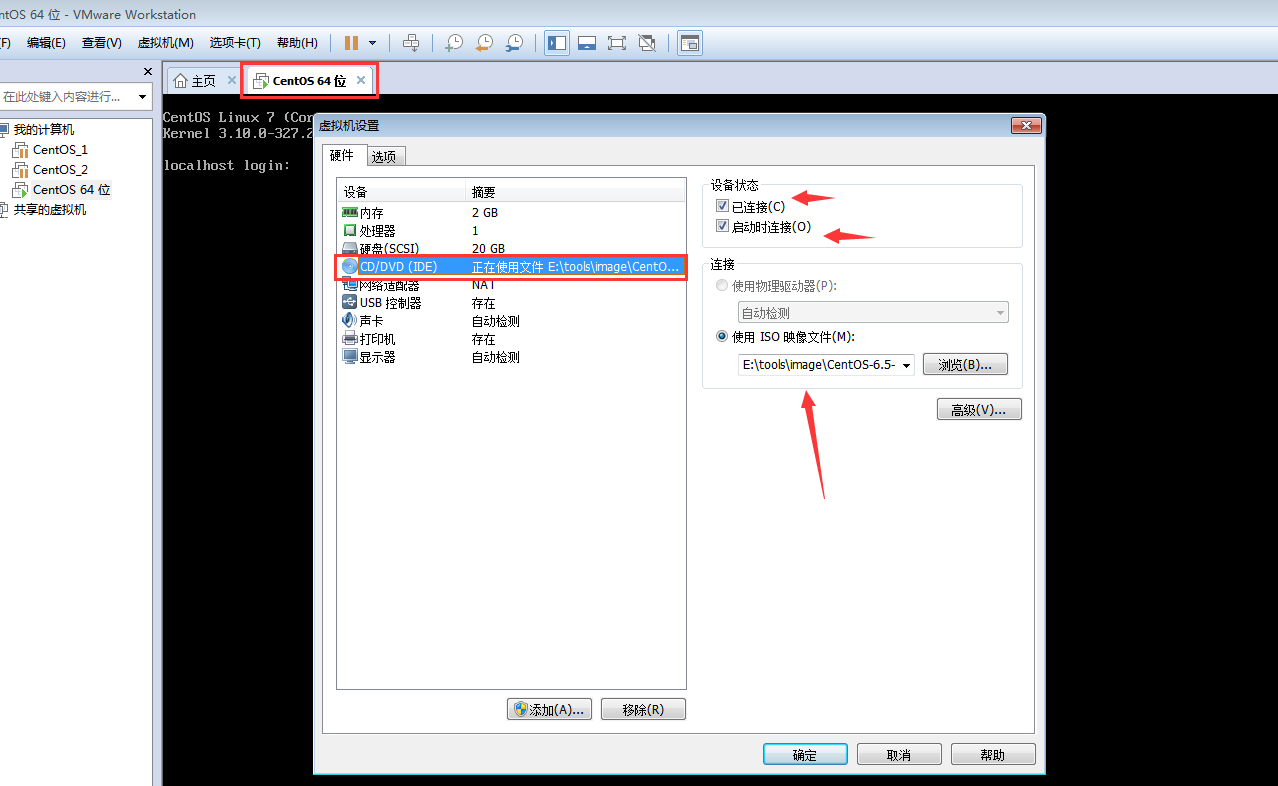
Linux 上是需要挂载光盘,我们进行挂载
[root@localhost ~]# mount /dev/cdrom /mnt/mount: /dev/sr0 is write-protected, mounting read-only
制作镜像,用于安装操作系统,使cobbler导入镜像
[root@localhost ~]# cobbler import --path=/mnt/ --name=CentOS-6-x86_64 --arch=x86_64--path=从哪里导入--name=名称--arch=系统位数32 or 64
导入过程中yum仓库和其他的已经给我们做好了
导入的位置
[root@localhost ks_mirror]# pwd/var/www/cobbler/ks_mirror[root@localhost ks_mirror]# lsCentOS-7-x86_64 config
在导入一个centos.7的,首先我们先卸载7的
[root@localhost ~]# umount /dev/cdrom
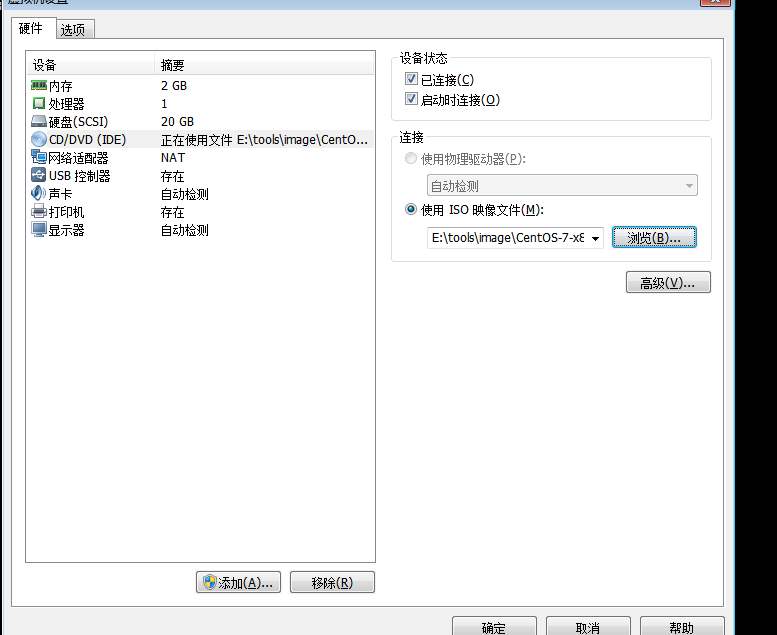
重新进行挂载
[root@localhost ~]# mount /dev/cdrom /mnt/mount: /dev/sr0 is write-protected, mounting read-only
继续执行,代表制作一个centos7的镜像
[root@localhost /]# cobbler import --path=/mnt/ --name=CentOS-7.1-x86_64 --arch=x86_64
具体参数请参考上面的内容
查看cobbler都有哪些命令
[root@localhost /]# cobbler profileusage=====cobbler profile addcobbler profile copycobbler profile dumpvarscobbler profile editcobbler profile findcobbler profile getkscobbler profile listcobbler profile removecobbler profile renamecobbler profile report
例如:我们查看当前有几个镜像
[root@localhost /]# cobbler profile listCentOS-6-x86_64CentOS-7-x86_64
查看我们2个系统的详细信息
[root@localhost /]# cobbler profile reportName : CentOS-7.1-x86_64TFTP Boot Files : {}Comment :DHCP Tag : defaultDistribution : CentOS-7.1-x86_64Enable gPXE? : 0Enable PXE Menu? : 1Fetchable Files : {}Kernel Options : {}Kernel Options (Post Install) : {}Kickstart : /var/lib/cobbler/kickstarts/sample_end.ksKickstart Metadata : {}Management Classes : []Management Parameters : <<inherit>>Name Servers : []Name Servers Search Path : []Owners : ['admin']Parent Profile :Internal proxy :Red Hat Management Key : <<inherit>>Red Hat Management Server : <<inherit>>Repos : []Server Override : <<inherit>>Template Files : {}Virt Auto Boot : 1Virt Bridge : xenbr0Virt CPUs : 1Virt Disk Driver Type : rawVirt File Size(GB) : 5Virt Path :Virt RAM (MB) : 512Virt Type : kvmName : CentOS-7-x86_64TFTP Boot Files : {}Comment :DHCP Tag : defaultDistribution : CentOS-7-x86_64Enable gPXE? : 0Enable PXE Menu? : 1Fetchable Files : {}Kernel Options : {}Kernel Options (Post Install) : {}Kickstart : /var/lib/cobbler/kickstarts/sample_end.ksKickstart Metadata : {}Management Classes : []Management Parameters : <<inherit>>Name Servers : []Name Servers Search Path : []Owners : ['admin']Parent Profile :Internal proxy :Red Hat Management Key : <<inherit>>Red Hat Management Server : <<inherit>>Repos : []Server Override : <<inherit>>Template Files : {}Virt Auto Boot : 1Virt Bridge : xenbr0Virt CPUs : 1Virt Disk Driver Type : rawVirt File Size(GB) : 5Virt Path :Virt RAM (MB) : 512Virt Type : kvm
修改ks的路径,自定义安装后,需要设置的一些东西,例如开启哪些服务,关闭哪些服务。安装什么东西等
我们先上传已经设置好的cfg文件
下载链接 密码:iq4t
为了规范,我们把kickstarts文件放在/var/lib/cobbler/kickstarts下面
[root@localhost ~]# cd /var/lib/cobbler/kickstarts/[root@localhost kickstarts]# rz -Erz waiting to receive.
检查一下路径是否正确
[root@localhost kickstarts]# lltotal 60-rw-r--r-- 1 root root 3704 Aug 24 2016 CentOS-6-x86_64.cfg-rw-r--r-- 1 root root 1355 Aug 25 2016 CentOS-7-x86_64.cfg-rw-r--r-- 1 root root 115 Jan 23 2016 default.ks-rw-r--r-- 1 root root 22 Jan 23 2016 esxi4-ks.cfg-rw-r--r-- 1 root root 22 Jan 23 2016 esxi5-ks.cfgdrwxr-xr-x 2 root root 54 Aug 23 09:17 install_profiles-rw-r--r-- 1 root root 1424 Jan 23 2016 legacy.ks-rw-r--r-- 1 root root 292 Jan 23 2016 pxerescue.ks-rw-r--r-- 1 root root 2916 Jan 23 2016 sample_autoyast.xml-rw-r--r-- 1 root root 1825 Jan 23 2016 sample_end.ks-rw-r--r-- 1 root root 0 Jan 23 2016 sample_esx4.ks-rw-r--r-- 1 root root 324 Jan 23 2016 sample_esxi4.ks-rw-r--r-- 1 root root 386 Jan 23 2016 sample_esxi5.ks-rw-r--r-- 1 root root 1784 Jan 23 2016 sample.ks-rw-r--r-- 1 root root 3419 Jan 23 2016 sample_old.seed-rw-r--r-- 1 root root 5879 Jan 23 2016 sample.seed
自定义kickstarts文件
我们使用cobbler profile report命令看到Kickstart默认在/var/lib/cobbler/kickstarts/sample_end.ks
我们直接使用命令进行修改,我们修改6的kickstarts
[root@localhost /]# cobbler profile edit --name=CentOS-6-x86_64 --kickstart=/var/lib/cobbler/kickstarts/CentOS-6-x86_64.cfg
修改7的kickstarts
[root@localhost /]# cobbler profile edit --name=CentOS-7-x86_64 --kickstart=/var/lib/cobbler/kickstarts/CentOS-7-x86_64.cfg
因为Centos7 默认的网卡不在/etc/init.d/network
所以我们需要修改内核
[root@localhost /]# cobbler profile reportKernel Options : {}
我们查看到这里可以定义内核参数
[root@localhost /]# cobbler profile edit --name=CentOS-7-x86_64 --kopts='net.ifnames=0 biosdevname=0'
这样我们在安装Centos7的时候就会默认给我们加上这个内核参数
[root@localhost /]# cobbler profile reportName : CentOS-7.1-x86_64TFTP Boot Files : {}Comment :DHCP Tag : defaultDistribution : CentOS-7.1-x86_64Enable gPXE? : 0Enable PXE Menu? : 1Fetchable Files : {}Kernel Options : {'biosdevname': '0', 'net.ifnames': '0'}
提示:默认cobbler profile report会查看当前配置的所有,我们可以使用cobbler profile ”Cobbler 定义的名字“来查看
执行cobbler sync会删除原来的文件,相当于从新进行加载
[root@localhost /]# cobbler synctask started: 2016-08-24_001542_synctask started (id=Sync, time=Wed Aug 24 00:15:42 2016)running pre-sync triggerscleaning treesremoving: /var/www/cobbler/images/CentOS-7-x86_64removing: /var/www/cobbler/images/CentOS-7.1-x86_64removing: /var/lib/tftpboot/pxelinux.cfg/defaultremoving: /var/lib/tftpboot/grub/imagesremoving: /var/lib/tftpboot/grub/grub-x86.efiremoving: /var/lib/tftpboot/grub/grub-x86_64.efiremoving: /var/lib/tftpboot/grub/efidefaultremoving: /var/lib/tftpboot/images/CentOS-7-x86_64removing: /var/lib/tftpboot/images/CentOS-7.1-x86_64removing: /var/lib/tftpboot/s390x/profile_listcopying bootloaderstrying hardlink /var/lib/cobbler/loaders/grub-x86.efi -> /var/lib/tftpboot/grub/grub-x86.efitrying hardlink /var/lib/cobbler/loaders/grub-x86_64.efi -> /var/lib/tftpboot/grub/grub-x86_64.eficopying distros to tftpbootcopying files for distro: CentOS-7.1-x86_64trying hardlink /var/www/cobbler/ks_mirror/CentOS-7.1-x86_64/images/pxeboot/vmlinuz -> /var/lib/tftpboot/images/CentOS-7.1-x86_64/vmlinuztrying hardlink /var/www/cobbler/ks_mirror/CentOS-7.1-x86_64/images/pxeboot/initrd.img -> /var/lib/tftpboot/images/CentOS-7.1-x86_64/initrd.imgcopying files for distro: CentOS-7-x86_64trying hardlink /var/www/cobbler/ks_mirror/CentOS-7-x86_64/images/pxeboot/vmlinuz -> /var/lib/tftpboot/images/CentOS-7-x86_64/vmlinuztrying hardlink /var/www/cobbler/ks_mirror/CentOS-7-x86_64/images/pxeboot/initrd.img -> /var/lib/tftpboot/images/CentOS-7-x86_64/initrd.imgcopying imagesgenerating PXE configuration filesgenerating PXE menu structurecopying files for distro: CentOS-7.1-x86_64trying hardlink /var/www/cobbler/ks_mirror/CentOS-7.1-x86_64/images/pxeboot/vmlinuz -> /var/www/cobbler/images/CentOS-7.1-x86_64/vmlinuztrying hardlink /var/www/cobbler/ks_mirror/CentOS-7.1-x86_64/images/pxeboot/initrd.img -> /var/www/cobbler/images/CentOS-7.1-x86_64/initrd.imgWriting template files for CentOS-7.1-x86_64copying files for distro: CentOS-7-x86_64trying hardlink /var/www/cobbler/ks_mirror/CentOS-7-x86_64/images/pxeboot/vmlinuz -> /var/www/cobbler/images/CentOS-7-x86_64/vmlinuztrying hardlink /var/www/cobbler/ks_mirror/CentOS-7-x86_64/images/pxeboot/initrd.img -> /var/www/cobbler/images/CentOS-7-x86_64/initrd.imgWriting template files for CentOS-7-x86_64rendering DHCP filesgenerating /etc/dhcp/dhcpd.confrendering TFTPD filesgenerating /etc/xinetd.d/tftpprocessing boot_files for distro: CentOS-7.1-x86_64processing boot_files for distro: CentOS-7-x86_64cleaning link cachesrunning post-sync triggersrunning python triggers from /var/lib/cobbler/triggers/sync/post/*running python trigger cobbler.modules.sync_post_restart_servicesrunning: dhcpd -t -qreceived on stdout:received on stderr:running: service dhcpd restartreceived on stdout:received on stderr: Redirecting to /bin/systemctl restart dhcpd.servicerunning shell triggers from /var/lib/cobbler/triggers/sync/post/*running python triggers from /var/lib/cobbler/triggers/change/*running python trigger cobbler.modules.scm_trackrunning shell triggers from /var/lib/cobbler/triggers/change/**** TASK COMPLETE ***
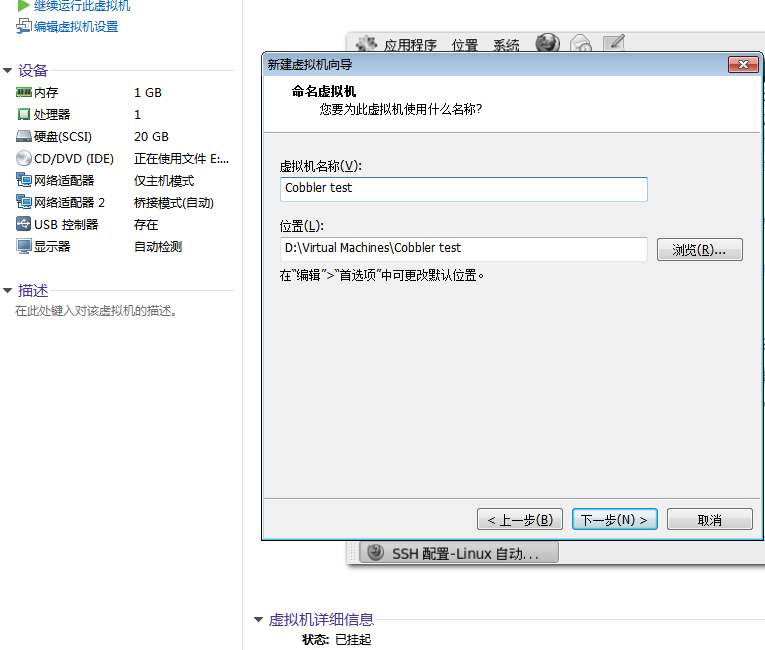
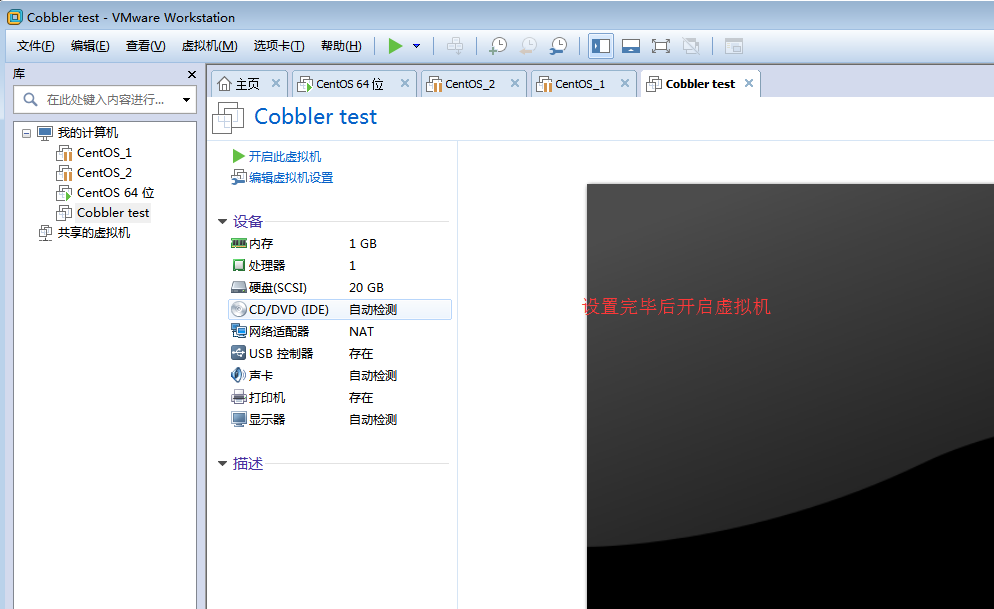
新建虚拟机进行安装
提示:我们先打开系统日志,因为dhcp默认会将日志显示在/var/log/messages
我们在新建虚拟机 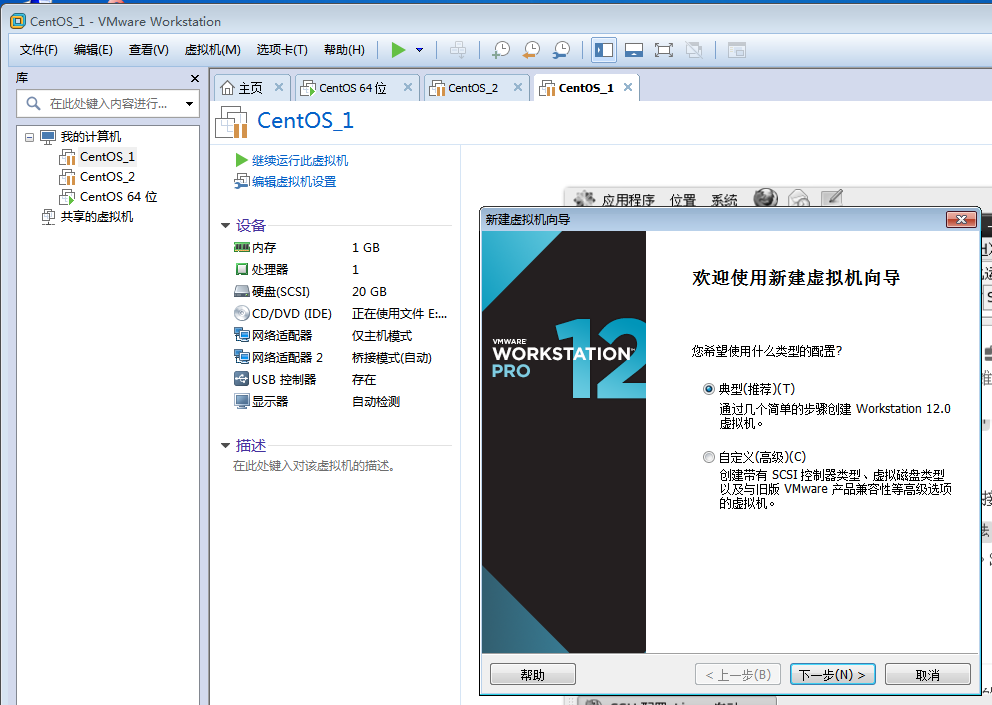
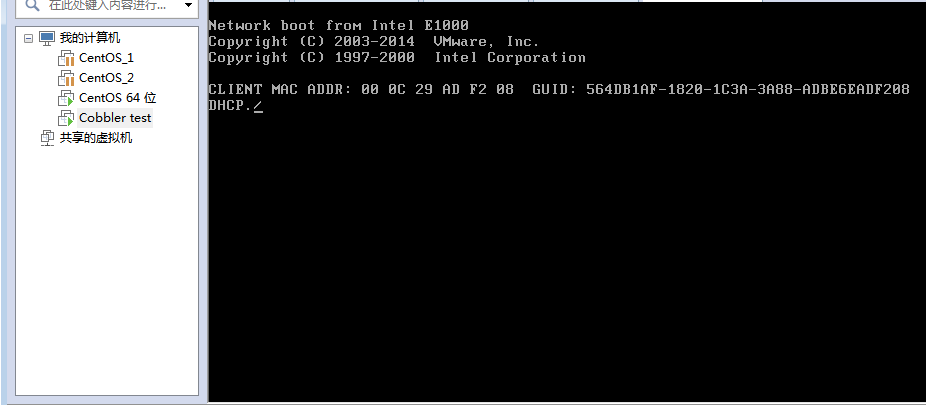
dhcp的4个步骤 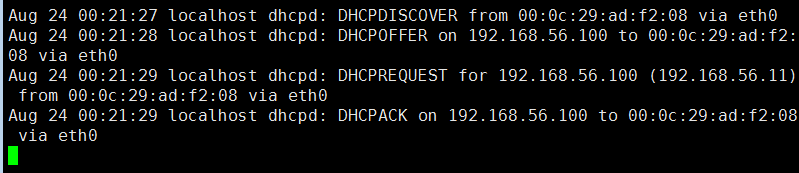
现在已经获取到了IP,TFTP没有开启 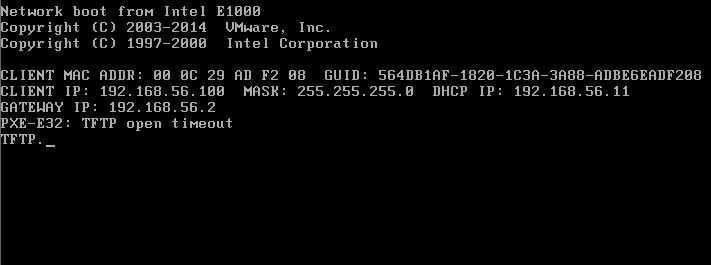
我们安装tftp
[root@localhost kickstarts]# yum install xinetd -y启动[root@localhost kickstarts]# systemctl start xinetd
耐心等待,如果超时2次需要重新启动,因为开启了dhcp获取到了IP地址,但是无法下载文件 肯定会超时 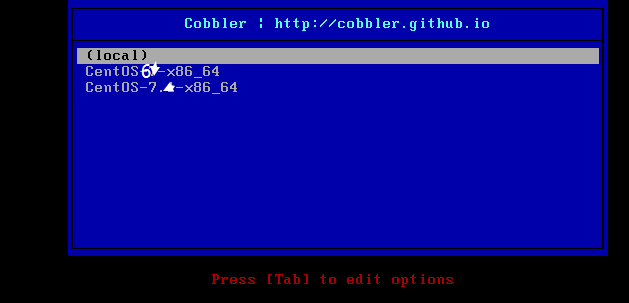
** 菜单解释:**
1.本地硬盘
2.CentOS-6
3.CentOS-7
提示:默认会计时,我们使用上下键不让它进行计时。有这个菜单的好处就是不会担心重启之后就把系统给重装了。
我们选择7进行安装 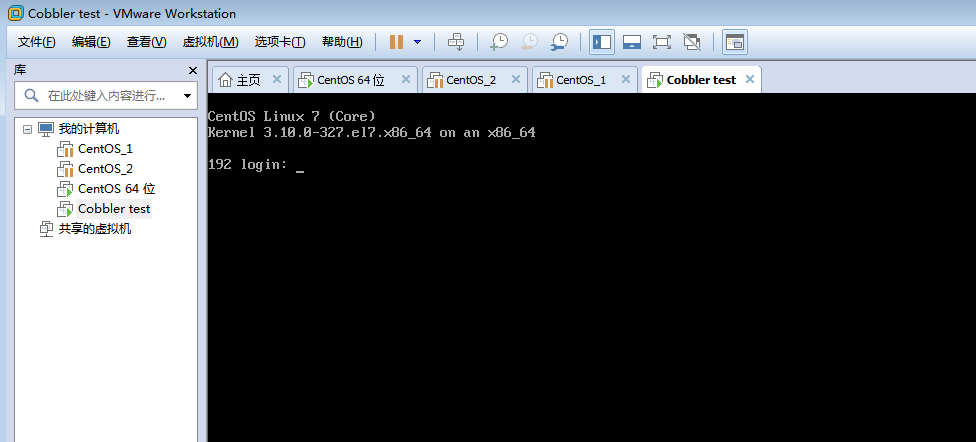
安装完成 
以上就是cobbler的基础安装部分!
自动重装系统
#提示:如果我们想重装那台系统,可以执行以下的步骤:
使用koan工具,让cobbler自动化重装
[root@localhost kickstarts]# yum install koan
查看我们可以安装的系统
[root@localhost kickstarts]# koan --server=192.168.56.11 --list=profiles- looking for Cobbler at http://192.168.56.11:80/cobbler_apiCentOS-6-x86_64CentOS-7-x86_64##--server=此处是cobbler的IP地址
例子:我们使用koan安装centos6
指定要重装的系统
[root@localhost kickstarts]# koan --replace-self --server=192.168.56.11 --profile=CentOS-6-x86_64- looking for Cobbler at http://192.168.56.11:80/cobbler_api- reading URL: http://192.168.56.11/cblr/svc/op/ks/profile/CentOS-6-x86_64install_tree: http://192.168.56.11/cblr/links/CentOS-6-x86_64downloading initrd initrd.img to /boot/initrd.img_koanurl=http://192.168.56.11/cobbler/images/CentOS-6-x86_64/initrd.img- reading URL: http://192.168.56.11/cobbler/images/CentOS-6-x86_64/initrd.imgdownloading kernel vmlinuz to /boot/vmlinuz_koanurl=http://192.168.56.11/cobbler/images/CentOS-6-x86_64/vmlinuz- reading URL: http://192.168.56.11/cobbler/images/CentOS-6-x86_64/vmlinuz- ['/sbin/grubby', '--add-kernel', '/boot/vmlinuz_koan', '--initrd', '/boot/initrd.img_koan', '--args', '"ks=http://192.168.56.11/cblr/svc/op/ks/profile/CentOS-7-x86_64 ksdevice=link kssendmac lang= text "', '--copy-default', '--make-default', '--title=kick1472015796']- ['/sbin/grubby', '--update-kernel', '/boot/vmlinuz_koan', '--remove-args=root']- reboot to apply changes
重启之后直接加载centos6 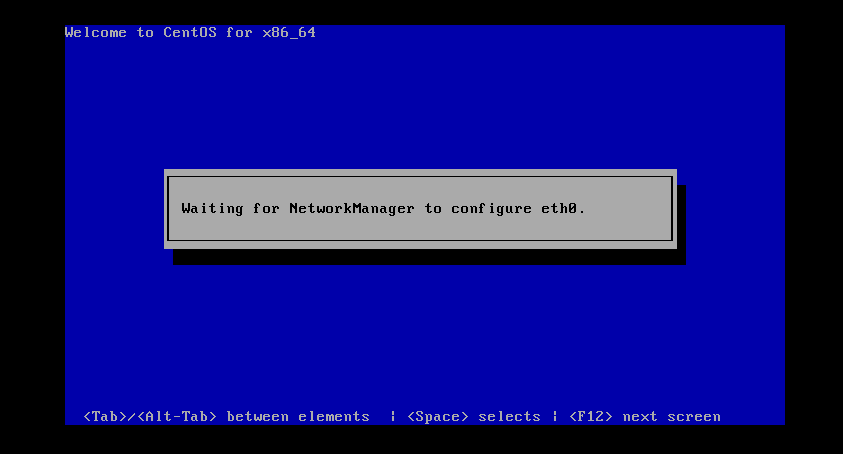
不需要我们选择,他自己进行选择。 
提示:在我们reboot,一定要确定我们要重启的服务器是哪一台。如果确实操作错了,需要赶紧关闭cobbler、断电
Cobbler_Web 界面设置
Cobbler提供了一个web界面,我们可以使用网页进行访问 
地址:https://192.168.56.11/cobbler_web
这里的用户名和密码是cobbler
如果我们想修改cobbler_web用户名可以到/etc/cobbler/users.conf
[root@localhost cobbler]# cat /etc/cobbler/users.conf[admins]admin = ""cobbler = ""
cobbler是描述
修改cobbler_web密码
[root@localhost cobbler]# htdigest /etc/cobbler/users.digest "Cobbler" cobblerChanging password for user cobbler in realm CobblerNew password:Re-type new password:
Cobbler=用户的描述
cobbler=用户名 
我们可以查看profiles,点击Edit可以修改系统的一些选项 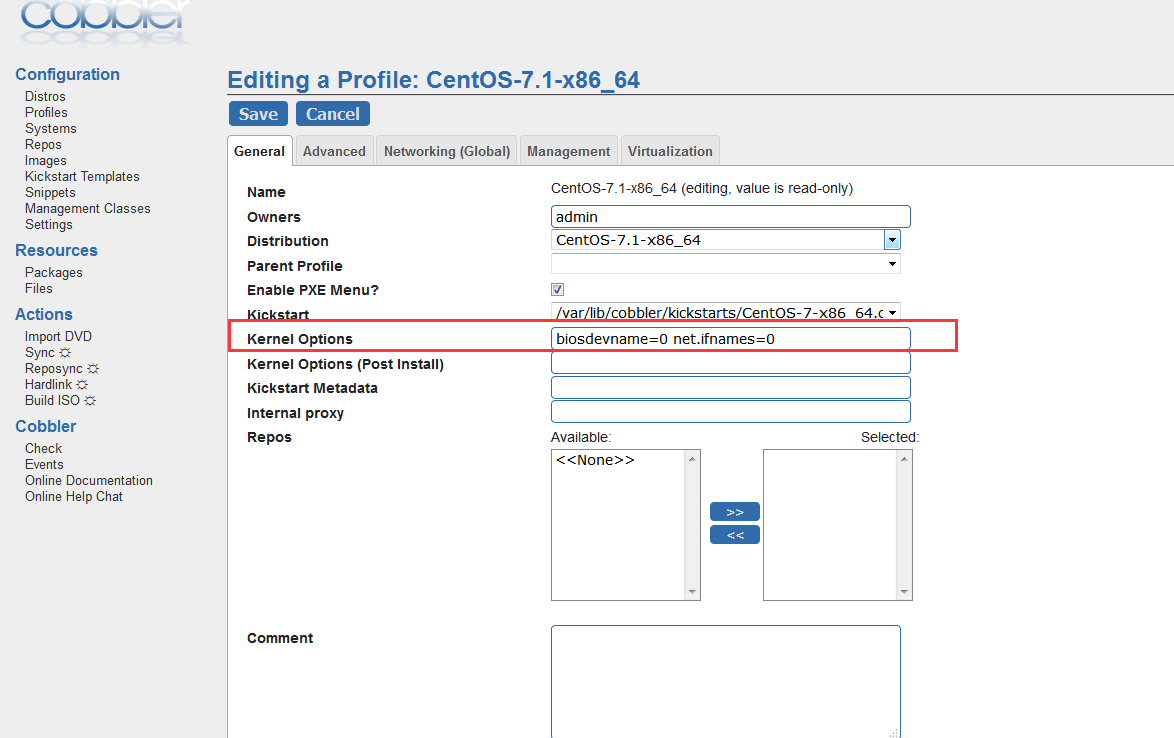
在kernel里面可以设置一些内核参数 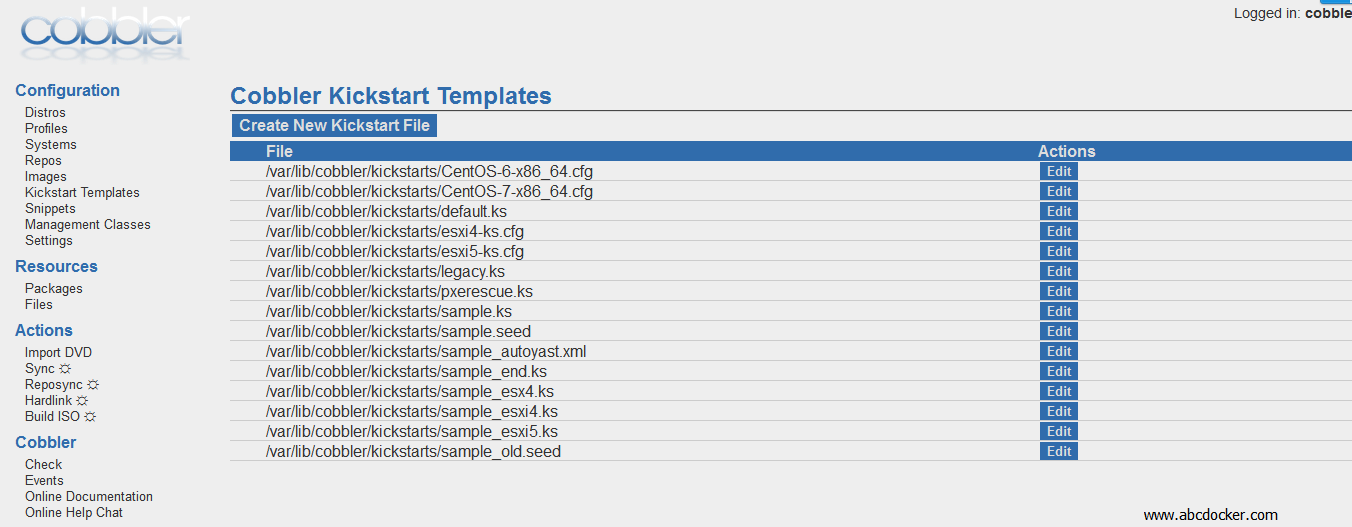
在Kickstart Templates 可以查看我们的kickstarts文件 
我们还可以修改kickstart文件 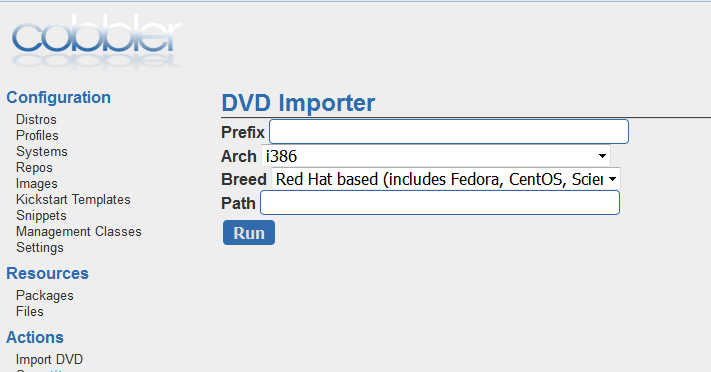
所有命令行操作cobbler,都可以在cobbler_web上面实现
高级设置
我们可以修改cobbler的选择系统的菜单 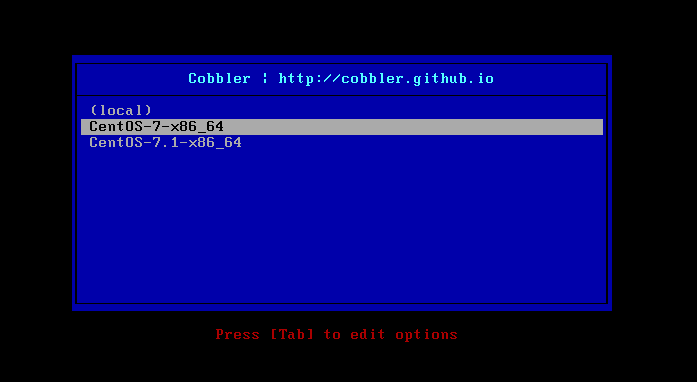
编辑配置文件
[root@localhost pxe]# cat /etc/cobbler/pxe/pxedefault.templateDEFAULT menuPROMPT 0MENU TITLE Cobbler www.abcdocker.com| http://www.abcdocker.comTIMEOUT 200TOTALTIMEOUT 6000ONTIMEOUT $pxe_timeout_profileLABEL local_abcdockerMENU LABEL [ install abcdocker.com ]MENU DEFAULTLOCALBOOT -1$pxe_menu_itemsMENU end
我们修改完配置文件之后需要刷新,否则不生效
[root@localhost pxe]# cobbler sync
我们可以在创建一台虚拟机测试(安装过程不说了,直接看结果)
修改图如下: 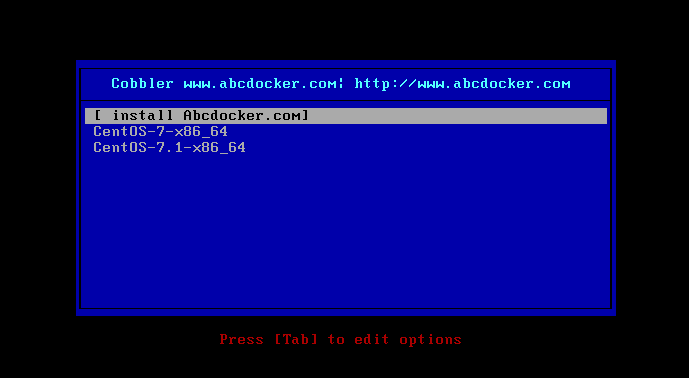
Cobbler重要的几个目录
镜像存放目录
[root@localhost cobbler]# ls /var/www/cobbler/ks_mirror/CentOS-7.1-x86_64 CentOS-7-x86_64 config
存放仓库镜像
[root@localhost cobbler]# ls /var/www/cobbler/repo_mirror/
kickstarts配置文件存放路径
[root@localhost cobbler]# ls /var/lib/cobbler/config kickstarts lock snippets web.ssdistro_signatures.json loaders scripts triggers webui_sessions
存放启动引导程序的目录
[root@localhost cobbler]# ls /var/lib/cobbler/loaders/COPYING.elilo COPYING.yaboot grub-x86_64.efi menu.c32 READMECOPYING.syslinux elilo-ia64.efi grub-x86.efi pxelinux.0 yaboot
一些相关配置的脚本
[root@localhost cobbler]# ls /var/lib/cobbler/snippets/cobbler_register networking.xmldownload_config_files partition_selectdownload_config_files_deb post_anamonfunc_install_if_enabled post_install_kernel_optionsfunc_register_if_enabled post_install_network_confighosts.xml post_install_network_config_debkdump.xml post_koan_add_reinstall_entrykeep_cfengine_keys post_run_debkeep_files post_s390_rebootkeep_rhn_keys pre_anamonkeep_ssh_host_keys pre_install_network_configkickstart_done pre_partition_selectkickstart_start preseed_apt_repo_configkoan_environment proxy.xmllate_apt_repo_config puppet_install_if_enabledlog_ks_post puppet_register_if_enabledlog_ks_post_nochroot redhat_registerlog_ks_pre restore_boot_devicemain_partition_select rhn_certificate_based_registernetwork_config save_boot_devicenetwork_config_esx suse_scriptwrapper.xmlnetwork_config_esxi
cobbler配置文件存放目录
[root@localhost cobbler]# ll /etc/cobbler/total 108-rw-r--r-- 1 root root 40 Jan 23 2016 auth.conf-rw-r--r-- 1 root root 75 Jan 23 2016 cheetah_macros-rw-r--r-- 1 root root 2409 Jan 23 2016 cobbler_bash-rw-r--r-- 1 root root 11636 Jan 23 2016 completions-rw-r--r-- 1 root root 2951 Aug 23 18:05 dhcp.template-rw-r--r-- 1 root root 385 Jan 23 2016 dnsmasq.template-rw-r--r-- 1 root root 2014 Jan 23 2016 import_rsync_whitelistdrwxr-xr-x 2 root root 30 Aug 23 09:17 isodrwxr-xr-x 2 root root 37 Aug 23 09:17 ldap-rw-r--r-- 1 root root 3076 Jan 23 2016 modules.conf-rw-r--r-- 1 root root 43 Jan 23 2016 mongodb.conf-rw-r--r-- 1 root root 680 Jan 23 2016 named.templatedrwxr-xr-x 2 root root 4096 Aug 23 09:17 powerdrwxr-xr-x 2 root root 4096 Aug 24 05:51 pxedrwxr-xr-x 2 root root 40 Aug 23 09:17 reporting-rw-r--r-- 1 root root 368 Jan 23 2016 rsync.exclude-rw-r--r-- 1 root root 1073 Jan 23 2016 rsync.template-rw-r--r-- 1 root root 754 Jan 23 2016 secondary.template-rw-r--r-- 1 root root 19654 Aug 23 17:59 settings-rw-r--r-- 1 root root 740 Jan 23 2016 tftpd.template-rw-r--r-- 1 root root 848 Jan 23 2016 users.conf-rw-r--r-- 1 root root 49 Aug 24 05:27 users.digest-rw-r--r-- 1 root root 117 Jan 24 2016 version-rw-r--r-- 1 root root 522 Jan 23 2016 zone.templatedrwxr-xr-x 2 root root 6 Jan 24 2016 zone_templates
主要的配置文件目录还是settings
[root@localhost cobbler]# ll /etc/cobbler/settings-rw-r--r-- 1 root root 19654 Aug 23 17:59 /etc/cobbler/settings
构建yum仓库
我们每次安装都需要在指定阿里云的yum源那样会比较麻烦,可以直接在装机的时候进行设置
例如:我们构建一个openstack的yum源
第一步:添加repo
[root@localhost ~]# cobbler repo add --name=openstack-mitaka --mirror=http://mirrors.aliyun.com/centos/7.2.1511/cloud/x86_64/openstack-mitaka/ --arch=x86_64 --breed=yumrepo=构建yum仓库add=添加--name=源的名字--mirror=源的地址
第二部:刷新同步repo
[root@localhost ~]# cobbler reposync#提示:他会将网站下面所有的包下载到本地,并且帮我们创建repo文件(/etc/yum.repos.d)
第三步:添加repo到对应的profile
[root@localhost ~]# cobbler profile edit --name=CentOS-7-x86_64 --repos="openstack-mitaka"
默认情况下,在安装系统的时候会默认安装openstack-mitaka
可以通过修改配置文件,1代表开启
[root@localhost ~]# vim /etc/cobbler/settingsyum_post_install_mirror: 1
第四步:修改kickstart文件
在我们的kickstarts的配置文件中加入$yum_config_stanaz,这样在安装的时候会自动调节yum仓库[root@localhost ~]# vim /var/lib/cobbler/kickstarts/CentOS-7-x86_64.cfg%postsystemctl disable postfix.service$yum_config_stanaz%end
第五步:添加定时任务,定期同步repo
[root@localhost ~]# echo "00 00 * * * /usr/bin/cobbler reposync --tries=3 --no-file" >>/var/spool/cron/root
自动化的一套流程(系统层面)
因为我们每次安装系统都会很麻烦,而且环境会不一致所以我们可以按照每个服务器的mac地址进行设置
profile
操作系统
分区
预分配的Ip地址
主机名
子网
网关
dns
角色
规划如下: 
mac地址生成方法:设置—>硬件—>网络–>高级—>生成 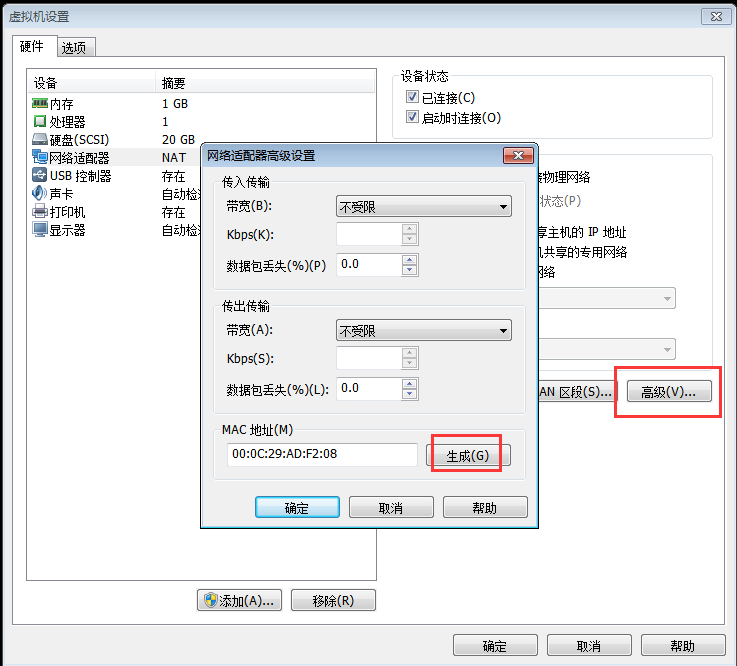
cobbler设置
cobbler system add --name=linux-node1.com --mac=00:0C:29:AD:F2:08 \--profile=CentOS-7.1-x86_64 \--ip-address=192.168.56.12 \--subnet=255.255.255.0 \--gateway=192.168.56.2 \--interface=eth0 --static=1 \--hostname=linux-node1.com \--name-servers="192.168.56.12" \--kickstart=/var/lib/cobbler/kickstarts/CentOS-7-x86_64.cfg
结果如下:
[root@localhost ~]# cobbler system list[root@localhost ~]# cobbler system add --name=linux-node1.com --mac=00:0C:29:AD:F2:08 \> --profile=CentOS-7-x86_64 \> --ip-address=192.168.56.12 \> --subnet=255.255.255.0 \> --gateway=192.168.56.2 \> --interface=eth0 --static=1 \> --hostname=linux-node1.com \> --name-servers="192.168.56.12" \> --kickstart=/var/lib/cobbler/kickstarts/CentOS-7-x86_64.cfg
cobbler system list查看当前的规划
如果不知道我们的本地镜像都有哪些可以通过下面的命令查看
[root@localhost ~]# cobbler profile listCentOS-6-x86_64CentOS-7-x86_64
提示:要会看报错信息,根据报错信息进行排查
我们设置完在查看一下
[root@localhost ~]# cobbler system listlinux-node1.com
我们执行刷新命令。
[root@localhost ~]# cobbler sync
否则不生效
此时我们可以查看dhcp的配置文件,已经帮我们定义好了一个
[root@localhost ~]# cat /etc/dhcp/dhcpd.conf# group for Cobbler DHCP tag: defaultgroup {host generic1 {hardware ethernet 00:0C:29:AD:F2:08;fixed-address 192.168.56.12;option host-name "linux-node1.com";option subnet-mask 255.255.255.0;option routers 192.168.56.2;filename "/pxelinux.0";next-server 192.168.56.11;}}
温馨提示:MAC地址必须要和装系统的一样,生成见上方 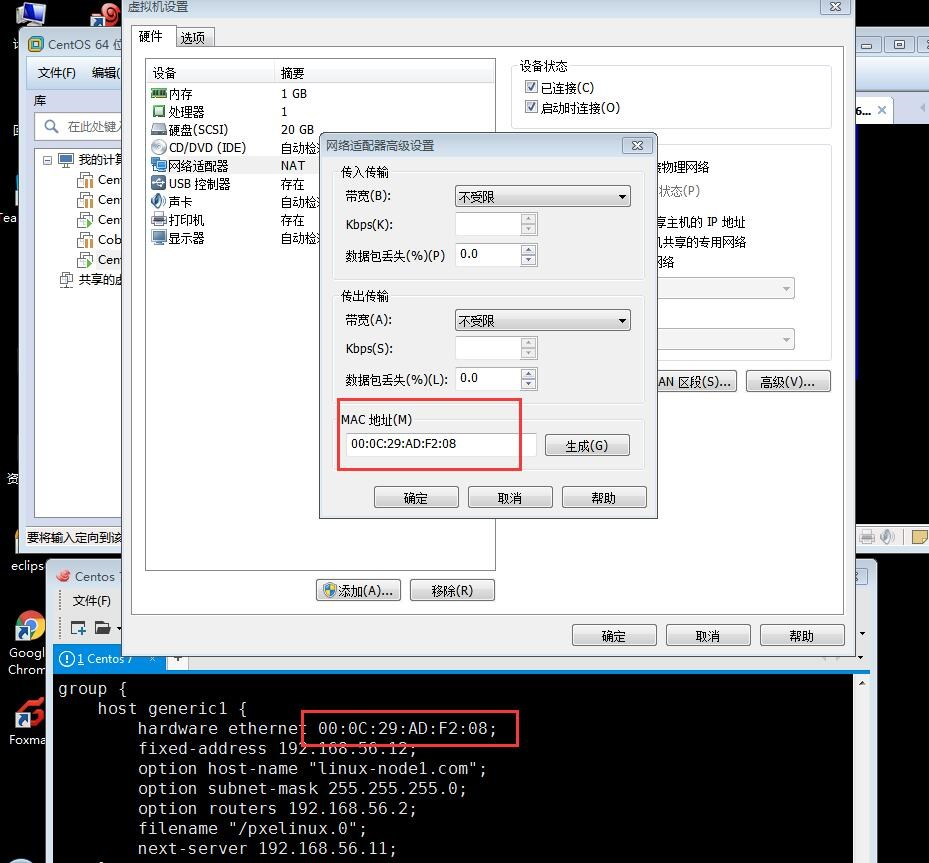
现在按照正常的情况下,我们新建一台虚拟机默认就会安装Centos7,不会让我们选择,帮我设置好主机名和IP地址 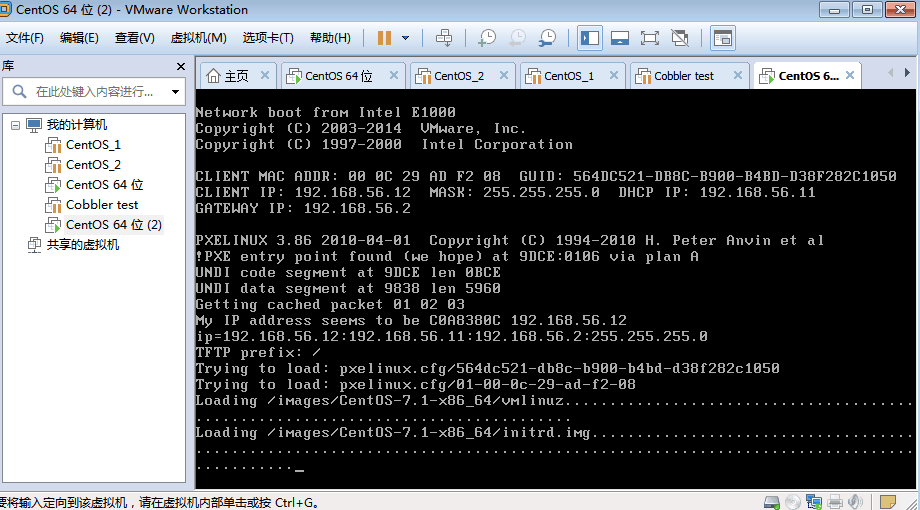
这样就会自动进行安装了
提示:这里只有对应的mac地址匹配上了,才会执行自动安装,如果没有匹配上。会让我们 选择其他安装的选项 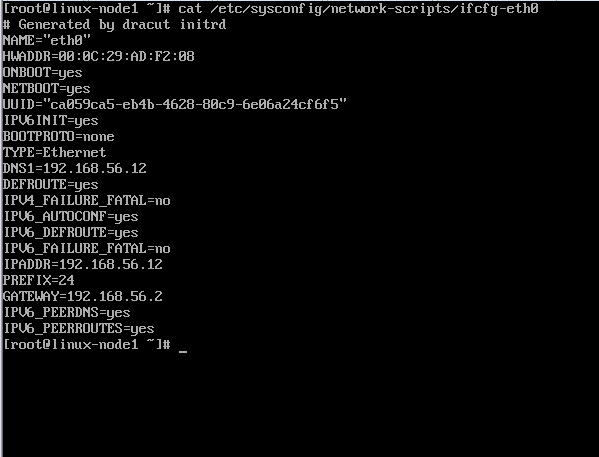
安装完成!
cobbler大多都是使用脚本实现的
脚本路径:
[root@localhost ~]# cat /var/lib/cobbler/snippets/post_install_network_config[root@localhost ~]# ll /var/lib/cobbler/snippets/total 208-rw-r--r-- 1 root root 431 Jan 23 2016 cobbler_register-rw-r--r-- 1 root root 645 Jan 23 2016 download_config_files-rw-r--r-- 1 root root 865 Jan 23 2016 download_config_files_deb-rw-r--r-- 1 root root 61 Jan 23 2016 func_install_if_enabled-rw-r--r-- 1 root root 448 Jan 23 2016 func_register_if_enabled-rw-r--r-- 1 root root 821 Jan 23 2016 hosts.xml-rw-r--r-- 1 root root 1310 Jan 23 2016 kdump.xml-rw-r--r-- 1 root root 2506 Jan 23 2016 keep_cfengine_keys-rw-r--r-- 1 root root 4316 Jan 23 2016 keep_files-rw-r--r-- 1 root root 2609 Jan 23 2016 keep_rhn_keys-rw-r--r-- 1 root root 3155 Jan 23 2016 keep_ssh_host_keys-rw-r--r-- 1 root root 4547 Jan 23 2016 kickstart_done-rw-r--r-- 1 root root 1524 Jan 23 2016 kickstart_start-rw-r--r-- 1 root root 191 Jan 23 2016 koan_environment-rw-r--r-- 1 root root 644 Jan 23 2016 late_apt_repo_config-rw-r--r-- 1 root root 40 Jan 23 2016 log_ks_post-rw-r--r-- 1 root root 62 Jan 23 2016 log_ks_post_nochroot-rw-r--r-- 1 root root 281 Jan 23 2016 log_ks_pre-rw-r--r-- 1 root root 46 Jan 23 2016 main_partition_select-rw-r--r-- 1 root root 3790 Jan 23 2016 network_config-rw-r--r-- 1 root root 1918 Jan 23 2016 network_config_esx-rw-r--r-- 1 root root 2276 Jan 23 2016 network_config_esxi-rw-r--r-- 1 root root 4454 Jan 23 2016 networking.xml-rw-r--r-- 1 root root 769 Jan 23 2016 partition_select-rw-r--r-- 1 root root 707 Jan 23 2016 post_anamon-rw-r--r-- 1 root root 561 Jan 23 2016 post_install_kernel_options-rw-r--r-- 1 root root 16340 Jan 23 2016 post_install_network_config-rw-r--r-- 1 root root 11545 Jan 23 2016 post_install_network_config_deb-rw-r--r-- 1 root root 204 Jan 23 2016 post_koan_add_reinstall_entry-rw-r--r-- 1 root root 69 Jan 23 2016 post_run_deb-rw-r--r-- 1 root root 1988 Jan 23 2016 post_s390_reboot-rw-r--r-- 1 root root 194 Jan 23 2016 pre_anamon-rw-r--r-- 1 root root 6601 Jan 23 2016 pre_install_network_config-rw-r--r-- 1 root root 773 Jan 23 2016 pre_partition_select-rw-r--r-- 1 root root 628 Jan 23 2016 preseed_apt_repo_config-rw-r--r-- 1 root root 263 Jan 23 2016 proxy.xml-rw-r--r-- 1 root root 65 Jan 23 2016 puppet_install_if_enabled-rw-r--r-- 1 root root 644 Jan 23 2016 puppet_register_if_enabled-rw-r--r-- 1 root root 836 Jan 23 2016 redhat_register-rw-r--r-- 1 root root 662 Jan 23 2016 restore_boot_device-rw-r--r-- 1 root root 620 Jan 23 2016 rhn_certificate_based_register-rw-r--r-- 1 root root 358 Jan 23 2016 save_boot_device-rw-r--r-- 1 root root 438 Jan 23 2016 suse_scriptwrapper.xml
官方帮助文档:http://cobbler.github.io/manuals/2.4.0/
- 自动化运维之–Cobbler
- cobbler自动化运维
- 自动化运维之cobbler安装centos7.3
- CentOS 6.5自动化运维之基于cobbler服务的自动化安装操作系统详解
- 自动化运维使用cobbler实现大PXE
- 运维开发平台化ipmi和Cobbler构建自动化装机平台
- Cobbler自动化安装配置
- cobbler自动化部署
- Cobbler自动化部署linux操作系统
- 部署cobbler自动化安装系统
- Cobbler自动化系统服务器部署
- cobbler实现全自动化安装
- Cobbler多系统自动化安装
- cobbler之snippet-Ubuntu
- 使用 Cobbler 自动化和管理系统安装
- 使用 Cobbler 自动化和管理系统安装
- CentOS-5.5-x86_64 cobbler 自动化部署配置
- Centos7.3 Cobbler自动化批量系统部署
- 程序员、架构师、技术经理、技术总监和CTO有啥区别?
- 程序员的素质
- 自动更新检测,结合网上资料编写
- 我是一个线程 [转]
- SDNU 1304.约瑟夫环的强化版 打表......
- 自动化运维之–Cobbler
- 让用VS2012/VS2013编写的程序在XP中顺利运行
- leetcode 67. Add Binary
- 架构师之DNS实战
- IIS支持解析json
- 服务器重启导致无法启动MySQL
- Android Studio 2.3 问题汇总 - 解决一切障碍,为了更好的时代
- Android通用流行框架大全
- 配置IIS使其支持APK文件的下载