openvpn在centos 6.5上的安装
来源:互联网 发布:java游戏破解合集 编辑:程序博客网 时间:2024/05/22 16:40
Openvpn server for centos 6.5
参考文档:
1 http://blog.csdn.net/yu_xiang/article/details/9212543
2 http://www.geek-kb.com/install-and-configure-openvpn-centos-6-x/
3 https://www.unixmen.com/setup-openvpn-server-client-centos-6-5/
4 http://swupdate.openvpn.org/community/releases/
服务器配置如下
名z-ovs 接口eth3 其IP是172.16.17.233用来上网
在创建完成openvpn后,会自动生成tun0-00接口,IP是10.8.0.1, P-t-P:10.8.0.2
客户端配置如下
名z-cent 接口eth1 其IP是172.16.17.221
在创建完成openvpn后,会自动生成tun0-00接口,IP是10.8.0.1, P-t-P:10.8.0.2
服务器和客户端关系
Client(z-cent)-------------(vm network)----------------Server(z-ovs)------(vm network)------Internet
即z-ovs,用于上网的接口eth3和用于与z-cent相连的接口都接在外网上。
下图可能更准确
-------------------------------------------------------------------vm network
| | |
| | |
z-cent z-ovs Internet
Step 0 : 安装epel库,可以参考我之前的文章
- 服务器端安装:
Step 1 – 安装依赖关系:
yum install gcc make rpm-build autoconf.noarch zlib-devel pam-devel openssl-devel -y
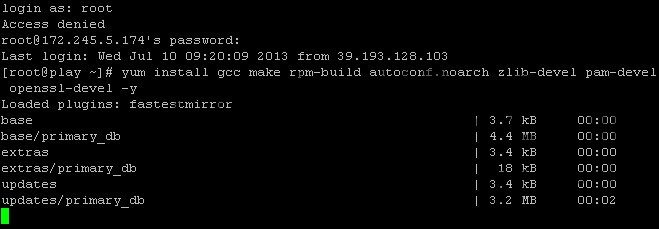
Login as root to your server via SSH.
Step 2 – 安装lzo:
yum install lzoStep 3 – 空:
null
Step 4 – 空:
null
安装OpenVPN
Step 5 – 安装Openvpn:
yum install openvpn -y
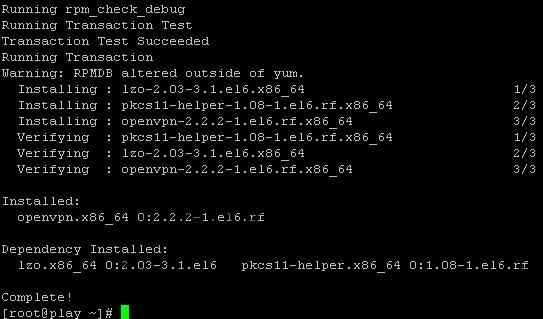
Install OpenVPN on CentOS 6.x
Step 6 – 安装easy-rsa:
yum -y install easy-rsa Running Transaction Installing : easy-rsa-2.2.2-1.el6.noarch 1/1 Verifying : easy-rsa-2.2.2-1.el6.noarch 1/1 Installed: easy-rsa.noarch 0:2.2.2-1.el6 Complete![root@localhost 2.0]# pwd/usr/share/easy-rsa/2.0[root@localhost 2.0]#
in the new version of OpenVPN (2.3.2) easy-rsa is not included
Step 7 – 空:
null.Step 8 – 清空认证证书目录(key/):
cd /usr/share/easy-rsa/2.0source vars./clean-all
hit enter for each line.

Create the certificate
Step 9 – 创建 CA 文件:
./build-ca
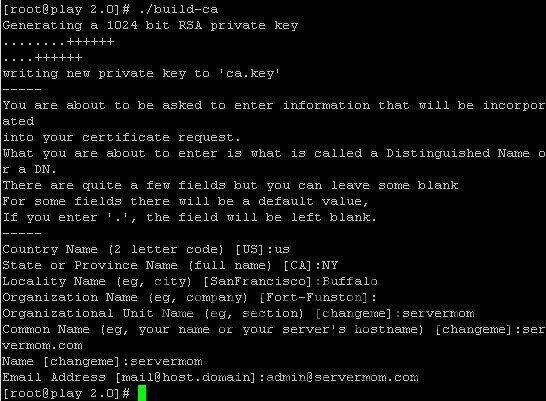
Build necessary CA file
Hint Country Name: may be filled or press enter State or Province Name: may be filled or press enter City: may be filled or press enter Org Name: may be filled or press enter Org Unit Name: may be filled or press enter Common Name: your server hostname Email Address: may be filled or press enter
Step 10 – 创建密钥:
./build-key-server server
这里创建的密钥以server为前缀
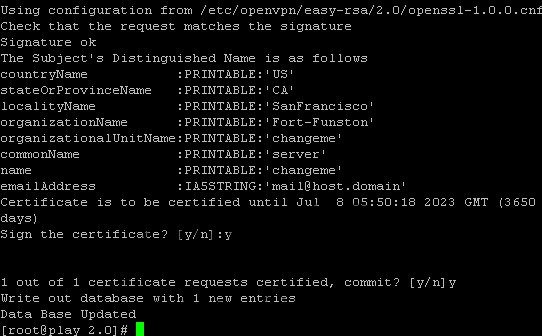
Build Key Server
Hint: Almost the same with ./build.ca but check the changes and additional Common Name: server A challenge password: leave Optional company name: fill or enter sign the certificate: y 1 out of 1 certificate requests: y You can simply leave them blank.
The only 2 required are
sign the certificate (choose “y”)
and
1 out of 1 certificate requests (choose “y”)
Step 11 – 创建Diffie Hellman算法所需参数:
./build-dh

Build Diffie Hellman
Step 12 – 创建OpenVPN配置文件:
nano /etc/openvpn/server.conf
Step 13 – 配置文件内容:
port 1194 #- portproto udp #- protocoldev tuntun-mtu 1500tun-mtu-extra 32mssfix 1450reneg-sec 0ca /usr/share/easy-rsa/2.0/keys/ca.crtcert /usr/share/easy-rsa/2.0/keys/server.crtkey /usr/share/easy-rsa/2.0/keys/server.keydh /usr/share/easy-rsa/2.0/keys/dh2048.pemplugin /usr/lib64/openvpn/plugin/lib/openvpn-auth-pam.so /etc/pam.d/login #- Comment this line if you are using FreeRADIUS#plugin /etc/openvpn/radiusplugin.so /etc/openvpn/radiusplugin.cnf #- Uncomment this line if you are using FreeRADIUSclient-cert-not-requiredusername-as-common-nameserver 10.8.0.0 255.255.255.0push "redirect-gateway def1"push "dhcp-option DNS 8.8.8.8"push "dhcp-option DNS 8.8.4.4"keepalive 5 30comp-lzopersist-keypersist-tunstatus 1194.logverb 3
Save it once done. (Control+O then Control+X)
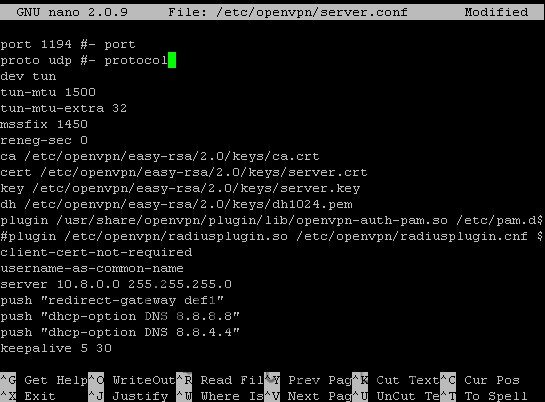
Edit config file
这里10.8.0.0系tun口(虚接口)所用地址
这里各配置项目可以参考centos wiki
https://wiki.centos.org/EdHeron/CentOS5OpenVPN
Step 14 – 启动服务:
service openvpn start
chkconfig openvpn on

Start OpenVPN service
Step 15 – You’ll also need to enable IP forwarding in the file /etc/sysctl.conf. Open it and edit “net.ipv4.ip_forward” line to 1:
nano /etc/sysctl.conf
replace 0 with 1 in this line:
net.ipv4.ip_forward = 1
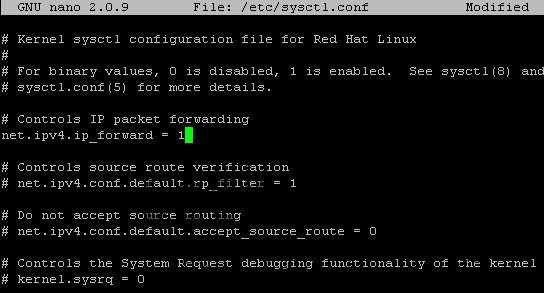
enable IP forwarding in the file /etc/sysctl.conf
Hit Control+O to save then Control+X to exit nano.
Step 16 – Issue this command to load the change:
sysctl -p
Step 17 – Create new Linux username which can also be used to login to the VPN:
useradd openvpn -s /bin/false
replace username with your own username. Then also create its password:
passwd openvpn

Replace password\username
Step 18 – Now route some iptables.
Xen and KVM users use:
iptables -t nat -A POSTROUTING -s 10.8.0.0/24 -o eth3 -j MASQUERADE
(1) IP 10.8.0.0/24伪装(masquerade)成为封包出去(-o)的那块装置上的IP !不管现在eth0的出口获得了怎样的动态ip,MASQUERADE会自动读取eth0现在的ip地址然后做SNAT出去,这样就实现了很好的动态SNAT地址转换。

route iptables
查看iptables -t nat -L -n
Step 19 –NULL
Step 20 – Now save that iptables rules:
service iptables save
service Iptables restart
WINDOWS客户端安装
Step 21 – Windows VPN client installation, lets create a server.ovpn config file. To make it easy, you can simply create it on your local computer using Notepad (or any other simple text editor tool). Enter following in that file:
clientdev tunproto udpremote 123.123.123.123 1194 # - Your server IP and OpenVPN Portresolv-retry infinitenobindtun-mtu 1500tun-mtu-extra 32mssfix 1450persist-keypersist-tunca ca.crtauth-user-passcomp-lzoreneg-sec 0verb 3
Then save it with .ovpn extension. Save that file in the config directory of where you installed OpenVPN client in your computer. See

create a server.ovpn config file.
Step 22 – That’s it. Now you can copy ca.crt file from /etc/openvpn/easy-rsa/2.0/keys/ directory and place it in your server’s document root (public_html).
cp /etc/openvpn/easy-rsa/2.0/keys/ca.crt /path/to/public/directory
example:
cp /etc/openvpn/easy-rsa/2.0/keys/ca.crt /var/www/www.geek-kb.com/public_html
Now you can download the ca.crt file from your browser by going to domain.com/ca.crt then save it to the same folder as .ovpn file you created earlier. That’s it. Now you can login to your VPN using username and password you’ve created.
Linux客户端安装
- 除非特别说明,大部分在client端完成
Step 23 – Centos VPN client installation:
Install openvpn lzo:
yum install openvpn lzo -y
Step 24 –(在Server端完成)创建客户端用的key:
在服务器端将client所需要的完成
./build-key client
Next, copy ca.crt, client.key, and client.crt from the OpenVPN server to your Centos machine(z-cent).
ca.crtclient.key
client.crt
scp ca.crt client.key client.crt root@172.16.17.221:/etc/openvpn
如果想撤消这个用户(client),在服务器端可以执行
./revoke-full client
Step 25 – 配置客户端
cp /usr/share/openvpn-2.3.12/........../client.conf /etc/openvpn/
Create a new config file called server.conf for example and paste these values into it (don’t forget to replace 123.123.123.123 with your OpenVPN server IP and also point the red marked lines to the relative path of your ca.crt, username.key, and username.crt ):
clientdev tunproto udpremote 172.16.17.233 1194resolv-retry infinitenobindpersist-keypersist-tuncomp-lzoverb 3ca "/etc/openvpn/ca.crt"cert "/etc/openvpn/client.crt"key "/etc/openvpn/client.key"
Next, move the server.conf file to /etc/openvpn and restart the service:
service openvpn restart
There’s one more thing remaining to do on machines in the remote VPN network:
On each machine you intend to connect to remotely, you have to add the relevant route (if you have a router in the remote network you can simply add the route there):
On a Linux machine:
# route add -net net.id/network.size gw ip.of.gateway metric 1
Example:
# route add -net 192.168.1.0/24 gw 192.168.0.100 metric 1
After adding the route, test to see if it works by using ping on an IP on the remote network and if it works then you should set it as a permanent route. To do that, create a file in /etc/sysconfig/network-scripts/ folder and name it route-dev_name (the device which resides on the network you routed). Example:
nano /etc/sysconfig/network-scripts/route-eth0
And then type into the file the route line, it should look like that:
192.168.1.0/24 via 192.168.0.100 dev eth0
Hit ‘Ctrl + X’ to save the file.
On a Windows machine:
c:\route add net.id mask network.mask gateway.ip
Example:
c:\route add 192.168.1.0 mask 255.255.255.0 192.168.0.100
As mentioned above, after adding the route, test to see if it works by using ping on an IP on the remote network and if it works then you should set it as a permanent route. To do that, run the same command again and add -p at the end of the line, like so:
c:\route add 192.168.1.0 mask 255.255.255.0 192.168.0.100 -p
Optional section (password protect your certificate):
If you would like your users to use a password protected certificate when connecting to your VPN server, follow the next steps: 1. Go to:
/etc/openvpn/easy-rsa/2.0
2. Edit the vars file as mentioned above. 3. Run:
# source ./vars# ./build-key-pass user_name
The password the user will have to input is the “PEM pass phrase”
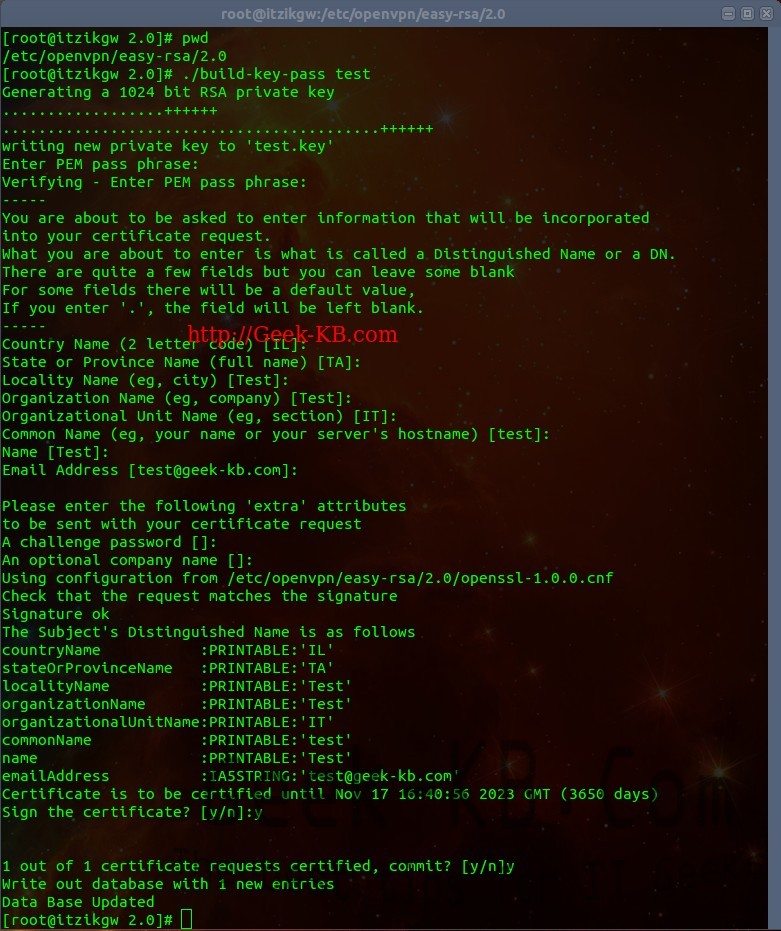
Password protect your certificate
4. Now copy the user.crt, user.key and ca.crt to the relevant folder on the client and edit your .ovpn file on Windows or server.conf in Linux to add the new files. 5. Connect. I hope this guide helped you, feel free to leave comments or ask questions.
- openvpn在centos 6.5上的安装
- 在CentOS的VPS中安装OpenVPN
- 在Windows 7上安装使用OpenVPN
- [Centos]openvpn 服务端的安装(easy-rsa3)
- centos 安装openvpn
- centos下安装openvpn
- CentOS安装openvpn
- CentOS 6 安装OpenVPN
- CentOS 7安装OpenVPN
- 部署在windows azure上的openvpn
- openvpn在mac上的使用
- CentOS6.5/7.0 上 OpenVPN的安装
- Tuxedo在Centos系统上的安装
- hadoop在CentOS上的安装部署
- Emacs 24.3在CentOS上的安装
- Tomcat在Centos上的安装
- 在CentOS上安装spice的Openstack
- Bugzilla在centos上的安装操作
- Thinkphp+Jqueryfrom图片异步上传预览
- 数据转模型
- Realm官方文档笔记(一)
- Android 中性能优化之lint使用总结
- echarts地图生成
- openvpn在centos 6.5上的安装
- Mql4 自定义函数模板
- 面向对象程序设计上机练习十二(运算符重载)
- 常用的数据源配置
- OCSS的现状与发展趋势
- Web图片滚动条加载、延迟加载技术LazyLoad研究
- ubuntu SSH服务器登陆与上传
- iOS中书写代码规范35条小建议
- 和程序员谈恋爱的好处和坏处


