Dagger2 使用初步
来源:互联网 发布:js淘宝购物车结算代码 编辑:程序博客网 时间:2024/06/07 07:14
Dagger2 是一个Android依赖注入框架,由谷歌开发,最早的版本Dagger1 由Square公司开发。依赖注入框架主要用于模块间解耦,提高代码的健壮性和可维护性。Dagger 这个库的取名不仅仅来自它的本意“匕首”,同时也暗示了它的原理。Jake Wharton 在对 Dagger 的介绍中指出,Dagger 即 DAG-er,这里的 DAG 即数据结构中的 DAG——有向无环图(Directed Acyclic Graph)。也就是说,Dagger 是一个基于有向无环图结构的依赖注入库,因此Dagger的使用过程中不能出现循环依赖。
Android开发从一开始的MVC框架,到MVP,到MVVM,不断变化。现在MVVM的data-binding还在实验阶段,传统的MVC框架Activity内部可能包含大量的代码,难以维护,现在主流的架构还是使用MVP(Model + View + Presenter)的方式。但是 MVP 框架也有可能在Presenter中集中大量的代码,引入DI框架Dagger2 可以实现 Presenter 与 Activity 之间的解耦,Presenter和其它业务逻辑之间的解耦,提高模块化和可维护性。
说了那么多,那什么是依赖呢?如果在 Class A 中,有 Class B 的实例,则称 Class A 对 Class B 有一个依赖。例如下面类 Human 中用到一个 Father 对象,我们就说类 Human 对类 Father 有一个依赖(参考)。

public class Human { ... Father father; ... public Human() { father = new Father(); }}
那什么又是依赖注入呢,依赖注入就是非自己主动初始化依赖,而通过外部来传入依赖的方式,简单来说就是不使用 new 来创建依赖对象。使用 Dagger2 创建依赖对象,我们就不用手动初始化了。个人认为 Dagger2 和 MVP 架构是比较不错的搭配,Activity 依赖的 Presenter 可以使用该DI框架直接生成,实现解耦,简单的使用方式如下:
public class MainActivity extends BaseActivity { @Inject MainActivityPresenter presenter; ... }
上面这些主要是对DI框架有一个初步全局的了解,下面来看看Dagger2的基本内容。Dagger2 通过注解来生成代码,定义不同的角色,主要的注解有:@Inject、@Module 、@Component 、@Provides 、@Scope 、@SubComponent 等。
@Inject: 通常在需要依赖的地方使用这个注解。换句话说,你用它告诉Dagger这个类或者字段需要依赖注入。这样,Dagger就会构造一个这个类的实例并满足他们的依赖。
@Module: Modules类里面的方法专门提供依赖,所以我们定义一个类,用@Module注解,这样Dagger在构造类的实例的时候,就知道从哪里去找到需要的 依赖。modules的一个重要特征是它们设计为分区并组合在一起(比如说,在我们的app中可以有多个组成在一起的modules)。
@Provides: 在modules中,我们定义的方法是用这个注解,以此来告诉Dagger我们想要构造对象并提供这些依赖。
@Component: Components从根本上来说就是一个注入器,也可以说是@Inject和@Module的桥梁,它的主要作用就是连接这两个部分。 Components可以提供所有定义了的类型的实例,比如:我们必须用@Component注解一个接口然后列出所有的 @Modules组成该组件,如 果缺失了任何一块都会在编译的时候报错。所有的组件都可以通过它的modules知道依赖的范围。
@Scope: Scopes可是非常的有用,Dagger2可以通过自定义注解限定注解作用域。后面会演示一个例子,这是一个非常强大的特点,因为就如前面说的一样,没必要让每个对象都去了解如何管理他们的实例。
介绍的差不多了,来看一个简单的实例,该实例参考了该项目和其相关的文章。该实例只是讲解怎么使用dagger2,并不涉及MVP,同时结合了当前流行的 Retrofit 2.0 、RxAndroid 等库(回想刚开始的时候做Android自己封装AsyncTask和使用BroadCast简直和原始人刀耕火种无异啊)。
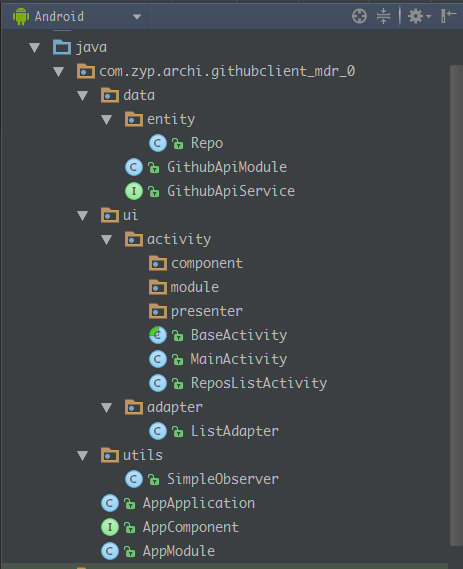
首先来看看整个工程的结构:
在 gradle 配置文件中首先引入需要的库:apply plugin: 'com.android.application'
apply plugin: 'com.android.application'
apply plugin: 'com.neenbedankt.android-apt' // 注释处理


android {
    compileSdkVersion 23
    buildToolsVersion "23.0.2"

    defaultConfig {
        applicationId "com.zyp.archi.githubclient_mdr_0"
        minSdkVersion 16
        targetSdkVersion 23
        versionCode 1
        versionName "1.0"
    }

    lintOptions {
        disable 'InvalidPackage'
    }

    packagingOptions {
        exclude 'META-INF/services/javax.annotation.processing.Processor'
    }

    buildTypes {
        release {
            minifyEnabled false
            proguardFiles getDefaultProguardFile('proguard-android.txt'), 'proguard-rules.pro'
        }
    }
}


dependencies {
    compile fileTree(dir: 'libs', include: ['*.jar'])
    testCompile 'junit:junit:4.12'
    compile 'com.android.support:appcompat-v7:23.1.1'

    compile 'com.android.support:recyclerview-v7:23.1.1'

    compile 'com.jakewharton:butterknife:7.0.1'

    compile 'com.squareup.retrofit:retrofit:2.0.0-beta2'
    compile 'com.squareup.retrofit:adapter-rxjava:2.0.0-beta2'
    compile 'com.squareup.retrofit:converter-gson:2.0.0-beta2'


    compile 'io.reactivex:rxandroid:1.1.0'
    compile 'io.reactivex:rxjava:1.1.0'

    compile 'com.google.dagger:dagger:2.0.2'
    compile 'com.google.dagger:dagger-compiler:2.0.2'
    provided 'org.glassfish:javax.annotation:10.0-b28'

}
由于 Dagger 使用 apt 生成代码,在Project gradle中还需要加入:
buildscript { repositories { jcenter() } dependencies { classpath 'com.android.tools.build:gradle:1.5.0' classpath 'com.neenbedankt.gradle.plugins:android-apt:1.8' // NOTE: Do not place your application dependencies here; they belong // in the individual module build.gradle files }}
网络相关的API在Application中生成,注意别忘了在Manifest文件中添加 <uses-permission android:name="android.permission.INTERNET"/> 和 绑定 android:name= .AppApplication 。
public class AppApplication extends Application{ private static AppApplication sInstance; private AppComponent appComponent; @Override public void onCreate(){ super.onCreate(); this.sInstance = this; setupCompoent(); } private void setupCompoent(){ appComponent = DaggerAppComponent.builder() .githubApiModule(new GithubApiModule()) .appModule(new AppModule(this)) .build(); } public static AppApplication getsInstance(){ return sInstance; } public AppComponent getAppComponent(){ return appComponent; }}
在 Application 中创建了 AppComponent 实例,并可以获取到,注意Appcomponent的实例化方式,Dagger + AppComponent.builder().somModule(new somModule()).build() ,注意写法,大小写也要注意,以后介绍Apt生成的原码的时候就清楚了为什么要这样写,我相信这里也是一个一开始不好理解的地方。接下来看看AppComponent是什么鬼。
@Component(modules = { AppModule.class, GithubApiModule.class})public interface AppComponent { // inject what void inject(ReposListActivity activity);}AppCompoent 是一个 Interface,通过 @Component 添加了两个 Module : AppModule、GithubApiModule。此外还有一个inject方法,其中的参数表示要注入的位置(先打个预防针,Component中的方法还可以起到暴露资源,实现Component中的“继承”的作用)。接下来看看AppModule 和 GithubApiModule。
@Modulepublic class AppModule { private Application application; public AppModule(Application application){ this.application=application; } @Provides public Application provideApplication(){ return application; }}
@Modulepublic class GithubApiModule { @Provides public OkHttpClient provideOkHttpClient() { OkHttpClient okHttpClient = new OkHttpClient(); okHttpClient.setConnectTimeout(60 * 1000, TimeUnit.MILLISECONDS); okHttpClient.setReadTimeout(60 * 1000, TimeUnit.MILLISECONDS); return okHttpClient; } @Provides public Retrofit provideRetrofit(Application application, OkHttpClient okHttpClient){ Retrofit retrofit = new Retrofit.Builder() .baseUrl(application.getString(R.string.api_github)) .addCallAdapterFactory(RxJavaCallAdapterFactory.create()) // 添加Rx适配器 .addConverterFactory(GsonConverterFactory.create()) // 添加Gson转换器 .client(okHttpClient) .build(); return retrofit; } @Provides protected GithubApiService provideGitHubService(Retrofit retrofit) { return retrofit.create(GithubApiService.class); }}
这两个Module很简单,但是也包含很多东西。首先作为Module,需要使用@Module注解,在被@Module注解修饰的类内部,使用@Provides注解来表明可以提供的依赖对象。需要注意的是,有些由@Provides 提供的方法需要输入参数,这些参数是怎么来的呢?这对于刚刚接触的新手来说有点棘手。这里就先说了,这些需要传入的参数需要其它用@Provides注解修饰的方法生成,比如在GithubModule.class 中的 provideGitHubService(Retrofit retrofit) 方法中的参数就是由另外一个 @Provides 注解修饰的方法生成的,这里就是public Retrofit provideRetrofit(Application application, OkHttpClient okHttpClient),那么这个provideRetrofit()方法中的参数又是怎么来的呢?请读者自己去找。
此外为什么GithubModule会这样设计,有没有更加单方法?试想当有多种 ApiService 需要用到的时候,OkhttpClient中的超时设置需要不同的时候,Retrofit 实例的 Converter需要不同的时候我们该如何应对?大家可以思考一下,我也在思考。
这里使用到了Retrofit,Retrofit的基本使用方法见这里,虽然Retrofit2.0 还处于 beta 阶段,但是这里还是任性的使用了,Retrofit2.0 新特性和基本使用方式见这里。
public interface GithubApiService { @GET("/users/{user}/repos") Observable<ArrayList<Repo>> getRepoData(@Path("user") String user);}
GithubAPiService 中定义了一个访问需要访问的接口,注意这里返回了一个Observable对象,这里使用到了 RxJava 的相关知识,RxJava的好处也很多,这里就不解释了,有兴趣入门参考见这里,此外建议大家参阅这里,其实都还不够。
好了准备工作基本上做好了,现在来看看Activity怎么写。首先定义 BaseActivity,这里提一下基本的Android应用开发架构,稍微有经验的开发者肯定都是会对Activity 进行分层的,将一些公共的代码放在BaseActivity中,当然BaseActivity也许不止一种,或者不止一层,这就要具体问题具体分析了,此外一般还会引入utils 包来定义一些公共的静态方法来实现对这个应用的AOP,具体可以参考这里。这里BaseActivity 提供了ButterKnife依赖注入,提供了Component建立的方法和布局文件获取方法。
public abstract class BaseActivity extends AppCompatActivity { @Override protected void onCreate(Bundle savedInstanceState) { super.onCreate(savedInstanceState); setContentView(getLayoutId()); ButterKnife.bind(this); setupActivityComponent(AppApplication.getsInstance().getAppComponent()); } protected abstract void setupActivityComponent(AppComponent appComponent); protected abstract int getLayoutId();}
这里设计了两个Activity,一个是MainActivity 一个是 ReposListActivity。MainActivity 提供一个按钮,点击则跳转到ReposListActivity,显示某一个人的GitHub账户上的信息。
public class MainActivity extends BaseActivity { @OnClick(R.id.showButton) public void onShowRepositoriesClick() { startActivity(new Intent(this, ReposListActivity.class)); } @Override protected void onCreate(Bundle savedInstanceState) { super.onCreate(savedInstanceState); } @Override public int getLayoutId(){ return R.layout.activity_main; } @Override public void setupActivityComponent(AppComponent appComponent){ }}
/** * Created by zhuyp on 2016/1/10. */public class ReposListActivity extends BaseActivity { @Bind(R.id.repos_rv_list) RecyclerView mRvList; @Bind(R.id.pbLoading) ProgressBar pbLoading; @Inject GithubApiService githubApiService; @Override protected void onCreate(Bundle savedInstanceState) { super.onCreate(savedInstanceState); initView(); } @Override public int getLayoutId(){ return R.layout.activity_repos_list; } @Override public void setupActivityComponent(AppComponent appComponent){ appComponent.inject(this); } private void initView(){ LinearLayoutManager manager = new LinearLayoutManager(this); manager.setOrientation(LinearLayoutManager.VERTICAL); mRvList.setLayoutManager(manager); ListAdapter adapter = new ListAdapter(); mRvList.setAdapter(adapter); loadData(adapter); } private void loadData(final ListAdapter adapter){ showLoading(true); githubApiService.getRepoData(getUser()) .subscribeOn(Schedulers.io()) .observeOn(AndroidSchedulers.mainThread()) .subscribe(new SimpleObserver<ArrayList<Repo>>() { @Override public void onNext(ArrayList<Repo> repos) { showLoading(false); adapter.setRepos(repos); } @Override public void onError(Throwable e){ showLoading(false); } }); } private String getUser(){ return "bird1015"; } public void showLoading(boolean loading) { Log.i("info",loading + " Repos"); pbLoading.setVisibility(loading ? View.VISIBLE : View.GONE); }}
简单说一下 ReposListActivity 中的依赖注入,@Inject 注入了GithubApiService,在loadData() 方法中读取对应用户GitHub上的信息并返回。这里我们只提取了很少一部分信息,并显示在RecyclerView中。由于本篇文章不是介绍Rxjava在Android中的应用,RxJava 相关就不做具体解释了,有兴趣可以从前面提到过的资料中去了解。从上面代码可以看到程序的处理逻辑异常清晰简单,这就是Rxjava的威力所在,但是这也是一个不好上手的东西,建议还是根据参考资料学习一下吧,不管能否实际运用,至少能看得懂啊。
这只是Dagger2的一个入门实例代码,其实要搞懂Dagger需要看生成的源码(后面会写文章介绍),希望我能尽快再写一至两篇总结一下其它特性,比如 SubComponent ,Dependencies,Scope等。上面代码中还用到的资源我就直接贴在下面了。
public class ListAdapter extends RecyclerView.Adapter<ListAdapter.RepoViewHolder> { private ArrayList<Repo> mRepos; public ListAdapter() { mRepos = new ArrayList<>(); } public void setRepos(ArrayList<Repo> repos) { mRepos = repos; notifyItemInserted(mRepos.size() - 1); } @Override public RepoViewHolder onCreateViewHolder(ViewGroup parent, int viewType) { View view = LayoutInflater.from(parent.getContext()) .inflate(R.layout.item_repo, parent, false); return new RepoViewHolder(view); } @Override public void onBindViewHolder(RepoViewHolder holder, int position) { holder.bindTo(mRepos.get(position)); } @Override public int getItemCount() { return mRepos.size(); } public static class RepoViewHolder extends RecyclerView.ViewHolder { @Bind(R.id.item_iv_repo_name) TextView mIvRepoName; @Bind(R.id.item_iv_repo_detail) TextView mIvRepoDetail; public RepoViewHolder(View itemView) { super(itemView); ButterKnife.bind(this, itemView); } public void bindTo(Repo repo) { mIvRepoName.setText(repo.name ); mIvRepoDetail.setText(String.valueOf(repo.description + "(" + repo.language + ")")); } }}
/** * Created by zhuyp on 2016/1/10. */public class Repo { public String name; // 库的名字 public String description; // 描述 public String language; // 语言// public String testNullField; // 试错}
/** * Created by zhuyp on 2016/1/10. */public class SimpleObserver<T> implements Observer<T> { @Override public void onCompleted() { } @Override public void onError(Throwable e) { } @Override public void onNext(T t) { }}
activity_main.xml
<?xml version="1.0" encoding="utf-8"?><LinearLayout xmlns:android="http://schemas.android.com/apk/res/android" xmlns:tools="http://schemas.android.com/tools" android:layout_width="match_parent" android:layout_height="match_parent" android:orientation="vertical" android:paddingBottom="@dimen/activity_vertical_margin" android:paddingLeft="@dimen/activity_horizontal_margin" android:paddingRight="@dimen/activity_horizontal_margin" android:paddingTop="@dimen/activity_vertical_margin"> <Button android:id="@+id/showButton" android:layout_width="match_parent" android:layout_height="wrap_content" android:text="@string/main_goto_activity"/></LinearLayout>
activity_repo_list.xml
<?xml version="1.0" encoding="utf-8"?><LinearLayout xmlns:android="http://schemas.android.com/apk/res/android" android:layout_width="match_parent" android:layout_height="match_parent" android:orientation="vertical"> <android.support.v7.widget.RecyclerView android:id="@+id/repos_rv_list" android:layout_width="match_parent" android:layout_height="match_parent"/> <ProgressBar android:id="@+id/pbLoading" android:layout_width="wrap_content" android:layout_height="wrap_content" /></LinearLayout>
item_repo.xml
<?xml version="1.0" encoding="utf-8"?><LinearLayout xmlns:android="http://schemas.android.com/apk/res/android" android:layout_width="match_parent" android:layout_height="match_parent" xmlns:tools="http://schemas.android.com/tools" android:orientation="vertical"> <TextView android:id="@+id/item_iv_repo_name" tools:text="Repos name" android:layout_width="match_parent" android:layout_height="wrap_content" android:padding="8dp" android:textColor="@android:color/holo_purple" android:textSize="22sp"/> <TextView android:id="@+id/item_iv_repo_detail" tools:text="Details" android:layout_width="match_parent" android:layout_height="wrap_content" android:padding="8dp" android:textSize="14sp"/></LinearLayout>
strings.xml
<resources> <string name="app_name">GithubClient_mdr_0</string> <string name="main_mock_data">自定义数据(测试)</string> <string name="main_goto_activity">跳转列表</string> <string name="api_github">https://api.github.com</string></resources>
- Dagger2 使用初步
- Dagger2 使用初步
- Dagger2初步使用心得
- Dagger2初步使用篇1
- Dagger2初步使用及介绍
- Dagger2(初步探索一)
- Dagger2(初步探索二)
- Dagger2使用
- Dagger2使用
- Dagger2使用
- Dagger2使用
- Dagger2使用
- Dagger2使用
- Dagger2使用
- Dagger2-android (不是dagger2)使用
- Dagger2(初步探索三)
- Dagger2使用(一)Dagger2 介绍
- Dagger2使用记录
- android studio 加快gradle 编译
- 根据当前系统日期显示年龄(实岁)
- ubuntu进程管理
- vs2013调试程序时出现“计算机丢失.dll文件”
- Battleships in a Board
- Dagger2 使用初步
- 树莓派问题总结
- 运算符
- mysql导入导出权限问题解决
- LeetCode No.377 Combination Sum IV
- 《Photoshop智能手机APP界面设计》学习笔记之二
- Oracle学习(二)
- opencv内数据结构
- poj_1035 Spell checker(字符串处理)