腾讯云centos 7部署 dotnetcore+Angular2 实践
来源:互联网 发布:html商城源码 编辑:程序博客网 时间:2024/05/11 19:22
版权声明:本文由屈政斌原创文章,转载请注明出处:
文章原文链接:https://www.qcloud.com/community/article/239
来源:腾云阁 https://www.qcloud.com/community
服务器: 腾讯云主机(Centos 7.1)
项目:aspnetcore+angular2 开源项目模版
该项目使用webpack 打包Angular2, 内网涉及到npm请使用tnpm
环境安装
1.安装dotnetcore
根据官方指导进行安装;
官网给出的安装引导是安装dotnet core 1.1 ,但是我们项目使用的dotnetcore 1.0.1
所以必须再安装1.0.1 (备注dotnet core 可以多个版本并存)
curl -sSL -o dotnet.tar.gz https://go.microsoft.com/fwlink/?LinkID=827529tar zxf dotnet.tar.gz -C /opt/dotnet(下载的地址不一样)
2.禁用防火墙
systemctl stop firewalld.service #停止firewallsystemctl disable firewalld.service #禁止firewall开机启动由于是学习项目,可以先关闭防火墙, 生成环境请配置防火墙iptable
3.安装Nginx
yum install nginx systemctl start nginx使用命令行测试 curl http://127.0.0.1 能访问到html内容则正常
项目构建
1.构建项目
在windows环境 构建 指引 参考
npm如果访问问题可以使用tnpm
npm install -g yonpm install -g generator-aspnetcore-angular22.创建项目
选择高级模版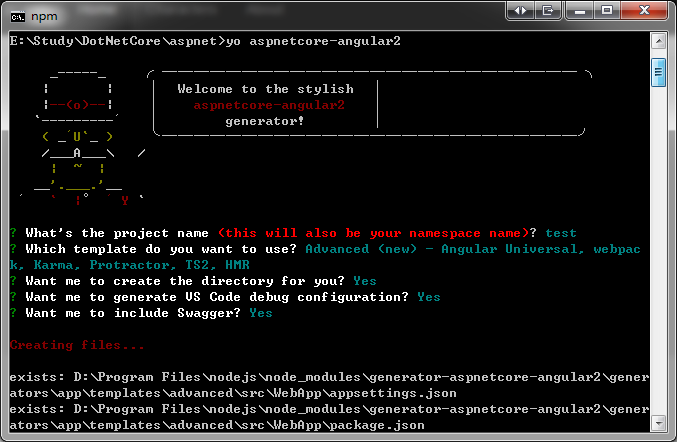
取消npm 安装 使用 tnpm
3.编译项目
编译dotnet ,编译angular2
dotnet 程序集restore,webpack 打包Angular2 ,本地运行项目
有兴趣的同学可以多了解快命令具体做了啥
4.本地访问
http://localhost:3000/
部署项目
1.执行发布脚本
dotnet publish该命令会执行project.json 的构建命令
"scripts": {"prepublish": [ "npm install", "npm run rebuild-sass", "npm run build" ],"postpublish": [ "dotnet publish-iis --publish-folder %publish:OutputPath% --framework %publish:FullTargetFramework%" ]}2.压缩生成文件
目录:
\test\src\test\bin\Debug\netcoreapp1.0\publish
压缩成zip ,稍后上传到linux进行部署
3.上传项目
使用ftp工具上传只centos (我使用的xshell+xftp)
解压文件: unzip test.zip
4.启动项目
set ASPNETCORE_ENVIRONMENT=Developmentdotnet test.dll server.urls=http://127.0.0.1:3000/(备注 此处没有使用localhost ,是因为ip6 下bind错误 )
已经监听了
5.测试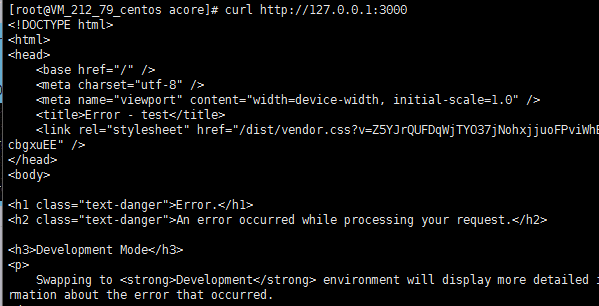
发现上面虽然打开了我们的页面其实是爆了一个错误
需要修改 Views\Home\Index.cshtml 文件
<app-root asp-prerender-module="wwwroot/src/server" asp-prerender-webpack-config="webpack.config.js"> Loading...</app-root>去掉如下代码
asp-prerender-module="wwwroot/src/server" asp-prerender-webpack-config="webpack.config.js"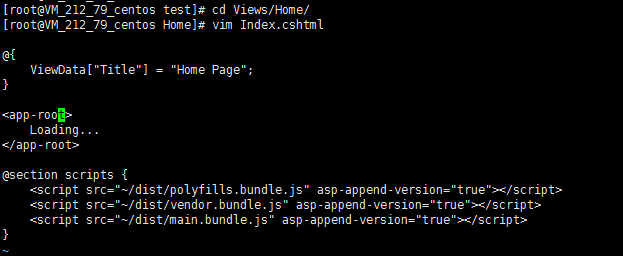
curl 测试html正常
6.配置代理
3000端口不适合暴露外网, 配置Nginx 反向代理
vim /etc/nginx/nginx.conf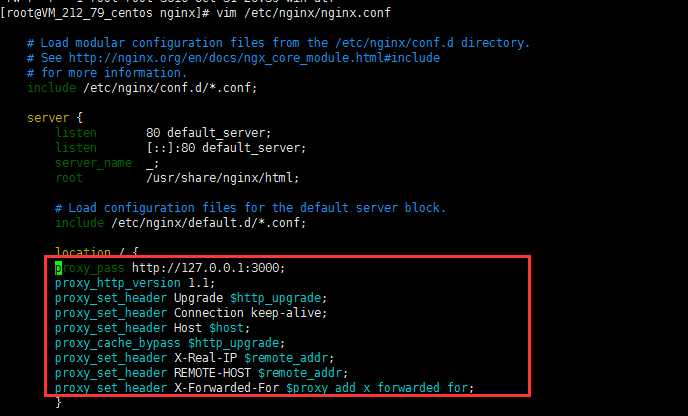
添加 cgi
proxy_pass http://127.0.0.1:3000; proxy_http_version 1.1; proxy_set_header Upgrade $http_upgrade; proxy_set_header Connection keep-alive; proxy_set_header Host $host; proxy_cache_bypass $http_upgrade; proxy_set_header X-Real-IP $remote_addr; proxy_set_header REMOTE-HOST $remote_addr; proxy_set_header X-Forwarded-For $proxy_add_x_forwarded_for;检查nginx配置
重启nginx
/usr/sbin/nginx -tservice nginx restart#获取使用reloadnginx -s reload7.查看成果
使用外网ip访问站点, 直接访问80端口就好了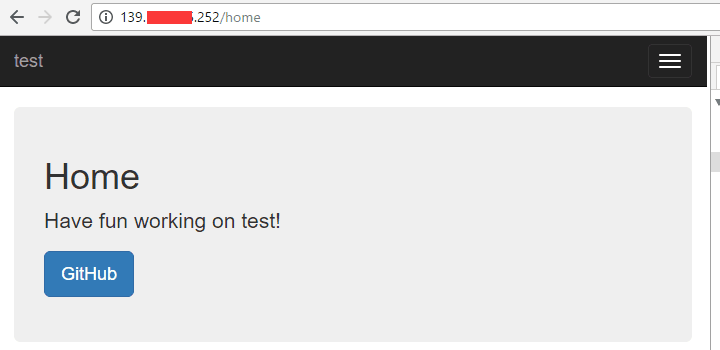
其他
该项目目前只是用于学习dotnetcore ,Angular2 , 顺便熟悉一下 npm,webpack,linux。
- 腾讯云centos 7部署 dotnetcore+Angular2 实践
- 腾讯云centos 7部署 dotnetcore+Angular2 实践
- centos 7部署 dotnetcore+Angular2 实践
- centos 7 部署 dotnetcore+Angular2 实践
- Docker 部署dotnetcore
- Docker 部署dotnetcore
- 腾讯云部署
- Node.js+MongoDB+Nginx在腾讯云的CentOS的部署
- Openstack Liberty 部署实践(Centos 7.1503)
- Angular2 Service实践
- 腾讯云部署https请求
- CentOS 6.8 部署腾讯蓝鲸运维平台
- 通过Jexus 部署 dotnetcore版本MusicStore 示例程序
- 腾讯云CentOS安装Nginx
- 腾讯云 CentOS-Base.repo
- 腾讯云CentOS 7挂载数据盘
- CentOS 7 部署 Kubernetes
- CentOS 7 部署 Kubernetes
- 1064. 朋友数(20)
- 一步一步学区块链(6)truffle开发框架
- 【codeforce246B】
- 【map】UVa 156 反片语;
- Linux网络编程--tinyhttpd
- 腾讯云centos 7部署 dotnetcore+Angular2 实践
- 207. Course Schedule
- YOJ:字符串的修改(双版本)
- 深度解析CountDownLatch源码
- 使用开源软件 enfuse 做照片的曝光合成
- 一个高级PHP工程师所应该具备的
- 【HTML5】SVG制作过山车动画(一)
- Supervisor 守护 dotnetcore 程序
- AVL树(平衡二叉搜索树)