Android view 工作流程《上》
来源:互联网 发布:奇葩秀视频直播间源码 编辑:程序博客网 时间:2024/05/16 07:50
view基本认识
提到view,你可能会说,视图不就是窗口,而一个窗口往往就是一个activity。所以会有一个activity就是一个view的错觉。其实也不能说完全错了,这其中确实有玄机。
setContentView说起
为啥会让我们有activity即view的印象,原因就在于Activity一般都在onCreate函数中里使用setContentView设置UI界面。我们略作分析:
mWindow为何物?
Activity.Java
/** * 根据布局文件来填充activity的view。 */ public void setContentView(int layoutResID) { getWindow().setContentView(layoutResID);//我们需要看下getWindow()返回的是什么。 } /** * Retrieve the current {@link android.view.Window} for the activity. * This can be used to directly access parts of the Window API that * are not available through Activity/Screen. * * @return Window The current window, or null if the activity is not * visual. */ public Window getWindow() { return mWindow;// 是window的一个实例 } mWindow是何方神圣,又是谁创造了它,我们control+F一下在attach函数中找到了它mWindow =PolicyManager.makeNewWindow(this),不过又多出来一个PolicyManager,这货又是干啥的,我们进去看看先。
public final class PolicyManager { private static final String POLICY_IMPL_CLASS_NAME = "com.android.internal.policy.impl.Policy"; private static final IPolicy sPolicy; static { // Pull in the actual implementation of the policy at run-time try { Class policyClass = Class.forName(POLICY_IMPL_CLASS_NAME); sPolicy = (IPolicy)policyClass.newInstance(); } catch (ClassNotFoundException ex) { throw new RuntimeException( POLICY_IMPL_CLASS_NAME + " could not be loaded", ex); 。。。。。。 // The static methods to spawn new policy-specific objects public static Window makeNewWindow(Context context) { return sPolicy.makeNewWindow(context); } } 该类代码比较少,申明了一个Policy类型的单例对象,我们再看看它是神马。
public PhoneWindow makeNewWindow(Context context) { return new PhoneWindow(context);//亲,注意啦,出现关键词PhoneWindow。 } 到这里我们弄清楚了一个事实,mWindow就是一个PhoneWindow对象。同样的手法,我们可以知道mWindowManager成员变量的真实类型是LocalWindowManager。
深入setContentView
弄清楚了以上概念,我们可以重新回到setContenView函数了。根据上面的结论,直接到PhoneWindow去找它。
public void setContentView(View view, ViewGroup.LayoutParams params) { if (mContentParent == null) { installDecor(); } else { mContentParent.removeAllViews(); } mContentParent.addView(view, params); final Callback cb = getCallback(); if (cb != null) { cb.onContentChanged(); } } 可以知道mContentParent是viewGroup类型,它存在时就负责把view加载出来,不存在的时候会走installDecor方法。
private void installDecor() { if (mDecor == null) { mDecor = generateDecor();//创建mDecor,它是DecorView类型,继承于FrameLayout。 mDecor.setDescendantFocusability(ViewGroup.FOCUS_AFTER_DESCENDANTS); mDecor.setIsRootNamespace(true); } if (mContentParent == null) { mContentParent = generateLayout(mDecor); //创建标题栏 mTitleView = (TextView)findViewById(com.android.internal.R.id.title); ...... } } 这里需要我们进一步看下generateLayout()方法:
protected ViewGroup generateLayout(DecorView decor) { // Apply data from current theme. //1,根据getWindowStyle()返回的数组来设定一些窗口属性值feature,如是否全屏,是否带标题栏。 TypedArray a = getWindowStyle(); mIsFloating = a.getBoolean(com.android.internal.R.styleable.Window_windowIsFloating, false); int flagsToUpdate = (FLAG_LAYOUT_IN_SCREEN|FLAG_LAYOUT_INSET_DECOR) & (~getForcedWindowFlags()); if (mIsFloating) { setLayout(WRAP_CONTENT, WRAP_CONTENT); setFlags(0, flagsToUpdate); } else { setFlags(FLAG_LAYOUT_IN_SCREEN|FLAG_LAYOUT_INSET_DECOR, flagsToUpdate); } if (a.getBoolean(com.android.internal.R.styleable.Window_windowNoTitle, false)) { requestFeature(FEATURE_NO_TITLE); } if (a.getBoolean(com.android.internal.R.styleable.Window_windowFullscreen, false)) { setFlags(FLAG_FULLSCREEN, FLAG_FULLSCREEN&(~getForcedWindowFlags())); } if (a.getBoolean(com.android.internal.R.styleable.Window_windowShowWallpaper, false)) { setFlags(FLAG_SHOW_WALLPAPER, FLAG_SHOW_WALLPAPER&(~getForcedWindowFlags())); } ...... // Inflate the window decor. //2,根据上面设定的features值,决定加载何种窗口布局文件。 int layoutResource; int features = getLocalFeatures(); // System.out.println("Features: 0x" + Integer.toHexString(features)); if ((features & ((1 << FEATURE_LEFT_ICON) | (1 << FEATURE_RIGHT_ICON))) != 0) { if (mIsFloating) { layoutResource = com.android.internal.R.layout.dialog_title_icons; } else { layoutResource = com.android.internal.R.layout.screen_title_icons; } ...... } mDecor.startChanging(); //3,把特定的view添加到decorView里。 View in = mLayoutInflater.inflate(layoutResource, null); decor.addView(in, new ViewGroup.LayoutParams(MATCH_PARENT, MATCH_PARENT)); //4,这个contentParent由findViewById返回,实际上就是mDecorView一部分。 ViewGroup contentParent = (ViewGroup)findViewById(ID_ANDROID_CONTENT); ...... mDecor.finishChanging(); return contentParent; } 窗口布局文件解析
上面第二步提到根据上面设定的features值,决定加载何种窗口布局文件,我们找一个系统窗口布局文件分析一下:
路径在:.frameworks/base/core/res/layout/screen_title.xml
<!-- This is an optimized layout for a screen, with the minimum set of features enabled. --> <LinearLayout xmlns:android="http://schemas.android.com/apk/res/android" android:orientation="vertical" android:fitsSystemWindows="true"> <FrameLayout android:layout_width="match_parent" android:layout_height="?android:attr/windowTitleSize" style="?android:attr/windowTitleBackgroundStyle"> <TextView android:id="@android:id/title" style="?android:attr/windowTitleStyle" android:background="@null" android:fadingEdge="horizontal" android:gravity="center_vertical" android:layout_width="match_parent" android:layout_height="match_parent" /> </FrameLayout> <FrameLayout android:id="@android:id/content" android:layout_width="match_parent" android:layout_height="0dip" android:layout_weight="1" android:foregroundGravity="fill_horizontal|top" android:foreground="?android:attr/windowContentOverlay" /> </LinearLayout> 可以看到是一个简单的布局文件,一个LinearLayout下包含了两个子FrameLayout视图,第一个FrameLayout用来显示标题栏(TitleBar);第二个FrameLayout用来显示id为content视图。
穿越回顾一下view结构 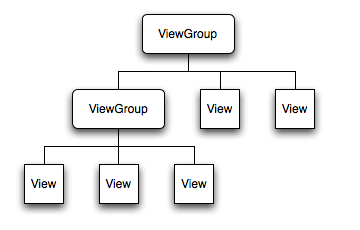
以上我们由setcontentView()引出了两个在view界举足轻重的大佬PhoneWindow和DecorView,它们之间的关系可以简单用下面的图来表示。 
总结
举个不太恰当的类比:如果说PhoneWindow是画,一种抽象概念的画,那DecorView会更具体一点,它可以是山水画。而MyView就是具体的唐伯虎手下的凤凰傲意图了。
这里说的View、DecorView等都是UI单元,这些UI单元工作都在onDraw函数中完成。如果把onDraw想象成画图过程,那我们需要知道画布是什么?查阅资料后,得出答案就是Surface,关于它的前世今生还需看一下源码ViewRoot.java。
public final class ViewRoot extends Handler implements ViewParent, View.AttachInfo.Callbacks { View mView; private final Surface mSurface = new Surface(); } 以上我们收集齐了PhoneWindow,DecorView,ViewRoot,Surface四颗神奇的龙珠,让我们一起把view召唤到手机屏幕上吧。
以上只是些开胃菜,需果腹,请看Android view 工作流程《下》。
- Android view 工作流程《上》
- Android view 工作流程《上》
- 戏说Android view 工作流程《上》
- 戏说Android view 工作流程《上》
- Android view 工作流程
- Android View 工作流程
- 戏说Android view 工作流程
- Android view 工作流程《下》
- Android--View的工作流程
- Android View的工作流程
- 戏说Android view 工作流程《下》
- 戏说Android view 工作流程《下》
- android知识回顾之view工作流程
- View工作流程
- View的工作流程
- View的工作流程
- View的工作流程
- View工作流程
- 《重构--改善既有代码的设计》总结三之重新组织函数
- java学习(properties)
- 10:变量作用域、指针
- Redis入门 Hello World
- 数据结构之查找总结
- Android view 工作流程《上》
- shuf处理文本
- 1121. Damn Single (25)-PAT甲级真题
- Stanford coreNLP源码学习(1)
- Ubuntu安装codeblocks
- 1123. Is It a Complete AVL Tree (30)-PAT甲级真题
- 二叉树的下一个结点
- 数据结构实验之排序六:希尔排序
- 异常:java.lang.IllegalArgumentException: node to traverse cannot be null!