Lesson 8: 渲染框架
来源:互联网 发布:修改手机型号软件大全 编辑:程序博客网 时间:2024/06/03 13:54
原文地址:
http://www.directxtutorial.com/Lesson.aspx?lessonid=11-4-3
什么是渲染目标视图?为什么要创建渲染目标视图?
首先从渲染目标说起。前面我们说了在显示前台缓冲区的时候,DirectX在后台渲染后台缓冲区,后台缓冲区就是渲染目标。而渲染目标视图就是在缓冲区的颜色贴图基础上来渲染的。(因为很多时候缓冲区的颜色贴图还没有完成,我们要在其基础上继续渲染)
设置渲染目标:
在Direct3D里渲染,必须要设置渲染的目标。
通常,这个目标指的是后台缓冲区。
我们一般这样完成设置:
ID3D11RenderTargetView *backbuffer; // global declaration// this function initializes and prepares Direct3D for usevoid InitD3D(HWND hWnd){ // Direct3D initialization // ... // get the address of the back buffer ID3D11Texture2D *pBackBuffer; swapchain->GetBuffer(0, __uuidof(ID3D11Texture2D), (LPVOID*)&pBackBuffer); // use the back buffer address to create the render target dev->CreateRenderTargetView(pBackBuffer, NULL, &backbuffer); pBackBuffer->Release(); // set the render target as the back buffer devcon->OMSetRenderTargets(1, &backbuffer, NULL);}ID3D11RenderTargetView *backbuffer;
这个变量是一个指向对象的指针,这个指针拥有所有关于缓冲目标的信息。这里我们打算对后台缓冲区进行渲染,所以取名为backbuffer。
ID3D11Texture2D *pBackBuffer;
在3D渲染中,纹理是图片的别名,ID3D11Texture2D是一个储存平面图像的接口对象。
2D纹理(texture)是一种数据元素矩阵。2D纹理的用途之一是存储2D图像数据,在纹理的每个元素中存储一个像素颜色。
swapchain->GetBuffer(0, __uuidof(ID3D11Texture2D), (LPVOID*)&pBackBuffer);
GetBuffer()用于从后备缓冲区获得2D贴图。
第一个参数,缓存索引,0给出第一个缓存,就是交换链此时的后备缓存)。
第二个参数,尝试操纵的接口类型,2D贴图类型就是ID3D11Texture2D,我们通过使用__uuidof()来获取它的特有ID。
第三个参数,保存获得的缓存(2D贴图)。
dev->CreateRenderTargetView(pBackBuffer, NULL, &backbuffer);
创建一个目标渲染视图。
第一个参数,是我们从后台缓冲区获得的2D视图贴图,我们在这个贴图的基础上继续渲染。
第二个参数,渲染目标的描述。设置为NULL将给我们物体表面的Mip映射等级设为0。
第三个参数,保存创建的渲染目标视图。
pBackBuffer->Release();
因为已经得到了COM对象的一个引用,我们必须调用COM中的Release函数来减少引用的数量。这样做会避免内存的泄露,因为我们不想应用程序退出后,系统仍然保留着这里内存,这将导致系统资源的浪费,而这种浪费是不科学的。
devcon->OMSetRenderTargets(1, &backbuffer, NULL);
最后,我们需要通过这个函数将渲染目标绑定到设备上。
第一个参数,要绑定的渲染目标视图总数量。
第二个参数,渲染目标视图数组或一个渲染目标视图的指针。我们只有一个渲染目标,所以传入的是该渲染目标的地址。
第三个参数,深度模板缓冲视图。设为NULL为不绑定。
什么是视口?有什么作用?
举个例子,在一些游戏中,如果玩家要在同机双人游戏,那么我们需要分屏来显示各自玩家的画面,这样每个分屏就是都是一个视口。而通常在单人或非多屏游戏中它就是整个的屏幕,这种情况下我们只需简单的设置视口的宽高为D3D交换链的宽高即可。
设置视口:
视口是一个将像素坐标系转换为正常坐标系的方式,它定义了我们渲染到屏幕上的面积。
下图说明了两者的关系: 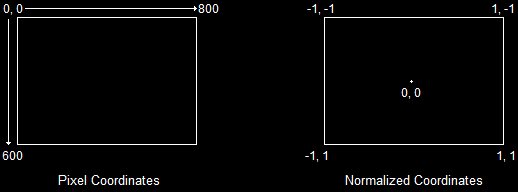
视口的设置代码如下:
// this function initializes and prepares Direct3D for usevoid InitD3D(HWND hWnd){ // Direct3D initialization // ... // Set the render target // ... // Set the viewport D3D11_VIEWPORT viewport; ZeroMemory(&viewport, sizeof(D3D11_VIEWPORT)); viewport.TopLeftX = 0; viewport.TopLeftY = 0; viewport.Width = 800; viewport.Height = 600; devcon->RSSetViewports(1, &viewport);}视口通过创建填充D3D11_VIEWPORT结构体来创建。
该结构体有宽度、高度、最小深度(近裁平面)、最大深度(远裁平面)、左上角坐标。
近裁剪平面将会消除需要渲染在它前面的对象,而远裁剪面用于消除任何在它之后的对象。这就创建了著名的视见体。视见体是3D图形学中的一个重要概念,这里深度被广泛使用。
RSSetViewports()用于将视口与设备环境绑定。
第一个参数是视口对象数量。
第二个参数是视口对象数组。
渲染框架:
接下来,我们用一个函数实现简单的渲染框架:
// this is the function used to render a single framevoid RenderFrame(void){ // clear the back buffer to a deep blue devcon->ClearRenderTargetView(backbuffer, D3DXCOLOR(0.0f, 0.2f, 0.4f, 1.0f)); // do 3D rendering on the back buffer here // switch the back buffer and the front buffer swapchain->Present(0, 0);}devcon->ClearRenderTargetView()
清除渲染目标视图的颜色缓存。
第一个参数,渲染目标的地址。
第二个参数,RBG颜色值。这种颜色可以是红色,绿色,蓝色,和透明色Alpha数组中任意指定的0.0到1.0之间的颜色。这里0.0表示强度为0,而1.0表示完全饱满的强度。
Present函数,实现交换链中的“交换”作用,将已经渲染好的缓存显示在屏幕上。
第一个参数,同步区间。如果同步区间是0表示立即绘制,1,2,3,4 表示在第n 个垂直消隐(vertical blanking)之后绘制。一个垂直消隐是当前帧最后一行更新完毕与下一帧第一行更新时的时间差。计算机显示器设备更新显示像素是垂直一行行的更新。
第二个参数,该函数的显示标识。如果是0则输出每个缓存,是 DXGI_PRESENT_TEST则用于测试目的不输出任何东西,或者DXGI_PRESENT_DO_NOT_SEQUENCE用于不按照利用垂直消隐同步顺序的输出(即乱序输出)。
记得清理:
正如其他COM接口对象一样,渲染目标同样需要释放内存并关闭其线程。
// this is the function that cleans up Direct3D and COMvoid CleanD3D(){ // close and release all existing COM objects swapchain->Release(); backbuffer->Release(); dev->Release(); devcon->Release();}我们必须养成最后清理COM接口的习惯,后面创建的接口越多,越容易忘记。
渲染框架的完整代码:
// include the basic windows header files and the Direct3D header files#include <windows.h>#include <windowsx.h>#include <d3d11.h>#include <d3dx11.h>#include <d3dx10.h>// include the Direct3D Library file#pragma comment (lib, "d3d11.lib")#pragma comment (lib, "d3dx11.lib")#pragma comment (lib, "d3dx10.lib")// global declarationsIDXGISwapChain *swapchain; // the pointer to the swap chain interfaceID3D11Device *dev; // the pointer to our Direct3D device interfaceID3D11DeviceContext *devcon; // the pointer to our Direct3D device contextID3D11RenderTargetView *backbuffer; // the pointer to our back buffer// function prototypesvoid InitD3D(HWND hWnd); // sets up and initializes Direct3Dvoid RenderFrame(void); // renders a single framevoid CleanD3D(void); // closes Direct3D and releases memory// the WindowProc function prototypeLRESULT CALLBACK WindowProc(HWND hWnd, UINT message, WPARAM wParam, LPARAM lParam);// the entry point for any Windows programint WINAPI WinMain(HINSTANCE hInstance, HINSTANCE hPrevInstance, LPSTR lpCmdLine, int nCmdShow){ HWND hWnd; WNDCLASSEX wc; ZeroMemory(&wc, sizeof(WNDCLASSEX)); wc.cbSize = sizeof(WNDCLASSEX); wc.style = CS_HREDRAW | CS_VREDRAW; wc.lpfnWndProc = WindowProc; wc.hInstance = hInstance; wc.hCursor = LoadCursor(NULL, IDC_ARROW); wc.hbrBackground = (HBRUSH)COLOR_WINDOW; wc.lpszClassName = L"WindowClass"; RegisterClassEx(&wc); RECT wr = {0, 0, 800, 600}; AdjustWindowRect(&wr, WS_OVERLAPPEDWINDOW, FALSE); hWnd = CreateWindowEx(NULL, L"WindowClass", L"Our First Direct3D Program", WS_OVERLAPPEDWINDOW, 300, 300, wr.right - wr.left, wr.bottom - wr.top, NULL, NULL, hInstance, NULL); ShowWindow(hWnd, nCmdShow); // set up and initialize Direct3D InitD3D(hWnd); // enter the main loop: MSG msg; while(TRUE) { if(PeekMessage(&msg, NULL, 0, 0, PM_REMOVE)) { TranslateMessage(&msg); DispatchMessage(&msg); if(msg.message == WM_QUIT) break; } RenderFrame(); } // clean up DirectX and COM CleanD3D(); return msg.wParam;}// this is the main message handler for the programLRESULT CALLBACK WindowProc(HWND hWnd, UINT message, WPARAM wParam, LPARAM lParam){ switch(message) { case WM_DESTROY: { PostQuitMessage(0); return 0; } break; } return DefWindowProc (hWnd, message, wParam, lParam);}// this function initializes and prepares Direct3D for usevoid InitD3D(HWND hWnd){ // create a struct to hold information about the swap chain DXGI_SWAP_CHAIN_DESC scd; // clear out the struct for use ZeroMemory(&scd, sizeof(DXGI_SWAP_CHAIN_DESC)); // fill the swap chain description struct scd.BufferCount = 1; // one back buffer scd.BufferDesc.Format = DXGI_FORMAT_R8G8B8A8_UNORM; // use 32-bit color scd.BufferUsage = DXGI_USAGE_RENDER_TARGET_OUTPUT; // how swap chain is to be used scd.OutputWindow = hWnd; // the window to be used scd.SampleDesc.Count = 1; // how many multisamples scd.SampleDesc.Quality = 0; // multisample quality level scd.Windowed = TRUE; // windowed/full-screen mode // create a device, device context and swap chain using the information in the scd struct D3D11CreateDeviceAndSwapChain(NULL, D3D_DRIVER_TYPE_HARDWARE, NULL, NULL, NULL, NULL, D3D11_SDK_VERSION, &scd, &swapchain, &dev, NULL, &devcon); // get the address of the back buffer ID3D11Texture2D *pBackBuffer; swapchain->GetBuffer(0, __uuidof(ID3D11Texture2D), (LPVOID*)&pBackBuffer); // use the back buffer address to create the render target dev->CreateRenderTargetView(pBackBuffer, NULL, &backbuffer); pBackBuffer->Release(); // set the render target as the back buffer devcon->OMSetRenderTargets(1, &backbuffer, NULL); // Set the viewport D3D11_VIEWPORT viewport; ZeroMemory(&viewport, sizeof(D3D11_VIEWPORT)); viewport.TopLeftX = 0; viewport.TopLeftY = 0; viewport.Width = 800; viewport.Height = 600; devcon->RSSetViewports(1, &viewport);}// this is the function used to render a single framevoid RenderFrame(void){ // clear the back buffer to a deep blue devcon->ClearRenderTargetView(backbuffer, D3DXCOLOR(0.0f, 0.2f, 0.4f, 1.0f)); // do 3D rendering on the back buffer here // switch the back buffer and the front buffer swapchain->Present(0, 0);}// this is the function that cleans up Direct3D and COMvoid CleanD3D(void){ // close and release all existing COM objects swapchain->Release(); backbuffer->Release(); dev->Release(); devcon->Release();}- Lesson 8: 渲染框架
- Lesson 8 几何渲染
- 【DirecX 教程】Lesson 8:渲染帧
- Lesson 8
- 学习Nehe Lesson 6 && Lesson 7 && Lesson 8
- yii框架页面渲染
- cocos2d-x渲染框架
- 渲染框架的使用
- 核心动画渲染框架
- yii框架页面渲染
- 最强表格渲染框架
- 新概念英语 lesson 8
- Lesson 8 Examination
- Nehe OpenGL lesson 8
- Lesson 8 Nehe
- CI框架初识-视图渲染
- Directx11渲染框架重构
- 圣思园---Java SE Lesson 8
- 判断一个单链表是否是回文链表
- mysql-5.7.17-winx64安装
- LevelStreaming - UE4中的关卡流
- test
- IKanalyzer、ansj_seg、jcseg三种中文分词器的实战较量
- Lesson 8: 渲染框架
- Android开发——DatePicker和TimePicker时间选择器
- 图片的下载和保存
- Android开发——AlertDialog自定义对话框
- Oracle的下载、安装和配置
- MFC点击按钮,弹出另一个对话框
- 简单的通讯录——第二版(动态版)
- Shell脚本调用java程序 Example
- Jenkins部署