【opencv 官方教程】翻译2 核心功能 上
来源:互联网 发布:变音软件ios 版本 编辑:程序博客网 时间:2024/05/29 15:40
LUT(I, lookUpTable, J);
The Core Functionality (core module)
Here you will learn the about the basic building blocks of the library. A must read and know for understanding how to manipulate the images on a pixel level.
官方教程第二部分 核心功能
1. Mat 基本图像容器
Mat - The Basic Image Container
Compatibility: > OpenCV 2.0
Author: Bernát Gábor
You will learn how to store images in the memory and how to print out their content to the console.
Mat
Opencv大约是诞生于2001年,那时候用c接口的数据接口IplImage来存储图像。这大概是你能看到的最早的具有教育意义的矩阵。随之而来的问题产生于c语言的表(应该是二位数组)。其中最大的麻烦就是要管理内存。这样需要开发者小心的分配和回收内存。对于小程序来说这样没什么问题,可随着代码的开发,你会消耗越来越多的精力去维护(内存管理)。
幸运的是,C++的出现和类的概念从某种程度上化解了自动分配和管理内存的问题,并且c++和c是没有兼容问题的(实际上,c++比c的类型管理要严格,所以用c++编译器编译c程序时需要大量的类型矫正)。而且,随后的OpenCV2.0提供了新的C++接口,让你完全不用操心内存管理的问题了。除了部分嵌入式设备仅支持c之外,这种方法(c++接口)已经基本满足各种需求了。
对于Mat你最需要知道的事是它自动完成了内存分配的问题,虽然你可以自行管理。而且在对象传递时,他们使用的内存也是重用的。
Mat含有两部分数据:矩阵头(包含大小、存储方式、矩阵地址等多个信息)、一个指向矩阵像素的指针(根据存储方式决定维度)。矩阵头部分的大小是固定的。矩阵大小因图片而异。
OpenCV是一个图像处理库,包含了大量的图像处理函数。为了解决一个特定问题,我们往往需要多次调用这些函数。所以,传递图像(作为参数)是一个很常用的功能。我们应该避免复制(大)图像产生的巨大计算量。
为了解决这个问题,OpenCV使用了引用计数系统。所以复制对象其实只是复制了一个矩阵头部分,并非开辟新空间去复制实际数据。
如下
Mat A, C; // creates just the header partsA = imread(argv[1], IMREAD_COLOR); // here we'll know the method used (allocate matrix)Mat B(A); // Use the copy constructorC = A; // Assignment operator代码仅使用了一段空间存储图像,而不是为三个对象各开辟一段空间。对图片的操作会对三个对象均产生影响。
甚至,你可以仅引用部分的实际数据。如
Mat D (A, Rect(10, 10, 100, 100) ); // using a rectangleMat E = A(Range::all(), Range(1,3)); // using row and column boundaries关于引用计数的其他部分本人就不详细介绍了,没有大的区别。
如果你想复制真正的数据,可以通过cv::Mat::clone() andcv::Mat::copyTo()
Mat F = A.clone();Mat G;A.copyTo(G);
Storing methods存储方式
这决定你如何存储像素。可以选择颜色空间和数据类型。颜色空间:色彩元素的表现组合方式。最简单的颜色空间就是灰度(gray scale),用一定范围的黑白来表示。
比较主流的方式是RGB,因为它就是人眼对于颜色的识别方法,包含红绿蓝三色。通常我们还附加上透明度来表示(alpha)。
其他主流表现方式:
There are, however, many other color systems each with their own advantages:
- RGB is the most common as our eyes use something similar, however keep in mind that OpenCV standard display system composes colors using the BGR color space (a switch of the red and blue channel).
- 这段话说BGR是opencv用的显示方式,与RGB比特点是对红蓝通道的选择。
- The HSV and HLS decompose colors into their hue, saturation and value/luminance components, which is a more natural way for us to describe colors. You might, for example, dismiss the last component, making your algorithm less sensible to the light conditions of the input image.
- 基于色调、饱和度、明度的颜色空间。
- YCrCb is used by the popular JPEG image format.
- 某种流行的jpeg图片格式
- CIE L*a*b* is a perceptually uniform color space, which comes handy if you need to measure thedistance of a given color to another color.
- 一种易于计算颜色差值的颜色空间
最小的数据类型是char,也就是8bits。往大了就不好说了。即使是用4字节(如RGB那样)来表示一个像素人们也没满足,所以随着像素空间的增大图片的占用空间也越来越大。
Creating a Mat object explicitly 显示创建Mat对象
闲话我也不多说了,上示例把:
cv::Mat::Mat Constructor 构造函数
Mat M(2,2, CV_8UC3, Scalar(0,0,255));cout << "M = " << endl << " " << M << endl << endl;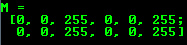
对于二维图像,参数前两个是行列数
- 第三个是存储方式
- 下面是关于格式的约定
- CV_[The number of bits per item][Signed or Unsigned][Type Prefix]C[The channel number]
For instance, CV_8UC3 means we use unsigned char types that are 8 bit long and each pixel has three of these to form the three channels. This are predefined for up to four channel numbers. Thecv::Scalar is four element short vector. Specify this and you can initialize all matrix points with a custom value. If you need more you can create the type with the upper macro, setting the channel number in parenthesis as you can see below.
- 关于第四个参数,也就是矩阵指针,略
cv::Mat::create function: 创建但不初始化。大小改变到不合适时重新分配空间。
M.create(4,4, CV_8UC(2));cout << "M = "<< endl << " " << M << endl << endl;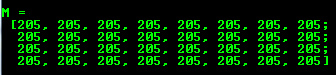
You cannot initialize the matrix values with this construction. It will only reallocate its matrix data memory if the new size will not fit into the old one.
MATLAB style initializer: cv::Mat::zeros , cv::Mat::ones , cv::Mat::eye . Specify size and data type to use: Matlab风格的初始化方式。(线性代数有关)
Mat E = Mat::eye(4, 4, CV_64F);cout << "E = " << endl << " " << E << endl << endl;Mat O = Mat::ones(2, 2, CV_32F);cout << "O = " << endl << " " << O << endl << endl;Mat Z = Mat::zeros(3,3, CV_8UC1);cout << "Z = " << endl << " " << Z << endl << endl;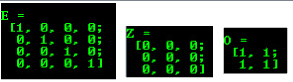
For small matrices you may use comma separated initializers:
Mat C = (Mat_<double>(3,3) << 0, -1, 0, -1, 5, -1, 0, -1, 0);cout << "C = " << endl << " " << C << endl << endl;
Create a new header for an existing Mat object and cv::Mat::clone or cv::Mat::copyTo it.
Mat RowClone = C.row(1).clone(); //注意这行,有点像matlab的思路,都是取出矩阵的部分进行操作cout << "RowClone = " << endl <<" " << RowClone << endl << endl;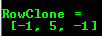
- 通过cv::randu() ,指定上下界随机生成
Mat R = Mat(3, 2, CV_8UC3); randu(R, Scalar::all(0), Scalar::all(255));
Output formatting 输出格式
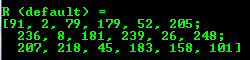
- cout << "R (default) = " << endl << R << endl << endl;
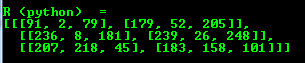
- Pythoncout << "R (python) = " << endl <<format(R, Formatter::FMT_PYTHON) << endl << endl;
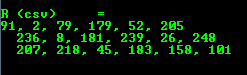
- Comma separated values (CSV)cout << "R (csv) = " << endl <<format(R, Formatter::FMT_CSV ) << endl << endl;
- Numpycout << "R (numpy) = " << endl <<format(R, Formatter::FMT_NUMPY ) << endl << endl;

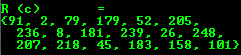
- Ccout << "R (c) = " << endl <<format(R, Formatter::FMT_C ) << endl << endl;
Output of other common items其他通用对象的输出
OpenCV offers support for output of other common OpenCV data structures too via the << operator:
- 2D PointPoint2f P(5, 1);cout << "Point (2D) = " << P << endl << endl;

- 3D PointPoint3f P3f(2, 6, 7);cout << "Point (3D) = " << P3f << endl << endl;

- std::vector via cv::Matvector<float> v;v.push_back( (float)CV_PI); v.push_back(2); v.push_back(3.01f);cout << "Vector of floats via Mat = " << Mat(v) << endl << endl;

- std::vector of pointsvector<Point2f> vPoints(20);for (size_t i = 0; i < vPoints.size(); ++i)vPoints[i] = Point2f((float)(i * 5), (float)(i % 7));cout << "A vector of 2D Points = " << vPoints << endl << endl;

2. 如何遍历、随机访问、用时测量
How to scan images, lookup tables and time measurement with OpenCV
Compatibility: > OpenCV 2.0
Author: Bernát Gábor
You'll find out how to scan images (go through each of the image pixels) with OpenCV. Bonus: time measurement with OpenCV.
最后给出了一个测量时间用的方法,做过单片机的也许有共鸣,能直接理解
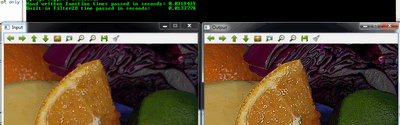
double t = (double)getTickCount();// do something ...t = ((double)getTickCount() - t)/getTickFrequency();cout << "Times passed in seconds: " << t << endl;
后面先介绍了一下图像存储方式,然后告诉你cv::Mat::isContinuous()可以提速,原因:
这个跟计算机组成有关,关于ip寄存器的。其中一个结论是下面的代码,前面比后面快:
for(i=0;i<5;++i){ for(j=0;j<1000;++j) ++m;}for(i=0;i<1000;++i){ for(j=0;j<5;++j) ++m;}基于这个道理,官方网站提出用这个函数可以把列矩阵转换为行矩阵处理,并称之为高效途径。 后面的内容均为对于不同查表算法的效率。查表,我估计是某种映射处理,比如调高亮度,把当前亮度输入,通过查表获取经过处理后的亮度。The efficient way
Mat& ScanImageAndReduceC(Mat& I, const uchar* const table){ // accept only char type matrices CV_Assert(I.depth() == CV_8U); int channels = I.channels(); int nRows = I.rows; int nCols = I.cols * channels; if (I.isContinuous()) { nCols *= nRows; nRows = 1; } int i,j; uchar* p; for( i = 0; i < nRows; ++i) { p = I.ptr<uchar>(i); for ( j = 0; j < nCols; ++j) { p[j] = table[p[j]]; } } return I;}oruchar* p = I.data;for( unsigned int i =0; i < ncol*nrows; ++i) *p++ = table[*p];
The iterator (safe) method
Mat& ScanImageAndReduceIterator(Mat& I, const uchar* const table){ // accept only char type matrices CV_Assert(I.depth() == CV_8U); const int channels = I.channels(); switch(channels) { case 1: { MatIterator_<uchar> it, end; for( it = I.begin<uchar>(), end = I.end<uchar>(); it != end; ++it) *it = table[*it]; break; } case 3: { MatIterator_<Vec3b> it, end; for( it = I.begin<Vec3b>(), end = I.end<Vec3b>(); it != end; ++it) { (*it)[0] = table[(*it)[0]]; (*it)[1] = table[(*it)[1]]; (*it)[2] = table[(*it)[2]]; } } } return I;}比较安全的一种方式On-the-fly address calculation with reference returning 随机寻址、返回引用
Mat& ScanImageAndReduceRandomAccess(Mat& I, const uchar* const table){ // accept only char type matrices CV_Assert(I.depth() == CV_8U); const int channels = I.channels(); switch(channels) { case 1: { for( int i = 0; i < I.rows; ++i) for( int j = 0; j < I.cols; ++j ) I.at<uchar>(i,j) = table[I.at<uchar>(i,j)]; break; } case 3: { Mat_<Vec3b> _I = I; for( int i = 0; i < I.rows; ++i) for( int j = 0; j < I.cols; ++j ) { _I(i,j)[0] = table[_I(i,j)[0]]; _I(i,j)[1] = table[_I(i,j)[1]]; _I(i,j)[2] = table[_I(i,j)[2]]; } I = _I; break; } } return I;}The Core Function
一种额外方式Mat lookUpTable(1, 256, CV_8U); uchar* p = lookUpTable.ptr(); for( int i = 0; i < 256; ++i) p[i] = table[i]; LUT(I, lookUpTable, J);
性能对比
Method
3. 掩码操作
Mask operations on matrices
Languages: C++, Java, Python
Compatibility: > OpenCV 2.0
Author: Bernát Gábor
You'll find out how to scan images with neighbor access and use thecv::filter2D function to apply kernel filters on images.
比如
Let us consider the issue of an image contrast enhancement method. Basically we want to apply for every pixel of the image the following formula:
掩码处理函数:
void Sharpen(const Mat& myImage,Mat& Result){ CV_Assert(myImage.depth() == CV_8U); // accept only uchar images const int nChannels = myImage.channels(); Result.create(myImage.size(),myImage.type()); for(int j = 1 ; j < myImage.rows-1; ++j) { const uchar* previous = myImage.ptr<uchar>(j - 1); const uchar* current = myImage.ptr<uchar>(j ); const uchar* next = myImage.ptr<uchar>(j + 1); uchar* output = Result.ptr<uchar>(j); for(int i= nChannels;i < nChannels*(myImage.cols-1); ++i) { *output++ = saturate_cast<uchar>(5*current[i] -current[i-nChannels] - current[i+nChannels] - previous[i] - next[i]); } } Result.row(0).setTo(Scalar(0)); Result.row(Result.rows-1).setTo(Scalar(0)); Result.col(0).setTo(Scalar(0)); Result.col(Result.cols-1).setTo(Scalar(0));}使用效果:Mat kernel = (Mat_<char>(3,3) << 0, -1, 0, -1, 5, -1, 0, -1, 0); filter2D( src, dst1, src.depth(), kernel );
- 【opencv 官方教程】翻译2 核心功能 上
- 【opencv 官方教程】翻译2 核心功能 中 图像操作 线性变换 亮度调整 简单绘图
- 【opencv 官方教程】翻译2 核心功能 下 傅里叶分离变换 XML格式IO
- 【opencv 官方教程】翻译3 图像处理 上
- 【opencv 官方教程】翻译4 highgui module
- 【opencv 官方教程】翻译5 视频输入输出
- 【opencv 官方教程】翻译7 机器学习
- 【opencv 官方教程】翻译9 GPU加速
- MasonryGitHub上的官方使用教程翻译
- 【opencv 官方教程】翻译3 图像处理 下
- 【opencv 官方教程】翻译8 进阶图像操作--HDR
- jdbc基础2--翻译sun官方教程
- 2D Toolkit官方教程翻译
- [翻译]angularjs 2.0官方新手入门教程(2)
- 2D Toolkit官方教程翻译
- Openbravo官方教程: 翻译Openbravo
- solr官方指南翻译 教程
- caffe2官方教程翻译整理
- opencv学习笔记(七)从电脑摄像头读入数据
- Retry重试机制
- c# datagridview 使用大全
- 互联网支付-退款中多证书情况下串证书Id
- leetcode--Binary Tree Paths
- 【opencv 官方教程】翻译2 核心功能 上
- 把数组排成最小的数
- OJ 1999: C语言实验——时间间隔
- Android碎裂的粒子效果
- 【协议】IIC总线协议介绍
- 功能性转场动画效果设计
- 线段树学习笔记(单点更新+区间查询最大值+lazy标记+pushdown操作+区间更新+求区间和)
- pip安装scrapy报错 ReadTimeoutError: HTTPSConnectionPool(host='pypi.python.org, port=443) Read time out
- 拆机记录01——游戏手柄