Spring ApplicationListener获取WEB路径或WEB-INF路径的方法
来源:互联网 发布:麻烦鬼动作数据 编辑:程序博客网 时间:2024/05/16 10:55
要在Spring ApplicationListener获取WEB路径或WEB-INF路径,首先通过
ContextRefreshedEvent获取Application上下文,然后将其强制转换为WebApplicationContext,这个WebApplicationcontext相当强大,可以获取Servlet上下文,Servlet上下文获得后就可以获取真实路径了。实现方式:
在ApplicationListener的onApplicationEvent()方法中加入下列代码:
ApplicationContext applicationContext = event.getApplicationContext(); WebApplicationContext webApplicationContext = (WebApplicationContext)applicationContext; ServletContext servletContext = webApplicationContext.getServletContext(); String path0 = servletContext.getRealPath("/");获取到的路径为当前WEB项目的运行环境路径,要想获得WEB-INF的路径,只需要在上述获得到的路径中加上“/WEB-INF/”即可。在eclipse中获取到的WEB路径形如:
d:\workspace\your-project\.metadata\.plugins\org.eclipse.wst.server.core\tmp1\wtpwebapps\your-project\WEB-INF
完整的代码如下:
MyApplicationListener.java
//需要注解,并扫描,在程序启动的时候就自动加载@Componentpublic class MyApplicationListener implements ApplicationListener<ContextRefreshedEvent> { @Override public void onApplicationEvent(ContextRefreshedEvent event) { ApplicationContext applicationContext = event.getApplicationContext(); WebApplicationContext webApplicationContext = (WebApplicationContext)applicationContext; ServletContext servletContext = webApplicationContext.getServletContext(); String path0 = servletContext.getRealPath("/"); System.out.println("path0:" + path0); }}该类可以用符号注解声明为组件,自动执行,不需要在web.xml中另行配置,利于移植,比较省事。参考(感谢这位兄弟的贡献):
【spring】ApplicationListener传递参数到页面(解决静态+动态资源路径+静态文件的缓存控制)
一.相对路径还是绝对路径的问题
前端页面加载资源或者请求的时候到底是使用相对路径还是绝对路径,想必大家都很清楚,用的是当然是相对路径,因为这样增加了项目的灵活性,不需要经常的改动。那既然是相对路径就需要在页面中小心使用了,一旦使用错误,讨厌的404就会来了,相当讨人厌。
二.相对路径的获取
相对路径的获取办法也有好多种
1. 一种是在jsp页面利用<%%>来拼凑路径,然后配置base路径,代码如下

<% String path = request.getContextPath(); String basePath = request.getScheme()+"://"+request.getServeName()+":"+request.getServePort()+"/"+path+"/";%><head><base href="<%basePath%>"></head>
2.这里为大家介绍另一种办法就是通过spring的Applicationlistener接口来传递相对路径的参数,可以直接在页面中使用,同时可以通过此方法来解决静态文件更新后的缓存问题。框架【spring+springmvc】
步骤:
①.引入spring及其他的相关jar包,此处省略
②.配置相关配置文件
spring的配置文件ApplicationContext.xml
<beans xmlns:xsi="http://www.w3.org/2001/XMLSchema-instance" xmlns="http://www.springframework.org/schema/beans" xmlns:context="http://www.springframework.org/schema/context" xmlns:p="http://www.springframework.org/schema/p" xmlns:util="http://www.springframework.org/schema/util" xmlns:aop="http://www.springframework.org/schema/aop" xmlns:task="http://www.springframework.org/schema/task" xsi:schemaLocation="http://www.springframework.org/schema/beans http://www.springframework.org/schema/beans/spring-beans.xsd http://www.springframework.org/schema/context http://www.springframework.org/schema/context/spring-context.xsd http://www.springframework.org/schema/util http://www.springframework.org/schema/util/spring-util-4.1.xsd http://www.springframework.org/schema/aop http://www.springframework.org/schema/aop/spring-aop-4.1.xsd http://www.springframework.org/schema/task http://www.springframework.org/schema/task/spring-task-4.1.xsd"> <context:component-scan base-package="com.raipeng.work.spring.model"/> <context:component-scan base-package="com.raipeng.work.spring.listener"/> <!--加载自定义的配置文件--> <context:property-placeholder location="classpath:config.properties"/></beans>
config.properties
git.version =1.0.0
web.xml
<!DOCTYPE web-app PUBLIC "-//Sun Microsystems, Inc.//DTD Web Application 2.3//EN" "http://java.sun.com/dtd/web-app_2_3.dtd" ><web-app> <display-name>Archetype Created Web Application</display-name> <context-param> <param-name>contextConfigLocation</param-name> <param-value>classpath:applicationContext.xml</param-value> </context-param> <servlet> <servlet-name>test</servlet-name> <servlet-class>org.springframework.web.servlet.DispatcherServlet</servlet-class> <init-param> <param-name>contextConfigLocation</param-name> <param-value>classpath:test-servlet.xml</param-value> </init-param> </servlet> <servlet-mapping> <servlet-name>test</servlet-name> <url-pattern>/</url-pattern> </servlet-mapping> <listener> <listener-class>org.springframework.web.context.ContextLoaderListener</listener-class> </listener></web-app>
test.servlet.xml (spring mvc 配置文件)
<?xml version="1.0" encoding="UTF-8"?><beans xmlns="http://www.springframework.org/schema/beans" xmlns:xsi="http://www.w3.org/2001/XMLSchema-instance" xmlns:context="http://www.springframework.org/schema/context" xmlns:p="http://www.springframework.org/schema/p" xmlns:util="http://www.springframework.org/schema/util" xmlns:mvc="http://www.springframework.org/schema/mvc" xsi:schemaLocation="http://www.springframework.org/schema/beans http://www.springframework.org/schema/beans/spring-beans-4.1.xsd http://www.springframework.org/schema/context http://www.springframework.org/schema/context/spring-context-4.1.xsd http://www.springframework.org/schema/util http://www.springframework.org/schema/util/spring-util-4.1.xsd http://www.springframework.org/schema/mvc http://www.springframework.org/schema/mvc/spring-mvc-4.1.xsd"> <context:component-scan base-package="com.xxx.work.spring.controller"/> <mvc:default-servlet-handler/> <mvc:annotation-driven/> <!--视图解析配置--> <bean class="org.springframework.web.servlet.view.InternalResourceViewResolver"> <property name="prefix" value="/WEB-INF/jsp"></property> <property name="suffix" value=".jsp"></property> </bean></beans>
webConfig.java
package com.xxx.work.spring.model;import org.springframework.beans.factory.annotation.Value;import org.springframework.stereotype.Component;/** * Created by 111 on 2015/11/24. *///需要加入注解并扫描该文件,用于后期的自动注入@Componentpublic class WebConfig { private String resource;//静态资源文件 private String context;//WEB应用上下文 private String revision;//CSS、js版本号,防止缓存的问题 public String getResource() { return resource; } public void setResource(String resource) { this.resource = resource; } public String getContext() { return context; } public void setContext(String context) { this.context = context; } public String getRevision() { return revision; } //加载配置文件中的值 @Value("${git.version}") public void setRevision(String revision) { this.revision = revision; }}
WebApplicationContextListener.java
package com.xxx.work.spring.listener;import com.raipeng.work.spring.model.WebConfig;import org.apache.logging.log4j.LogManager;import org.apache.logging.log4j.Logger;import org.springframework.context.ApplicationContext;import org.springframework.context.ApplicationListener;import org.springframework.context.event.ContextRefreshedEvent;import org.springframework.stereotype.Component;import org.springframework.web.context.WebApplicationContext;import javax.annotation.Resource;import javax.servlet.ServletContext;/** * Created by 111 on 2015/11/24. *///需要注解,并扫描,在程序启动的时候就自动加载@Componentpublic class WebApplicationListener implements ApplicationListener<ContextRefreshedEvent> { private Logger logger = LogManager.getLogger(WebApplicationListener.class); private WebConfig webConfig; //资源注入,也可以直接在变量上用autowired @Resource public void setWebConfig(WebConfig webConfig) { this.webConfig = webConfig; } //覆盖ApplicationListener的方法,重写自己的业务逻辑 @Override public void onApplicationEvent(ContextRefreshedEvent event) { ApplicationContext applicationContext = event.getApplicationContext(); WebApplicationContext webApplicationContext = (WebApplicationContext)applicationContext; ServletContext servletContext = webApplicationContext.getServletContext(); webConfig.setContext(servletContext.getContextPath()); webConfig.setResource(webConfig.getContext()+"/public"); servletContext.setAttribute("context",webConfig.getContext()); servletContext.setAttribute("resource",webConfig.getResource()); servletContext.setAttribute("revision",webConfig.getRevision()); logger.debug("context:{},resource:{},revision:{}",webConfig.getContext(),webConfig.getResource(),webConfig.getRevision()); }}
index.jsp
<%-- Created by IntelliJ IDEA. User: 111 Date: 2015/11/24 Time: 15:51 To change this template use File | Settings | File Templates.--%><!--jsp有的版本默认el表达式关闭,如果遇到el表达式没解析,可以试试加上这个--><%@ page isELIgnored="false"%><%@ page contentType="text/html;charset=UTF-8" language="java" %><html><head> <link rel="stylesheet" href="${resource}/css/index.css?revision=${revision}"> <title></title></head><body><img src="${resource}/image/image.png"/><a href="${context}/test/home">点击</a></body></html>
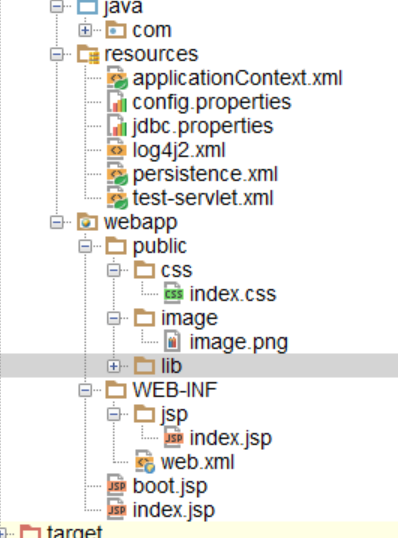
目录结构
 忽略boot.jsp
浏览器中的效果:

三.原理解析(暂略)
这里从spring的流程进行分析,
首先启动Tomcat服务器
——>根据web.xml中配置的contextLoaderListener初始化容器(ContextLoadListener.java 实现了ServletContextListener)
@Overridepublic void contextInitialized(ServletContextEvent event) { initWebApplicationContext(event.getServletContext());}
——>实际上是在父类ContextLoader中初始化,在ContextLoader中为容器例示一个根webApplicationContext(Instantiate the root WebApplicationContextfor this loader),方法为
if (this.context == null) { this.context = createWebApplicationContext(servletContext);}
接着如果有父上下文加载父上下文(这里parentContext为空)
四.js页面的相对路径解决(使用tiles布局,定义在general.jsp的公共页面):
<script type="text/javascript" src="${resource}/lib/amd/require.js" data-main="${resource}/lib/amd/config.js?revision=${revision}" data-app="${resource}/js/general.js,<tiles:insertAttribute name="app" ignore="true"/>" data-context="${context}" data-revision="${revision}" data-resource="${resource}" defer async="true"></script>在config.js(amd的配置文件)中
(function () { var scripts = document.getElementsByTagName('script'); for (var i = 0; i < scripts.length; i++) { if (scripts[i].getAttribute('data-main')) { var context = scripts[i].getAttribute('data-context'); var revision = scripts[i].getAttribute('data-revision'); var resource = scripts[i].getAttribute('data-resource'); var config = { context: context, revision: revision, resource: resource }; window.config = config; break; } }})(window);
调用时使用:url:config.context 静态页面:config.resource+"/lib"+..
- Spring ApplicationListener获取WEB路径或WEB-INF路径的方法
- 不同web服务器获取WEB-INF目录路径
- WEB-INF有关的目录路径总结
- Web项目获取路径的方法
- 在 Java servlet外部 获取WEB-INF 路径
- ibatis+spring WEB-INF\SqlMapConfig.xml (系统找不到指定的路径。)
- PHP路径指定web路径的方法
- 在 action 的 java 里面获得应用 WEB-INF 下面的文件的路径方法
- maven项目更改部署路径WEB-INF后mian方法报错找不到或无法加载主类
- WEB-INF 有关的目录路径问题总结
- WEB-INF 有关的目录路径问题总结
- WEB-INF 有关的目录路径问题总结
- WEB-INF 有关的目录路径问题总结
- WEB-INF 有关的目录路径问题总结
- web-inf文件夹下的外联css样式路径问题
- WEB-INF 有关的目录路径问题总结
- WEB-INF 有关的目录路径问题总结
- WEB-INF下jsp文件的路径问题
- Trafodion 性能优化之加载数据
- 标记汇总
- datatable 异步加载
- 使用nginx与nginx-rtmp-module搭建流媒体服务器
- Android 异步消息处理机制 让你深入理解 Looper、Handler、Message三者关系
- Spring ApplicationListener获取WEB路径或WEB-INF路径的方法
- 简单搭建ntp服务器
- 第二行代码读书笔记--git的使用(一)
- 空闲时间学一个Linux命令(12)—— more 命令
- 使用Spring Boot开发Web项目
- rake db:reset
- 最好用的抽奖软件
- javaWeb web.xml 中load-on-startup的含义
- Android Fragment 的使用,一些你不可不知的注意事项