C语言的图形界面?——简单外挂程序
来源:互联网 发布:艺术网站源码 编辑:程序博客网 时间:2024/05/17 03:42
简单接触c语言图形界面后就想把之前的控制台外挂小程序变成图形界面,仅供娱乐,目前只完成了两个版本即年度版和中文版的阳光和金币修改,其他修改可自行搜索偏移地址,这里奉上一篇个人认为比较详细的ce寻找基址的攻略和植物大战僵尸的全地址,大神勿喷~~
1.我爱秘籍植物大战僵尸全地址
2.ce寻找游戏基址 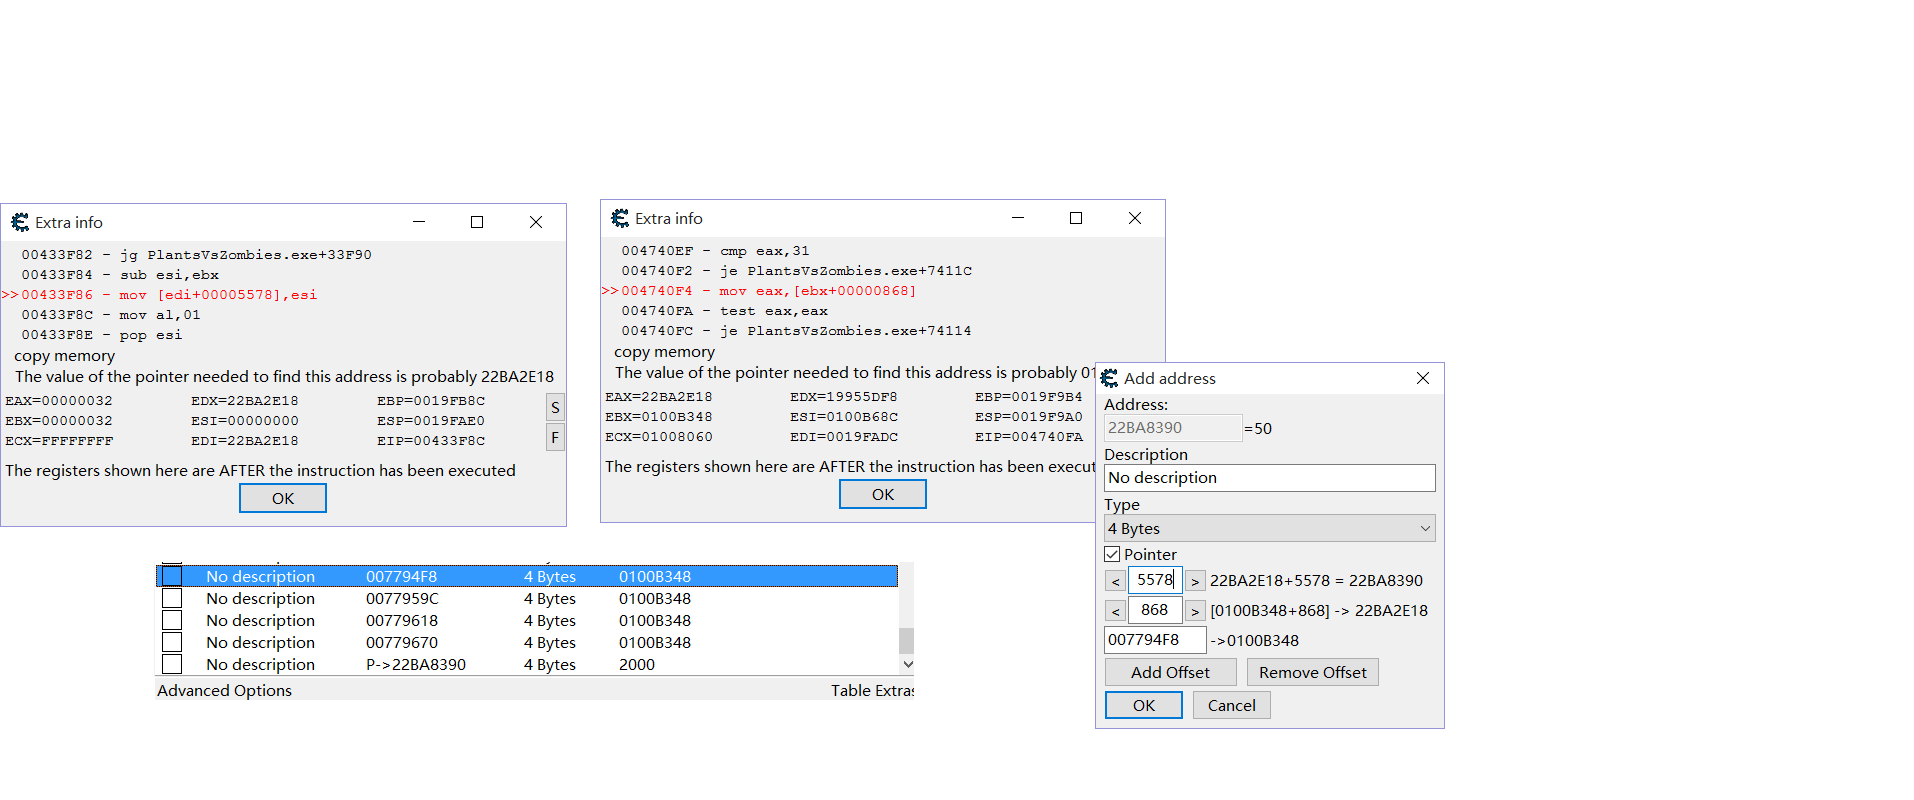
先简要说明下环境:
/********
编译环境:VS2015
<最近一次修改:2017.1.12 16:17 修改者:路过的小白成长ing 修改内容:①金币基址的寻找 ②内存的修改 ③图形界面的完善 ④增加一个版本的修改>
<遗留问题:①音乐播放问题 ②输入框返回需要点击多次的问题>
********/
第一步也是最重要的一步就是头文件以及一些所需函数的声明和变量的定义
include “stdafx.h”
include “stdlib.h”
include “graphics.h” //easyx图形库头文件
include “conio.h”
include “stdio.h”
include “windows.h”
include
pragma comment (lib,”winmm.lib”)
//WIN32的媒体播放接口
pragma warning( disable : 4996)
//关闭vs2015生命安全周期检查,可以在新建程序的时候关闭,我忘记了⊙﹏⊙b汗~~
//函数声明
void show(); //功能选择界面
void welcome(); //欢迎界面
void initFont(); //字体初始化
void Mshit(); //获取鼠标动作
void Opfun(); //进行功能选择
int FindGame(); //寻找游戏窗口
int xSun(int beat, HANDLE hGame); //修改阳光
int xMon(int beat, HANDLE hGame); //修改金币
int xPlantAmout(int beat, HANDLE hGame); //修改植物槽数
int ChangeInto(LPCVOID pBase, int p1, int p2, HANDLE hGame);//修改内存
void close(); //三秒后关闭程序
//定义所需的变量
MOUSEMSG msg = { 0 };
IMAGE backImg;
wchar_t str[10];
int temp = 0; //定义用于选择不同功能
int sum = 0; //定义用于存储value
int beat = 0; //定义用于判断版本
LPVOID buf = (LPVOID)∑
DWORD byread;
LPCVOID pBase; //定义LPCVOID类型存放基址,版本不同都不相同
int p1; //偏移1
int p2; //偏移2
接下来就是创建欢迎界面,选择自己喜欢的图片和背景音乐
void welcom()
{
/*播放音乐名为”where.mp3”的音乐,这里和后面出现的L是因为当前使用的字符集是UNICODE的字符集,小伙伴们可以进入属性把它换成多字节字符集就不用加L了,如果有小伙伴音乐放不出的可以试着用:PlaySound(TEXT(“where.wav”), NULL, SND_FILENAME | SND_ASYNC | SND_LOOP);
后面两个参数是异步播放和循环播放,如果是SND_SYNC那就是同步播放,就不能同时进行下一步了~~~播放wav类型的音乐文件,格式转换的软件有很多*/
mciSendString(L”open where.mp3 alias bgm”, 0, 0, 0);
mciSendString(L”play bgm repeat”, 0, 0, 0);
//初始化图形界面
initgraph(640, 480);
//加载并显示文件名为”植物大战僵尸.jpg”的图片
loadimage(&backImg, L”植物大战僵尸.jpg”, 640, 480, false);
putimage(0, 0, &backImg);
//初始化显示的文字,为了方便我们新建一个函数initFont()
initFont();
}
void initFont()
{
//设置输出字体
settextcolor(RGB(0, 0, 3));
settextstyle(50, 0, L”微软雅黑”);
setbkmode(TRANSPARENT);
//输出文字
outtextxy(240, 20, L”Begin!”);
outtextxy(240, 400, L”Over!”);
}
完成后编译运行的效果图即封面那张图
接下来就是获取鼠标信息决定是否进行下一步了
void Mshit()
{
msg = GetMouseMsg(); //获取鼠标信息
if (msg.x >= 240 && msg.x <= 400 && msg.y >= 20 && msg.y <= 70){ settextcolor(RED); outtextxy(240, 20, L"Begin!");}else if (msg.x >= 240 && msg.x <= 400 && msg.y >= 400 && msg.y <= 450){ settextcolor(RED); outtextxy(240, 400, L"Over!");}else initFont(); //以上为文字效果设置:当鼠标移入时变换字体颜色if (msg.mkLButton) //判断鼠标是否按下并执行相应的功能{ if (msg.x >= 240 && msg.x <= 400 && msg.y >= 400 && msg.y <= 450) { close(); //点击over则关闭程序 } if (msg.x >= 240 && msg.x <= 400 && msg.y >= 20 && msg.y <= 70) { show(); //点击begin则进入功能选择界面 }} }
//这里注意该函数需要死循环,知道用户选择为止
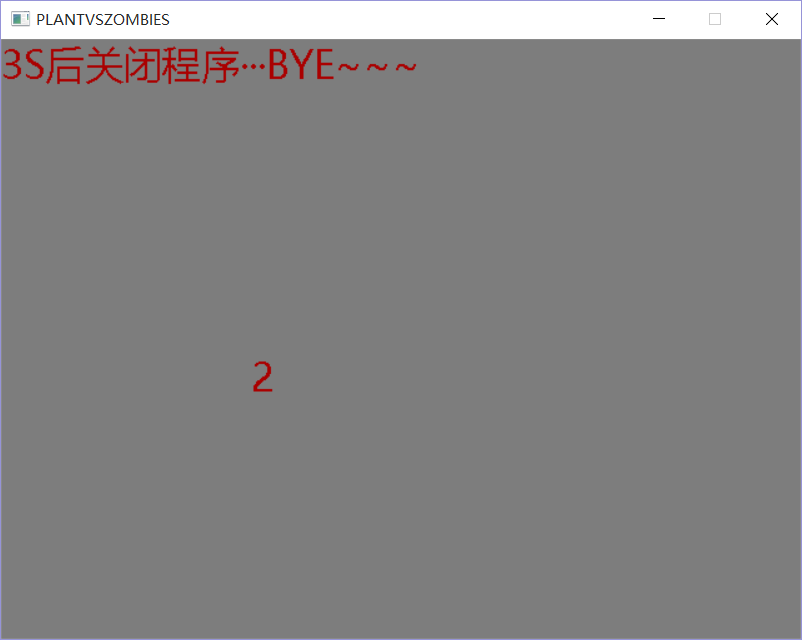
一步一步来,现在就是完成close()和show()函数的编写了
void close()
{
int c = 3;
char ch = ‘3’;
while (c)
{
cleardevice(); outtextxy(0, 0, L"3S后关闭程序···BYE~~~"); outtextxy(200, 250, ch); Sleep(1000); cleardevice(); c--; ch--;}closegraph();}
void Opfun()
{
while (1) //根据鼠标按下的位置执行相应的功能
{
msg = GetMouseMsg();
if (msg.x >= 200 && msg.x <= 400 && msg.y >= 130 && msg.y <= 170)
{
settextcolor(RED);
outtextxy(200, 130, L”1.修改阳光”);
}
else if (msg.x >= 200 && msg.x <= 400 && msg.y >= 190 && msg.y <= 230)
{
settextcolor(BLUE);
outtextxy(200, 190, L”2.修改金币”);
}
else if (msg.x >= 200 && msg.x <= 400 && msg.y >= 250 && msg.y <= 290)
{
settextcolor(YELLOW);
outtextxy(200, 250, L”3.修改植物槽数”);
}
else if (msg.x >= 200 && msg.x <= 400 && msg.y >= 310 && msg.y <= 350)
{
settextcolor(BLACK);
outtextxy(200, 310, L”4.退出程序”);
}
else show();
if (msg.mkLButton) { if (msg.x >= 200 && msg.x <= 400 && msg.y >= 130 && msg.y <= 170) { temp = 1; FindGame(); } else if (msg.x >= 200 && msg.x <= 400 && msg.y >= 190 && msg.y <= 230) { temp = 2; FindGame(); } else if (msg.x >= 200 && msg.x <= 400 && msg.y >= 250 && msg.y <= 290) { temp = 3; FindGame(); } else if (msg.x >= 200 && msg.x <= 400 && msg.y >= 310 && msg.y <= 350) { outtextxy(200, 230, L"3秒后关闭程序···"); close(); } }} }
···
Okay~~基本的界面就完成了,接下来就进入重点,也就是实现外挂功能了~~
//第一步先不急,先检查下游戏运行没有,运行了就看下版本是不是符合要求
int FindGame()
{
cleardevice();//先清屏~~~
//检查游戏版本和游戏是否运行
HWND hwnd = ::FindWindow(NULL, L”Plants vs. Zombies 1.2.0.1073 RELEASE”); //这里是检查游戏窗口名,看符不符合要求,符合要求获得窗口句柄
pBase = (LPCVOID)7836920; //这个版本我找到的基址(已换十进制)
beat = 1; //我设该版本设为1
if (hwnd == NULL)
{
hwnd = ::FindWindow(NULL, L”植物大战僵尸中文版”);
pBase = (LPCVOID)6987456; //这是这个版本的基址(十进制)
beat = 2; //该版本设为2
}
if (hwnd == NULL)
{
int c = 3;
char ch = ‘3’;
while (c)
{
outtextxy(0, 0, L”未发现正在运行的游戏,请检查版本或运行游戏···”);
Sleep(1000);
close();
}
cleardevice();
return 0; //未发现游戏,返回主菜单
}
//发现游戏运行检查是否寻找到的窗口是否正确
RECT p;
::GetWindowRect(hwnd, &p); //获取窗口坐标
settextstyle(20, 0, L”华文行楷”);
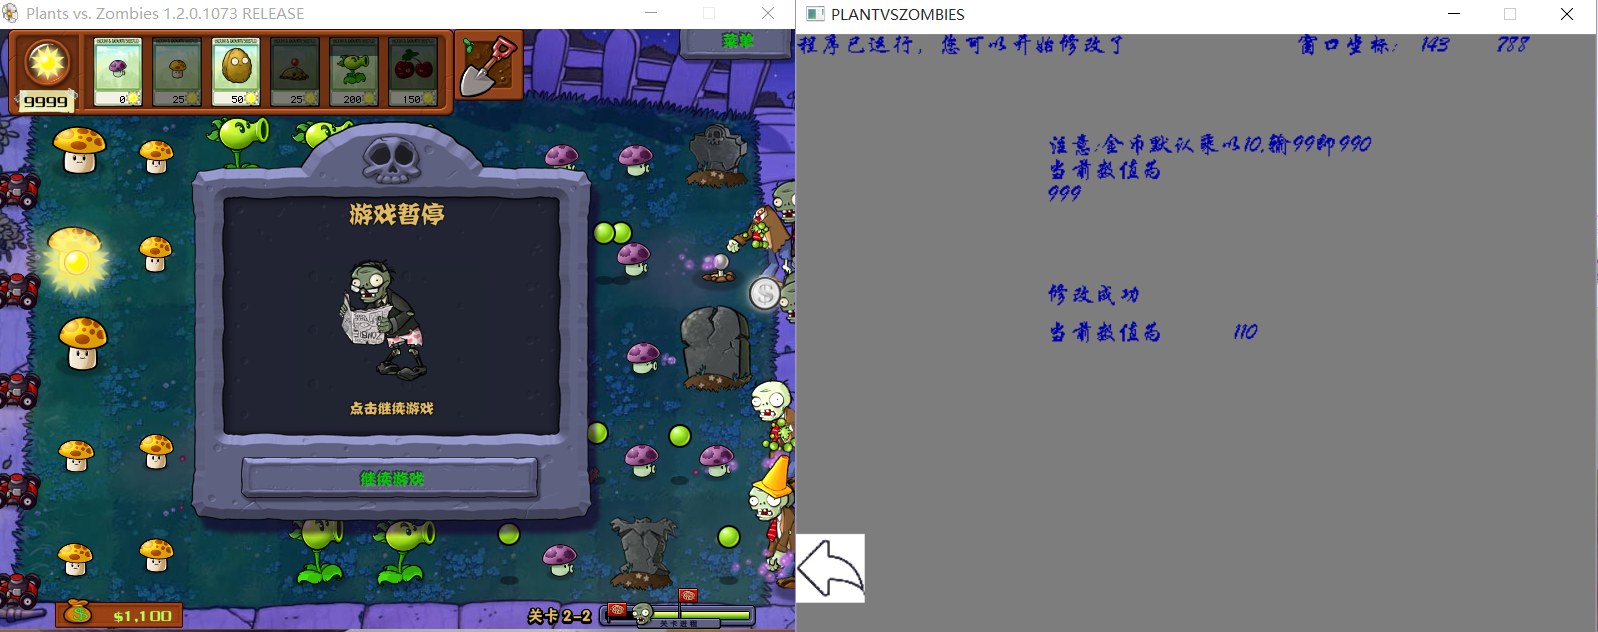
outtextxy(0, 0, L”程序已运行,您可以开始修改了”);
outtextxy(400, 0, L”窗口坐标:”);
_itow(p.left, str, 10); //将整数转换为字符串
outtextxy(500, 0, str);
_itow(p.right, str, 10); //同上
outtextxy(560, 0, str);
//输出窗口坐标验证一下
DWORD Id;::GetWindowThreadProcessId(hwnd, &Id); //获取线程、进程id
HANDLE hGame;
hGame = ::OpenProcess(PROCESS_ALL_ACCESS, false, Id); //获取进程句柄
switch (temp)
{
case 1: xSun(beat, hGame); break;
case 2: xMon(beat, hGame); break;
case 3: xPlantAmout(beat, hGame); break;
default : return 0; break;
}
}
万事俱备只欠东方了,已经找到游戏窗口和进程句柄了,就是根据选择修改相应的功能了
//如果是修改阳光就将偏移改成相应的值
int xSun(int beat, HANDLE hGame)
{
if (beat == 1)
{
p1 = 2152;
p2 = 21880;
}
else if (beat = 2)
{
p1 = 1896;
p2 = 21856;
}
else return 0;
ChangeInto(pBase, p1, p2, hGame);
}
//金币神马的同理
int xMon(int beat, HANDLE hGame)
{
if (beat == 1)
{
p1 = 2384; //16进制为950
p2 = 80; //16进制为50
}
else if (beat = 2)
{
p1 = 80;
p2 = 2384;
}
else return 0;
ChangeInto(pBase, p1, p2, hGame);
}
int xPlantAmout(int beat, HANDLE hGame)
{
if (beat == 1)
{
::ReadProcessMemory(hGame, pBase, buf, 4, &byread);
pBase = (LPVOID)(sum + (int)pBase);
p1 = 348;
p2 = 36;
}
else if (beat = 2)
{
outtextxy(0, 0, L”我是版本2”);
}
else return 0;
ChangeInto(pBase, p1, p2, hGame);
}
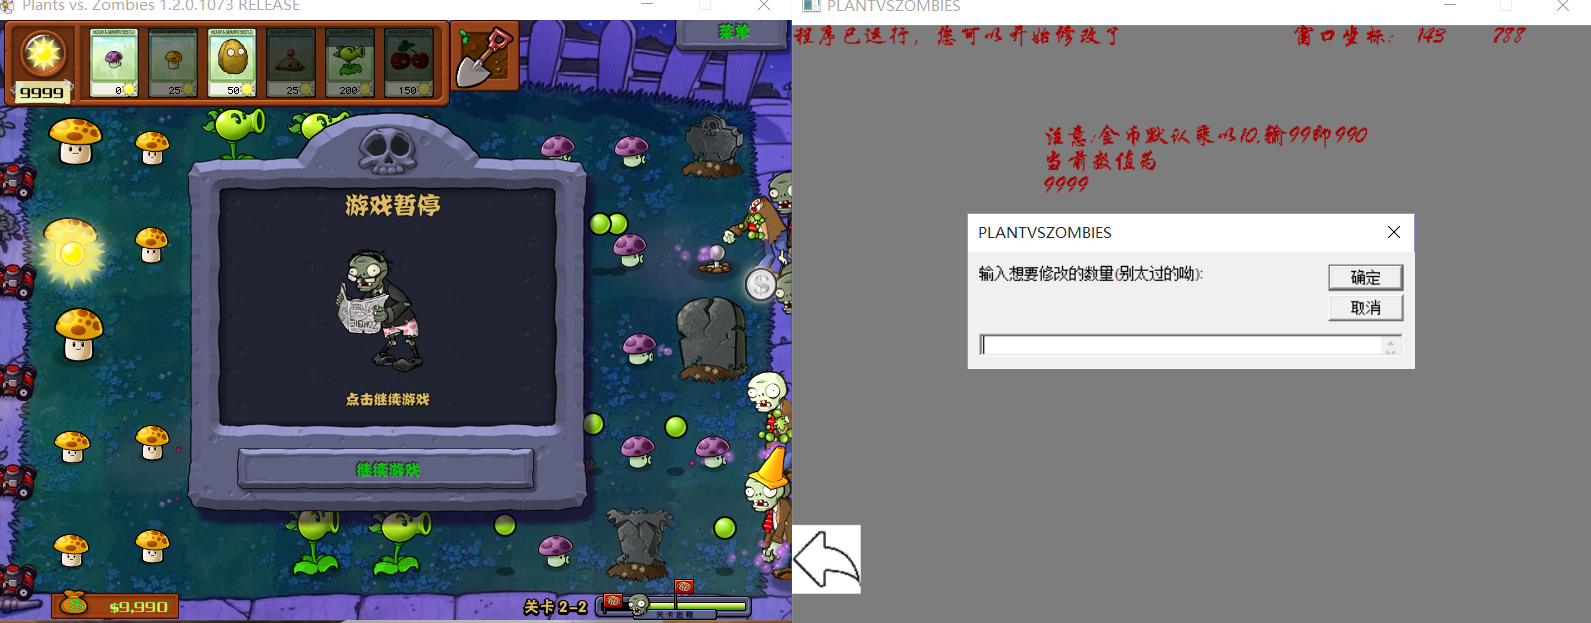
正式修改就显得很容易了
//传入偏移地址的值和游戏句柄
int ChangeInto(LPCVOID pBase, int p1, int p2, HANDLE hGame)
{
//这里弄了个返回图标,设置点击既可以返回,可忽略
IMAGE bp;
loadimage(&bp, L”返回1.jpg”, 55, 55, false);
putimage(0, 400, &bp);
//正式修改
::ReadProcessMemory(hGame, pBase, buf, 4, &byread);
pBase = (LPVOID)(sum + p1);
::ReadProcessMemory(hGame, pBase, buf, 4, &byread);
pBase = (LPVOID)(sum + p2);
::ReadProcessMemory(hGame, pBase, buf, 4, &byread);
_itow(sum, str, 10);
outtextxy(200, 100, L”当前数值为”);
outtextxy(200, 120, str);
if (temp = 2) outtextxy(200, 80, L”注意:金币默认乘以10,输99即990”);
int wsun, ret;
LPVOID wbuf = (LPVOID)&wsun;
int i = 1;
char str2[10];
do
{
i = 1;
if (InputBox(str, 10, L”输入想要修改的数量(别太过的呦):”, 0, 0, 0, 20, false) == ‘\0’)
{
return 0;
}
else
{
WideCharToMultiByte(0, 0, str, 4, str2, 4, 0, 0); //宽窄字节的转换,原因和使用L一样
for (ret = 0; ret < 4; ret++)
{
if (str2[ret] <= ‘9’&& str2[ret] >= ‘0’ || str2[ret] == ‘\0’) continue;
else
{
outtextxy(200, 220, L”输入有误,重新输入”);
i = 0;
cleardevice();
}
}
wsun = atoi((const char*)str2); ret = ::WriteProcessMemory(hGame, (LPVOID)pBase, wbuf, 4, &byread); if (ret == 0) { outtextxy(200, 200, L"修改失败···"); } else { outtextxy(200, 200, L"修改成功"); outtextxy(200, 230, L"当前数值为"); outtextxy(350, 230, str); } while (i == 1) { msg = GetMouseMsg(); if (msg.x >= 0 && msg.x <= 100 && msg.y >= 400 && msg.y <= 500) { loadimage(&bp, L"返回2.jpg", 55, 55, false); putimage(0, 400, &bp); if (msg.mkLButton) { cleardevice(); return 0; } } else { loadimage(&bp, L"D:\\works files/C_File/PLANTVSZOMBIES/images/返回1.jpg", 55, 55, false); putimage(0, 400, &bp); } }}} while (i == 0); //可以对输入进行检查
}
总结起来呢修改的思路就是
①获得窗口位置 ②获得进程id进而获得进程句柄 ③根据基质和偏移获得阳光地址 ④修改
OKAY~~~到此就全部结束了,需要扩展功能的小伙伴请自行设置O(∩_∩)O~~~~
效果图: 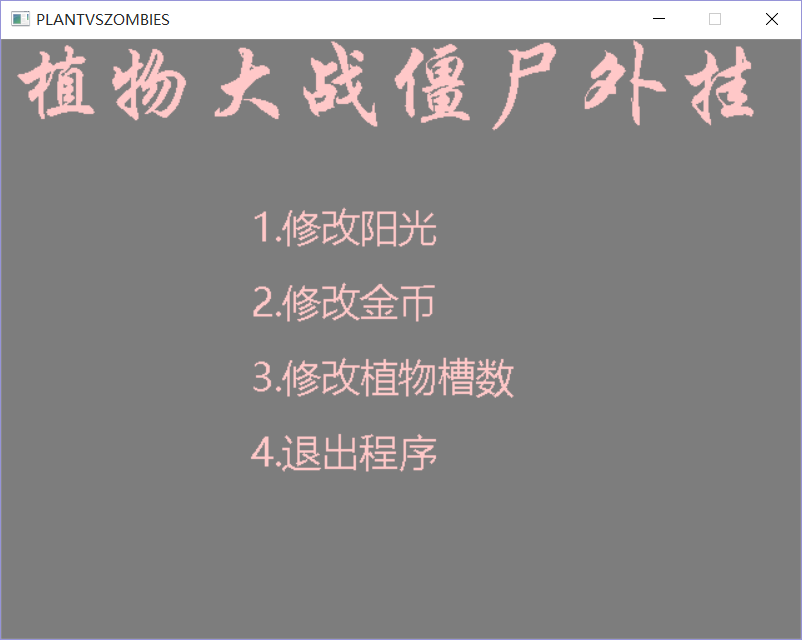
简单的一个图形界面的应用,给自己立个flag,继续学习~~~~
作者: 路过的小白成长ing
链接:http://www.imooc.com/article/15882
来源:慕课网
- C语言的图形界面?——简单外挂程序
- C语言外挂小程序
- 简单的 windows外挂程序
- MFC入门——简单的Windows图形界面小程序
- C语言栈--Hanoi实例(具有图形界面的程序)
- 简单的C语言程序——整数排列
- 简单的C语言程序
- 简单的c语言程序
- Object_c基础——oc程序与C语言程序开发过程的异同简单认识
- 一个简单的matlab图形界面程序GUI
- C语言简单程序
- C语言简单程序
- c语言简单程序
- C语言写的简单病毒程序
- 一个简单的C语言程序
- 简单的C语言实现程序
- 一个简单的C语言小程序
- 简单C语言程序的执行过程
- 预处理
- 理解测量
- Abstract methods do not specify a body
- 协同过滤算法
- MSP430定时器的使用
- C语言的图形界面?——简单外挂程序
- caffe的python接口学习(13):调试
- 从尾到头打印链表
- jQuery的ajax方法
- lightoj 1009 - Back to Underworld(二分图染色)
- bin文件转化成hex文件的实现
- Spring中java.lang.NoClassDefFoundError: org/springframework/core/MethodIntrospector
- 统计单词(分割字符串,字符串函数的应用)
- Linux服务器部署Java Web项目笔记