mysql安装方法
来源:互联网 发布:mc96f6432编程手册 编辑:程序博客网 时间:2024/05/23 11:21
MySQL是一个关系型数据库管理系统,由瑞典MySQL AB 公司开发,目前属于 Oracle 旗下公司。MySQL 最流行的关系型数据库管理系统,在 WEB 应用方面MySQL是最好的 RDBMS (Relational Database Management System,关系数据库管理系统) 应用软件之一。
一、Window版本
1、下载
1 MySQL Community Server 5.7.162 3 http://dev.mysql.com/downloads/mysql/
2、解压
如果想要让MySQL安装在指定目录,那么就将解压后的文件夹移动到指定目录,如:C:\mysql-5.7.16-winx64
3、初始化
MySQL解压后的 bin 目录下有一大堆的可执行文件,执行如下命令初始化数据:
1 cd c:\mysql-5.7.16-winx64\bin2 3 mysqld --initialize-insecure
4、启动MySQL服务
执行命令从而启动MySQL服务
1 # 进入可执行文件目录2 cd c:\mysql-5.7.16-winx64\bin3 4 # 启动MySQL服务5 mysqld
5、启动MySQL客户端并连接MySQL服务
由于初始化时使用的【mysqld --initialize-insecure】命令,其默认未给root账户设置密码
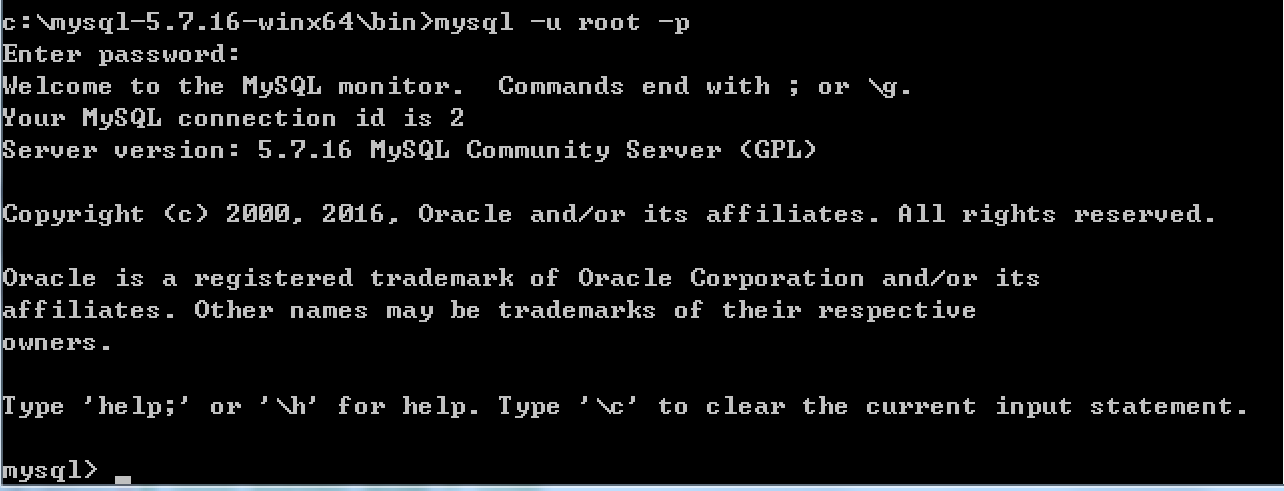
1 # 进入可执行文件目录2 cd c:\mysql-5.7.16-winx64\bin3 4 # 连接MySQL服务器5 mysql -u root -p6 7 # 提示请输入密码,直接回车
输入回车,见下图表示安装成功:
到此为止,MySQL服务端已经安装成功并且客户端已经可以连接上,以后再操作MySQL时,只需要重复上述4、5步骤即可。但是,在4、5步骤中重复的进入可执行文件目录比较繁琐,如想日后操作简便,可以做如下操作。
a. 添加环境变量
将MySQL可执行文件添加到环境变量中,从而执行执行命令即可
【右键计算机】--》【属性】--》【高级系统设置】--》【高级】--》【环境变量】--》【在第二个内容框中找到 变量名为Path 的一行,双击】 --> 【将MySQL的bin目录路径追加到变值值中,用 ; 分割】 如:C:\Program Files (x86)\Parallels\Parallels Tools\Applications;%SystemRoot%\system32;%SystemRoot%;%SystemRoot%\System32\Wbem;%SYSTEMROOT%\System32\WindowsPowerShell\v1.0\;C:\Python27;C:\Python35;C:\mysql-5.7.16-winx64\bin如此一来,以后再启动服务并连接时,仅需:
1 # 启动MySQL服务,在终端输入2 mysqld3 4 # 连接MySQL服务,在终端输入:5 mysql -u root -p
b. 将MySQL服务制作成windows服务
上一步解决了一些问题,但不够彻底,因为在执行【mysqd】启动MySQL服务器时,当前终端会被hang住,那么做一下设置即可解决此问题:
1 # 制作MySQL的Windows服务,在终端执行此命令:2 "c:\mysql-5.7.16-winx64\bin\mysqld" --install3 4 # 移除MySQL的Windows服务,在终端执行此命令:5 "c:\mysql-5.7.16-winx64\bin\mysqld" --remove
注册成服务之后,以后再启动和关闭MySQL服务时,仅需执行如下命令:
1 # 启动MySQL服务2 net start mysql3 4 # 关闭MySQL服务5 net stop mysql
二、Linux版本
1、采用二进制包安装mysql
二进制软件包名称
mysql-5.5.49-linux2.6-x8.6_64.tar.gz
添加用户和组
groupadd mysqluseradd -s /sbin/nologin -g mysql -M mysqltail -1 /etc/passwdid mysql
开始安装MySQL


1 [root@template ]# mkdir -p /home/oldboy/tools 2 [root@template ]# cd /home/oldboy/tools 3 [root@template tools]# wget http://dev.mysql.com/get/Downloads/MySQL-5.5/mysql-5.5.49-linux2.6-x86_64.tar.gz 4 [root@template tools]# tar xf mysql-5.5.49-linux2.6-x86_64.tar.gz 5 [root@template tools]# mkdir -p /application/ 6 [root@template tools]# mv mysql-5.5.49-linux2.6-x86_64 /application/mysql-5.5.49 7 [root@template tools]# ln -s /application/mysql-5.5.49/ /application/mysql 8 [root@template tools]# ls -l /application/mysql 9 lrwxrwxrwx 1 root root 26 10月 27 10:28 /application/mysql -> /application/mysql-5.5.49/10 11 [root@template tools]# cd /application/mysql/12 [root@template mysql]# ls -l support-files/*.cnf13 -rw-r--r-- 1 7161 wheel 4691 3月 1 2016 support-files/my-huge.cnf14 -rw-r--r-- 1 7161 wheel 19759 3月 1 2016 support-files/my-innodb-heavy-4G.cnf15 -rw-r--r-- 1 7161 wheel 4665 3月 1 2016 support-files/my-large.cnf16 -rw-r--r-- 1 7161 wheel 4676 3月 1 2016 support-files/my-medium.cnf17 -rw-r--r-- 1 7161 wheel 2840 3月 1 2016 support-files/my-small.cnf18 19 #复制my.cnf 配置文件20 [root@template mysql]# /bin/cp support-files/my-small.cnf /etc/my.cnf21 [root@template mysql]# mkdir -p /application/mysql/data22 [root@template mysql]# chown -R mysql.mysql /application/mysql/
初始化数据库
1 [root@template mysql]# /application/mysql/scripts/mysql_install_db --basedir=/application/mysql --datadir=/application/mysql/data --user=mysql 2 Installing MySQL system tables... 3 161027 10:30:22 [Note] /application/mysql/bin/mysqld (mysqld 5.5.49) starting as process 1958 ... 4 OK 5 Filling help tables... 6 161027 10:30:23 [Note] /application/mysql/bin/mysqld (mysqld 5.5.49) starting as process 1965 ... 7 OK 8 9 To start mysqld at boot time you have to copy10 support-files/mysql.server to the right place for your system11 12 PLEASE REMEMBER TO SET A PASSWORD FOR THE MySQL root USER !13 To do so, start the server, then issue the following commands:14 15 /application/mysql/bin/mysqladmin -u root password 'new-password'16 /application/mysql/bin/mysqladmin -u root -h template.com password 'new-password'17 18 Alternatively you can run:19 /application/mysql/bin/mysql_secure_installation20 21 which will also give you the option of removing the test22 databases and anonymous user created by default. This is23 strongly recommended for production servers.24 25 See the manual for more instructions.26 27 You can start the MySQL daemon with:28 cd /application/mysql ; /application/mysql/bin/mysqld_safe &29 30 You can test the MySQL daemon with mysql-test-run.pl31 cd /application/mysql/mysql-test ; perl mysql-test-run.pl32 33 Please report any problems at http://bugs.mysql.com/
添加数据库文件
1 [root@template mysql]# cp support-files/mysql.server /etc/init.d/mysqld2 [root@template mysql]# chmod +x /etc/init.d/mysqld3 [root@template mysql]# ll /etc/init.d/mysqld 4 -rwxr-xr-x 1 root root 10880 Oct 27 10:31 /etc/init.d/mysqld
二进制默认路径为/usr/local/mysql 启动脚本里面的路径要更改
1 [root@template mysql]# sed -i 's#/usr/local/mysql#/application/mysql#g' /application/mysql/bin/mysqld_safe /etc/init.d/mysqld
启动mysql数据库
1 [root@template mysql]# /etc/init.d/mysqld start2 Starting MySQL.. SUCCESS!
检查mysql数据库是否启动
1 [root@template mysql]# netstat -lntup|grep mysql2 tcp 0 0 0.0.0.0:3306 0.0.0.0:* LISTEN 2224/mysqld
设置mysql 开机自启动
1 [root@template mysql]# chkconfig --add mysqld2 [root@template mysql]# chkconfig mysqld on3 [root@template mysql]# chkconfig --list mysqld4 mysqld 0:off 1:off 2:on 3:on 4:on 5:on 6:off
配置开机自启动
1 echo "#mysql start by huzhihua at 2016-10-27" >>/etc/rc.local 2 echo "/etc/init.d/mysqld start" >>/etc/rc.local 3 4 [root@template mysql]# tail -2 /etc/rc.local 5 #mysql start by huzhihua at 2016-10-276 /etc/init.d/mysqld start
配置mysql命令的全局使用路径
1 [root@template mysql]# echo 'export PATH=/application/mysql/bin:$PATH' >>/etc/profile2 [root@template mysql]# tail -1 /etc/profile3 export PATH=/application/mysql/bin:$PATH4 [root@template mysql]# source /etc/profile5 [root@template mysql]# echo $PATH6 /application/mysql/bin:/usr/local/sbin:/usr/local/bin:/sbin:/bin:/usr/sbin:/usr/bin:/root/bin
登录mysql
别外三种登录方法:
1 mysql -uroot -p, 2 mysql -uroot 3 mysql -uroot -p 'oldboy123' 4 5 [root@template mysql]# mysql 6 Welcome to the MySQL monitor. Commands end with ; or \g. 7 Your MySQL connection id is 1 8 Server version: 5.5.49 MySQL Community Server (GPL) 9 10 Copyright (c) 2000, 2016, Oracle and/or its affiliates. All rights reserved.11 12 Oracle is a registered trademark of Oracle Corporation and/or its13 affiliates. Other names may be trademarks of their respective14 owners.15 16 Type 'help;' or '\h' for help. Type '\c' to clear the current input statement.17 18 mysql> exit #退出
2、采用yum的方式安装mysql
安装:
yum install mysql-server 服务端启动
mysql.server start
- MySql安装方法
- mysql configure 安装方法
- apt 安装mysql 方法
- 绿色版Mysql安装方法
- ubuntu安装mysql方法
- MySQL 绿色版安装方法
- Mac MySQL 安装方法
- mysql安装方法
- MySQL安装方法
- mysql安装方法
- mysql安装方法
- mysql安装方法
- MySql绿色安装方法
- 多种方法安装mysql
- Linux Mysql 安装方法
- mysql 安装方法
- 安装mysql方法
- mysql安装方法一
- 【Leetcode】219. Contains Duplicate II
- ContentProvider
- m•AAA+n•ABC+DD
- BZOJ 1008 越狱 【数论】
- firewalld禁止被PING(丢弃ICMP包)
- mysql安装方法
- 只是展示一下
- 【C++】指针(3):指针&数组
- 进程间通信--无名管道(pipe)
- 解决drupal下使用composer时报错:Failed to decode response: zlib_decode(): data error
- DTW动态规划调整
- 稳定排序
- windows下安装配置octave(仅供记录)
- 自己不优秀,认识谁都没用