The Color Changer

来源:互联网 发布:广东碣石翻新衣服淘宝 编辑:程序博客网 时间:2024/04/30 19:09

Introduction

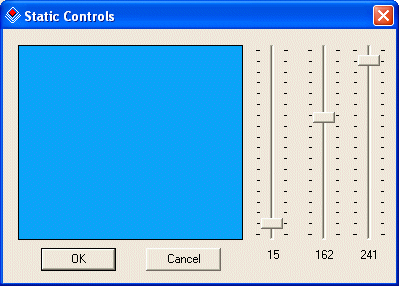
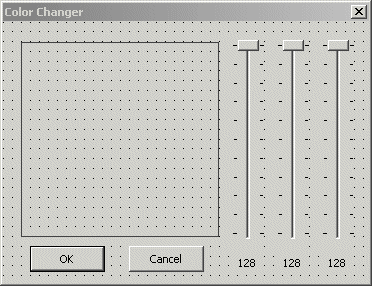
In this exercise, we will use track bars to change the color of a static control.

Prerequisites:

There are various types of objects you can use to preview a color. The static control is convenient because it provides a ready made rectangle although you still have to configure it because it is not natively equip to handle the change of colors. To do this, you can consider it simply as a platform with a client area. When painting this control, you mostly use the properties of the CWnd class. For this reason, you could as well use a list box, a tree view, or a list view, etc.

To allow the user to set the variances of a color, you can use sliders, scroll bars, or spin buttons, etc. In this exercise, we will use the sliders simply because we decide to use them. They don't necessarily provide more or less functionality than scroll bars or spin buttons.

Giving live and necessary feedback to the user is one of the greatest assets of a friendly application. On this application, we will use static text controls to show the red, green, and blue values of a color.

Creating the Application

The simplest static control is considered a label. It consists of a simple object that displays text. The user cannot directly change this text unless you programmatically allow it. This form of the static control is the simplest control you can use in an MFC application.

To add a simple label to a dialog box, you can click the Static Text button on the Controls toolbar and click on the dialog box. The only thing you need to do is to change the Caption property on the Properties window.

If you cannot add a label to the dialog box when designing it, you can programmatically create one. This is done using the CStatic class and calling the Create() method.

By default, you cannot change the properties of a static control unless you state this explicitly. This can be done in various ways. For example you can declare a CString variable, set its value using the Format method, then call the SetDlgItemText() function and change the text of the static control using its identifier.


<SCRIPT type=text/javascript><!--google_ad_client = "pub-3968514660870014";google_ad_width = 120;google_ad_height = 600;google_ad_format = "120x600_as";google_ad_channel ="";google_color_border = "336699";google_color_bg = "FFFFFF";google_color_link = "0000FF";google_color_url = "008000";google_color_text = "000000";//--></SCRIPT><SCRIPT src="http://pagead2.googlesyndication.com/pagead/show_ads.js" type=text/javascript></SCRIPT><IFRAME name=google_ads_frame marginWidth=0 marginHeight=0 src="http://pagead2.googlesyndication.com/pagead/ads?client=ca-pub-3968514660870014&amp;dt=1108977853703&amp;lmt=1107439346&amp;format=120x600_as&amp;output=html&amp;url=http%3A%2F%2Fwww.functionx.com%2Fvisualc%2Fapplications%2Fcolorchanger.htm&amp;color_bg=FFFFFF&amp;color_text=000000&amp;color_link=0000FF&amp;color_url=008000&amp;color_border=336699&amp;ref=http%3A%2F%2Fwww.google.com%2Fsearch%3Fhl%3Dzh-CN%26q%3Dsetticfreq%26lr%3D&amp;u_h=600&amp;u_w=800&amp;u_ah=570&amp;u_aw=800&amp;u_cd=32&amp;u_tz=480&amp;u_java=true" frameBorder=0 width=120 scrolling=no height=600 allowTransparency><img height="1" width="1" border="0" src="http://pagead2.googlesyndication.com/pagead/imp.gif?client=ca-pub-3968514660870014&dt=1108977853703&lmt=1107439346&format=120x600_as&output=html&url=http%3A%2F%2Fwww.functionx.com%2Fvisualc%2Fapplications%2Fcolorchanger.htm&color_bg=FFFFFF&color_text=000000&color_link=0000FF&color_url=008000&color_border=336699&ref=http%3A%2F%2Fwww.google.com%2Fsearch%3Fhl%3Dzh-CN%26q%3Dsetticfreq%26lr%3D&u_h=600&u_w=800&u_ah=570&u_aw=800&u_cd=32&u_tz=480&u_java=true&event=noiframe" /></IFRAME>


Practical Learning: Starting the Exercise

  1. Start Microsoft Visual C++
  2. Create a new project named ColorChanger1
  3. Create the project as a Dialog Based and set the Dialog Title as Color Changer
  4. Design the dialog box as follows:
     
    ControlIDCaptionAdditional Properties
    Picture ControlIDC_PREVIEWAREA   
    Slider ControlIDC_RED_TRACK Auto Ticks: True
    Orientation: Vertical
    Tick Marks: True
    Slider ControlIDC_GREEN_TRACK Auto Ticks: True
    Orientation: Vertical
    Tick Marks: True
    Slider ControlIDC_BLUE_TRACK Auto Ticks: True
    Orientation: Vertical
    Tick Marks: True
    Static TextIDC_RED_VALUE128Align Text: Center
    Static TextIDC_GREEN_VALUE128Align Text: Center
    Static TextIDC_BLUE_VALUE128Align Text: Center
  5. Using either the ClassWizard or the Add Member Variable Wizard, add the following member variables to the controls (the Static Text controls are created/declared as CString variables):
     
    IdentifierValue VariableControl Variable
    IDC_PREVIEWAREA m_PreviewArea
    IDC_RED_TRACK m_RedTrack
    IDC_GREEN_TRACK m_GreenTrack
    IDC_BLUE_TRACK m_BlueTrack
    IDC_RED_VALUEm_RedValue 
    IDC_GREEN_VALUEm_GreenValue 
    IDC_BLUE_VALUEm_BlueValue 
  6. In the header file of the dialog, declare a private COLORREF variable as follows:
     
    private:COLORREF brColor;};
  7. Initialize the colors and variable in the OnInitDialog() event of the dialog box as follows:
     
    BOOL CColorChanger1Dlg::OnInitDialog(){CDialog::OnInitDialog();// Set the icon for this dialog.  The framework does this automatically//  when the application's main window is not a dialogSetIcon(m_hIcon, TRUE);// Set big iconSetIcon(m_hIcon, FALSE);// Set small icon// TODO: Add extra initialization herem_RedTrack.SetRange(0, 255);m_RedTrack.SetTicFreq(15);m_RedTrack.SetPos(128);m_GreenTrack.SetRange(0, 255);m_GreenTrack.SetTicFreq(15);m_GreenTrack.SetPos(128);m_BlueTrack.SetRange(0, 255);m_BlueTrack.SetTicFreq(15);m_BlueTrack.SetPos(128);brColor = RGB(128, 128, 128);SetTimer(0x124, 20, NULL);return TRUE;  // return TRUE  unless you set the focus to a control}
  8. When the user changes the value of one of the sliders, we will retrieve its value, combine it with the values of the other two sliders, create a color from these values and apply it to the picture control. To implement this, initiate the OnTimer() event of the dialog and implement it as follows:
     
    void CColorChanger1Dlg::OnTimer(UINT nIDEvent){// TODO: Add your message handler code here and/or call defaultCClientDC dc(this);    // This is the rectangle that includes the big Static rectangleCRect Recto;// Store the dimensions of the Static control in the Recto objectm_PreviewArea.GetWindowRect(&Recto);ScreenToClient(&Recto);// Create a brush that will be used to paint the StaticCBrush BrushColor(brColor);// Select the brushCBrush *pBrush = dc.SelectObject(&BrushColor);// Draw the background of the Static objectdc.Rectangle(&Recto);// Give the brush back to the device contextdc.SelectObject(pBrush);CDialog::OnTimer(nIDEvent);}
  9. Initiate the WM_VSCROLL message for the dialog and implement its OnVScroll() event as follows:
     
    void CColorChanger1Dlg::OnVScroll(UINT nSBCode, UINT nPos, CScrollBar* pScrollBar){// TODO: Add your message handler code here and/or call defaultUpdateData();// The actual value is the position of the slider CSliderCtrl::GetPos()// We subtract it from 255 because of the orientation of the slider// and the navigation of the thumb boxint nRed   = 255 - m_RedTrack.GetPos();int nGreen = 255 - m_GreenTrack.GetPos();int nBlue  = 255 - m_BlueTrack.GetPos();CString PosRed, PosGreen, PosBlue;m_RedValue.Format("%d", nRed);m_GreenValue.Format("%d", nGreen);m_BlueValue.Format("%d", nBlue);CRect Recto;brColor = RGB(nRed, nGreen, nBlue);m_PreviewArea.GetWindowRect(&Recto);ScreenToClient(&Recto);UpdateData(FALSE);CDialog::OnVScroll(nSBCode, nPos, pScrollBar);}
  10. Test the application
  11. After using it, close it and return to your programming environment.
原创粉丝点击