学习ASP.NET MVC(十)——排序
来源:互联网 发布:饲料配方软件 编辑:程序博客网 时间:2024/06/05 09:38
1 按照价格对书籍进行排序
下面我们通过一个简单的例子学习如何对书籍信息按照价格进行排序。
首先,我们在Controllers\BookController.cs文件中的SearchIndex方法添加一个switch语句段,实现按照价格对书籍信息进行排序的功能。代码如下列粗体显示:
public ActionResult SearchIndex(string Category, string searchString, string sortBy) {//类型选项 var cateLst = new List<string>(); var cateQry = from d in db.Books orderby d.Category select d.Category; cateLst.AddRange(cateQry.Distinct()); ViewBag.category = new SelectList(cateLst); var books = from m in db.Books select m; if (!String.IsNullOrEmpty(searchString)) { books = books.Where(s => s.Name.Contains(searchString)); } //排序实现代码 switch (sortBy) { case "price_lowest": books = books.OrderBy(p => p.Price); break; case "price_highest": books = books.OrderByDescending(p => p.Price); break; default: break; } if (string.IsNullOrEmpty(Category)) return View(books); else { return View(books.Where(x => x.Category == Category)); } }上面这段代码分别使用Entity Framework的OrderBy和OrderByDescending方法,按照价格对书籍信息进行升序或降序排序。
前端界面代码
@model IEnumerable<MvcApplication1.Models.Book>@{ ViewBag.Title = "书籍查询";}<h2>书籍查询</h2> @using (Html.BeginForm("SearchIndex","book",FormMethod.Get)){ <p>书籍种类: @Html.DropDownList("category", "All") 书籍名称: @Html.TextBox("SearchString") <input type="submit" value="查询" /> </p> }<table> <tr> <th> @Html.DisplayNameFor(model => model.Category) </th> <th> @Html.DisplayNameFor(model => model.Name) </th> <th> @Html.DisplayNameFor(model => model.Numberofcopies) </th> <th> @Html.DisplayNameFor(model => model.AuthorID) </th> <th> @Html.DisplayNameFor(model => model.Price) </th> <th> @Html.DisplayNameFor(model => model.PublishDate) </th> <th></th> </tr>@foreach (var item in Model) { <tr> <td> @Html.DisplayFor(modelItem => item.Category) </td> <td> @Html.DisplayFor(modelItem => item.Name) </td> <td> @Html.DisplayFor(modelItem => item.Numberofcopies) </td> <td> @Html.DisplayFor(modelItem => item.AuthorID) </td> <td> @Html.DisplayFor(modelItem => item.Price) </td> <td> @Html.DisplayFor(modelItem => item.PublishDate) </td> <td> @Html.ActionLink("Edit", "Edit", new { id=item.BookID }) | @Html.ActionLink("Details", "Details", new { id=item.BookID }) | @Html.ActionLink("Delete", "Delete", new { id=item.BookID }) </td> </tr>}</table>其次,在Visual Studio中调试—>开始执行(不调试)-->启动应用程序,然后在浏览器的地址栏中修改URL数据,进行排序测试,URL的格式分别为book/SearchIndex?category=&SearchString=&sortBy=price_lowest和book/SearchIndex? category=&SearchString=&sortBy=price_highest。书籍信息应该分别显示为最低价格显示在列表的头部和最高价格显示在列表的头部。 如下图1,图2。

图1价格从低到高排序

图2 价格从高到低排序
2 在书籍查询页面中增加排序选项
排序功能,是给用户使用的,当然不能象上面我们做测试一样手工修改URL地址,所以我们不能使用上面的方法。我们需要在书籍查询页面中增加排序选项,允许用户可以按照他们自己选定的排序方式进行排序。我们需要在书籍查询页面中添加一个下拉列表以及一个填充该下拉列表值和文本的字典。
首先,我们需要在BookController类中修改SearchIndex方法。修改\Controllers\BookController.cs文件,在SearchIndex方法中添加排序选项,见下列粗体显示的代码:
public ActionResult SearchIndex(string Category, string searchString, string sortBy) {//类型选项 var cateLst = new List<string>(); var cateQry = from d in db.Books orderby d.Category select d.Category; cateLst.AddRange(cateQry.Distinct()); ViewBag.category = new SelectList(cateLst);//排序选项 var orderbyLst = new Dictionary<string, string> { { "价格从低到高", "price_lowest" }, { "价格从高到低", "price_highest" } }; ViewBag.sortBy = new SelectList(orderbyLst, "Value", "Key"); var books = from m in db.Books select m; if (!String.IsNullOrEmpty(searchString)) { books = books.Where(s => s.Name.Contains(searchString)); } // 排序功能实现 switch (sortBy) { case "price_lowest": books = books.OrderBy(p => p.Price); break; case "price_highest": books = books.OrderByDescending(p => p.Price); break; default: break; } if (string.IsNullOrEmpty(Category)) return View(books); else { return View(books.Where(x => x.Category == Category)); } }
其次,我们需要在书籍查询界面中添加一个下拉列表控件,用来显示排序方式,方便用户进行选择。在Views\Book\SearchIndex.cshtml文件的按照分类来过滤产品信息的代码后面,添加下列粗体显示的代码:
@model IEnumerable<MvcApplication1.Models.Book>@{ ViewBag.Title = "书籍查询";}<h2>书籍查询</h2> @using (Html.BeginForm("SearchIndex","book",FormMethod.Get)){ <p>书籍种类: @Html.DropDownList("category", "All") 书籍名称: @Html.TextBox("SearchString") 排序: @Html.DropDownList("sortBy", "不排序") <input type="submit" value="查询" /> </p> } <table> <tr> <th> @Html.DisplayNameFor(model => model.Category) </th> <th> @Html.DisplayNameFor(model => model.Name) </th> <th> @Html.DisplayNameFor(model => model.Numberofcopies) </th> <th> @Html.DisplayNameFor(model => model.AuthorID) </th> <th> @Html.DisplayNameFor(model => model.Price) </th> <th> @Html.DisplayNameFor(model => model.PublishDate) </th> <th></th> </tr>@foreach (var item in Model) { <tr> <td> @Html.DisplayFor(modelItem => item.Category) </td> <td> @Html.DisplayFor(modelItem => item.Name) </td> <td> @Html.DisplayFor(modelItem => item.Numberofcopies) </td> <td> @Html.DisplayFor(modelItem => item.AuthorID) </td> <td> @Html.DisplayFor(modelItem => item.Price) </td> <td> @Html.DisplayFor(modelItem => item.PublishDate) </td> <td> @Html.ActionLink("Edit", "Edit", new { id=item.BookID }) | @Html.ActionLink("Details", "Details", new { id=item.BookID }) | @Html.ActionLink("Delete", "Delete", new { id=item.BookID }) </td> </tr>}</table>
排序选项下拉列表控件使用视图包的sortBy属性来生成排序选项下拉列表控件中的下拉选项数据,其中下拉列表控件的显示文本使用Value值来指定,下拉列表控件中数据的值使用Key值来指定。
第三、在Visual Studio中调试—>开始执行(不调试)-->启动应用程序,然后点击书籍查询链接,在分类过滤下拉列表后面,我们会看到一个用于按照价格排序的下拉列表。如图3,4所示。
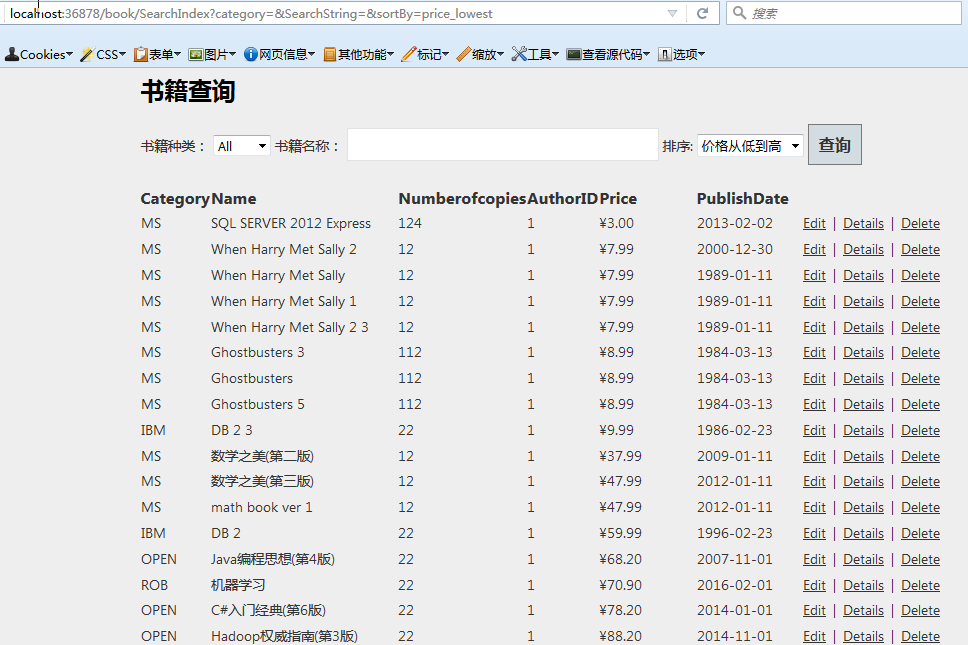
图3价格从低到高排序

图4:价格从高到低排序
- 学习ASP.NET MVC(十)——排序
- 学习ASP.NET MVC(十)——排序
- 学习ASP.NET MVC(十)——排序
- Asp.net MVC学习日记十(JQuery删除)
- ASP。NET学习十
- asp.net mvc 学习
- ASP.NET MVC学习
- ASP.NET十步学习法——第一步
- ASP.NET MVC 入门 (十)——查看Detail 和Delete 方法
- ASP.NET MVC 4 (十) 模型验证
- Asp.net mvc 知多少(十)
- Asp.net mvc 知多少(十)
- Asp.net mvc 知多少(十)
- asp.net mvc学习资料!——2
- 从零开始学习ASP.NET MVC
- Asp.net MVC 学习笔记
- asp.net mvc学习资料!
- ASP.NET MVC学习笔记
- 源码包升级
- 每天一个C++小程序(求线段长度)
- Android studio NDK成长记录(二)ndk-build
- js模拟form表单提交
- SpanbleString 图片下沉解决办法
- 学习ASP.NET MVC(十)——排序
- Java 操作MongoDB 基本操作
- Android屏幕尺寸,分辨率,屏幕适配剖析
- Node.js入门简介
- 6.3、auto-exists、exists、non empty
- 第一个li和最后一个li的特殊样式解决办法
- 单点系统架构的可用性与性能优化
- ES6新增(1)
- 【工具类篇------数据库】cocos2dx 3.6 sqlite3数据库的使用