玩性能测试的开源工具Locust
来源:互联网 发布:安卓捏人软件 编辑:程序博客网 时间:2024/06/11 14:45
这是我自己玩的一个开源性能测试工具推荐给大家。
1、它与目前主流的LoadRunner和Jmeter玩法都不一样。2、它完全基于Python开发,用Python来编写用户行为。
嗯,如果想用好它的话,你必须对Web开发有一定的认识。而且还要熟悉Python开发。
官方网站:http://locust.io/
Locust安装
1、安装Python:
官方:https://www.python.org/
安装Python2 或Python3
2、安装Locuse
2.1, 通过pip命令安装 /> pip install locustio
2.2, 通过GitHub上克隆项目安装(Python3推荐):https://github.com/locustio/locust
3、安装 pyzmq
If you intend to run Locust distributed across multiple processes/machines, we recommend you to also install pyzmq.
如果你打算运行Locust 分布在多个进程/机器,我们建议你也安装pyzmq.
通过pip命令安装。 /> pip install pyzmq
4、安装成功,CMD敲入命令验证。 /> locust --help
编写简单的性能测试脚本
创建load_test.py文件,通过Python编写性能测试脚本。

from locust import HttpLocust, TaskSet, taskclass UserBehavior(TaskSet): @task(1) def baidu(self): self.client.get("/")class WebsiteUser(HttpLocust): task_set = UserBehavior min_wait = 3000 max_wait = 6000创建UserBehavior()类继承TaskSet类,为用户行为。
创建baidu() 方法表示一个行为,访问百度首页。用@task() 装饰该方法为一个任务。1表示一个Locust实例被挑选执行的权重,数值越大,执行频率越高。在当前UserBehavior()行为下只有一个baidu()任务,所以,这里的权重设置为几,并无影响。
WebsiteUser()类用于设置性能测试。
task_set :指向一个定义了的用户行为类。
min_wait :用户执行任务之间等待时间的下界,单位:毫秒。
max_wait :用户执行任务之间等待时间的上界,单位:毫秒。
运行性能测试
切换到性能测试脚本所在的目录,启动性能测试:
------------------------------------------------------------------
.../> locust -f load_test.py --host=https://www.baidu.com
[2016-11-19 22:38:16,967] fnngj-PC/INFO/locust.main: Starting web monitor at *:8089
[2016-11-19 22:38:16,967] fnngj-PC/INFO/locust.main: Starting Locust 0.7.5
-----------------------------------------------------------------
load_test.py 为测试脚本,https://www.baidu.com 为测试的网站。
打开浏览器访问:http://127.0.0.1:8089
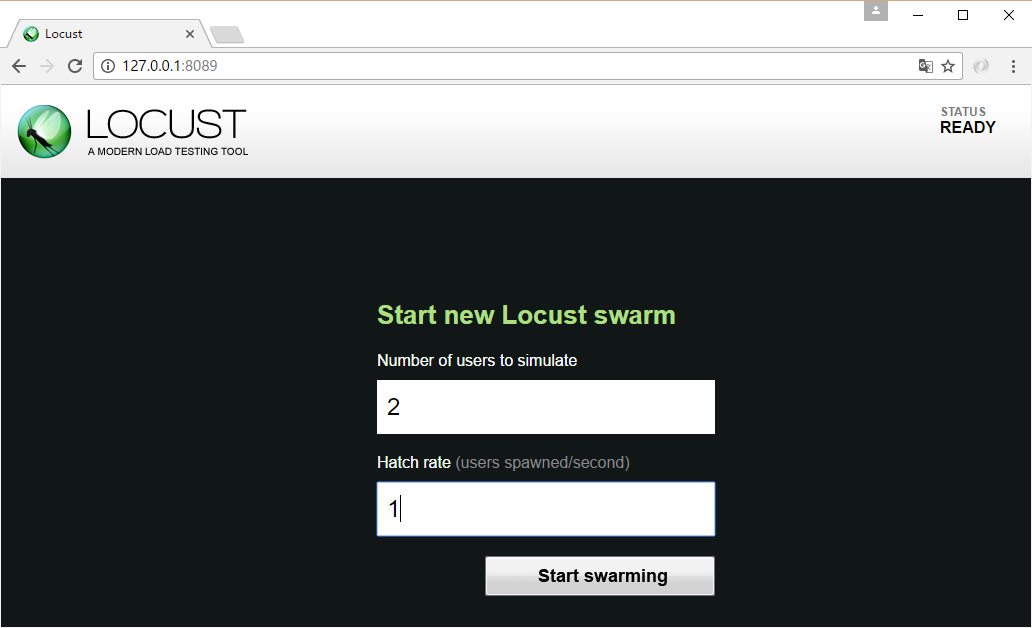
Number of users to simulate 设置模拟用户数
Hatch rate (users spawned/second) 孵化率?不知道怎么翻译,每秒产生(启动)的用户数。
点击Start swarming 开始运行性能测试。
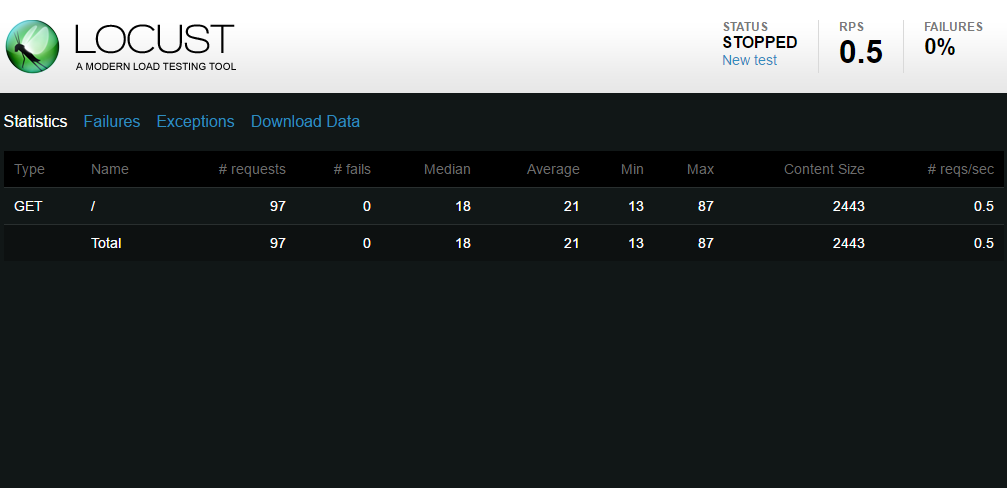
如果引起了你的兴趣,剩下的你自个玩吧!难点在性能测试脚本的编写上。
参考文档:http://docs.locust.io/en/latest/quickstart.html
Locust安装
1、安装Python:
官方:https://www.python.org/
安装Python2 或Python3
2、安装Locuse
2.1, 通过pip命令安装 /> pip install locustio
2.2, 通过GitHub上克隆项目安装(Python3推荐):https://github.com/locustio/locust
3、安装 pyzmq
If you intend to run Locust distributed across multiple processes/machines, we recommend you to also install pyzmq.
如果你打算运行Locust 分布在多个进程/机器,我们建议你也安装pyzmq.
通过pip命令安装。 /> pip install pyzmq
4、安装成功,CMD敲入命令验证。 /> locust --help
编写简单的性能测试脚本
创建load_test.py文件,通过Python编写性能测试脚本。
from locust import HttpLocust, TaskSet, taskclass UserBehavior(TaskSet): @task(1) def baidu(self): self.client.get("/")class WebsiteUser(HttpLocust): task_set = UserBehavior min_wait = 3000 max_wait = 6000创建UserBehavior()类继承TaskSet类,为用户行为。
创建baidu() 方法表示一个行为,访问百度首页。用@task() 装饰该方法为一个任务。1表示一个Locust实例被挑选执行的权重,数值越大,执行频率越高。在当前UserBehavior()行为下只有一个baidu()任务,所以,这里的权重设置为几,并无影响。
WebsiteUser()类用于设置性能测试。
task_set :指向一个定义了的用户行为类。
min_wait :用户执行任务之间等待时间的下界,单位:毫秒。
max_wait :用户执行任务之间等待时间的上界,单位:毫秒。
运行性能测试
切换到性能测试脚本所在的目录,启动性能测试:
------------------------------------------------------------------
.../> locust -f load_test.py --host=https://www.baidu.com
[2016-11-19 22:38:16,967] fnngj-PC/INFO/locust.main: Starting web monitor at *:8089
[2016-11-19 22:38:16,967] fnngj-PC/INFO/locust.main: Starting Locust 0.7.5
-----------------------------------------------------------------
load_test.py 为测试脚本,https://www.baidu.com 为测试的网站。
打开浏览器访问:http://127.0.0.1:8089
Number of users to simulate 设置模拟用户数
Hatch rate (users spawned/second) 孵化率?不知道怎么翻译,每秒产生(启动)的用户数。
点击Start swarming 开始运行性能测试。
如果引起了你的兴趣,剩下的你自个玩吧!难点在性能测试脚本的编写上。
参考文档:http://docs.locust.io/en/latest/quickstart.html
- 玩性能测试的开源工具Locust
- 深入浅出开源性能测试工具Locust
- 深入浅出开源性能测试工具Locust(使用篇)
- 9.性能测试工具Locust的高级使用——分布式使用Locust及定制Locust
- 7.性能测试工具Locust的初级使用
- Locust性能测试工具的安装及使用
- 基于locust的性能测试优化
- Locust性能测试
- 6.性能测试工具Locust介绍和安装
- 性能测试工具Locust基础安装教程与学习总结
- Locust性能测试学习总结
- Locust分布式进行性能测试
- 8.性能测试工具Locust的高级使用——熟悉相关的类和方法、特性
- 服务器web性能测试之Locust
- Locust性能测试框架介绍与安装
- locust python 性能测试,简单好用
- Locust一个分布式负载测试工具
- Locust 压力测试工具学习(一)
- 【Jekyll搭建GITHUB个人博客】安装Ruby 环境、包管理器 RubyGems、Jekyll与错误解决
- Android animated-rotate简单的图片旋转动画
- Struts详情解析
- Angular 2 + 折腾记 :(3)初步了解服务及使用
- Oracle数据笔记-【2】表分区
- 玩性能测试的开源工具Locust
- chrome浏览器的跨域设置——包括版本49前后两种设置
- Rendering Problems(布局渲染错误)
- shell 命令——paste用法
- 我的第一篇博客
- Mac下安装mysql5.7 完整步骤(图文详解)
- mysql 主主同步
- poj 1011 sticks
- 使用Docker构建redis集群