LNMP的编译安装与xcache、memcached的安装配置
来源:互联网 发布:java调用其他类的函数 编辑:程序博客网 时间:2024/05/16 05:31
1
[root@vm_101 ~]# yum -y groupinstall "Development Tools" "Development Libraries"1
[root@vm_101 ~]# yum -y install pcre pcre-devel zlib zlib-devel1
2
[root@vm_101 ~]# tar xf nginx-1.6.1.tar.gz -C /opt/[root@vm_101 ~]# cd /opt/nginx-1.6.1/1
2
[root@vm_101 nginx-1.6.1]# groupadd -r nginx[root@vm_101 nginx-1.6.1]# useradd -r -g nginx -s /sbin/nologin nginx1
[root@vm_101 nginx-1.6.1]# mkdir /usr/local/nginx1
2
3
4
5
6
7
8
9
10
11
12
13
14
15
16
17
18
19
20
21
22
23
24
25
26
27
28
29
30
31
32
33
34
35
36
37
38
39
40
[root@vm_101 nginx-1.6.1]# ./configure \--prefix=/usr/local/nginx \--sbin-path=/usr/sbin/nginx \--conf-path=/etc/nginx/nginx.conf \--error-log-path=/var/log/nginx/error.log \--http-log-path=/var/log/nginx/access.log \--pid-path=/var/run/nginx/nginx.pid \--lock-path=/var/lock/nginx.lock \--user=nginx \--group=nginx \--with-http_ssl_module \--with-http_flv_module \--with-http_stub_status_module \--with-http_gzip_static_module \--http-client-body-temp-path=/var/tmp/nginx/client/ \--http-proxy-temp-path=/var/tmp/nginx/proxy/ \--http-fastcgi-temp-path=/var/tmp/nginx/fcgi/ \--http-uwsgi-temp-path=/var/tmp/nginx/uwsgi \--with-pcre…………Configuration summary + using system PCRE library + using system OpenSSL library + md5: using OpenSSL library + sha1: using OpenSSL library + using system zlib library nginx path prefix: "/usr/local/nginx" nginx binary file: "/usr/sbin/nginx" nginx configuration prefix: "/etc/nginx" nginx configuration file: "/etc/nginx/nginx.conf" nginx pid file: "/var/run/nginx/nginx.pid" nginx error log file: "/var/log/nginx/error.log" nginx http access log file: "/var/log/nginx/access.log" nginx http client request body temporary files: "/var/tmp/nginx/client/" nginx http proxy temporary files: "/var/tmp/nginx/proxy/" nginx http fastcgi temporary files: "/var/tmp/nginx/fcgi/" nginx http uwsgi temporary files: "/var/tmp/nginx/uwsgi" nginx http scgi temporary files: "scgi_temp" ###如果出现报错的话,应该是由于软件包的依赖关系所导致的,自行安装相应的软件包即可[root@vm_101 nginx-1.6.1]# make && make install1
2
3
4
5
6
7
8
9
10
11
12
13
14
15
16
17
18
19
20
21
22
23
24
25
26
27
28
29
30
31
32
33
34
35
36
37
38
39
40
41
42
43
44
45
46
47
48
49
50
51
52
53
54
55
56
57
58
59
60
61
62
63
64
65
66
67
68
69
70
71
72
73
74
75
76
77
78
79
80
81
82
83
84
85
86
87
88
89
90
91
92
93
94
95
96
97
98
99
100
101
102
103
104
105
106
107
108
109
110
111
112
113
114
115
116
117
118
119
120
121
122
123
124
125
126
127
128
129
130
[root@vm_101 nginx-1.6.1]# vim /etc/init.d/nginx#!/bin/sh## nginx - this script starts and stops the nginx daemon## chkconfig: - 85 15 # description: Nginx is an HTTP(S) server, HTTP(S) reverse \# proxy and IMAP/POP3 proxy server# processname: nginx# config: /etc/nginx/nginx.conf# config: /etc/sysconfig/nginx# pidfile: /var/run/nginx.pid # Source function library.. /etc/rc.d/init.d/functions # Source networking configuration.. /etc/sysconfig/network # Check that networking is up.[ "$NETWORKING" = "no" ] && exit 0 nginx="/usr/sbin/nginx"prog=$(basename $nginx) NGINX_CONF_FILE="/etc/nginx/nginx.conf" [ -f /etc/sysconfig/nginx ] && . /etc/sysconfig/nginx lockfile=/var/lock/nginx.lock make_dirs() { # make required directories user=`$nginx -V 2>&1 | grep "configure arguments:" | sed 's/[^*]*--user=\([^ ]*\).*/\1/g' -` if [ -z "`grep $user /etc/passwd`" ]; then useradd -M -s /bin/nologin $user fi options=`$nginx -V 2>&1 | grep 'configure arguments:'` for opt in $options; do if [ `echo $opt | grep '.*-temp-path'` ]; then value=`echo $opt | cut -d "=" -f 2` if [ ! -d "$value" ]; then # echo "creating" $value mkdir -p $value && chown -R $user $value fi fi done} start() { [ -x $nginx ] || exit 5 [ -f $NGINX_CONF_FILE ] || exit 6 make_dirs echo -n $"Starting $prog: " daemon $nginx -c $NGINX_CONF_FILE retval=$? echo [ $retval -eq 0 ] && touch $lockfile return $retval} stop() { echo -n $"Stopping $prog: " killproc $prog -QUIT retval=$? echo [ $retval -eq 0 ] && rm -f $lockfile return $retval} restart() { configtest || return $? stop sleep 1 start} reload() { configtest || return $? echo -n $"Reloading $prog: " killproc $nginx -HUP RETVAL=$? echo} force_reload() { restart} configtest() { $nginx -t -c $NGINX_CONF_FILE} rh_status() { status $prog} rh_status_q() { rh_status >/dev/null 2>&1} case "$1" in start) rh_status_q && exit 0 $1 ;; stop) rh_status_q || exit 0 $1 ;; restart|configtest) $1 ;; reload) rh_status_q || exit 7 $1 ;; force-reload) force_reload ;; status) rh_status ;; condrestart|try-restart) rh_status_q || exit 0 ;; *) echo $"Usage: $0 {start|stop|status|restart|condrestart|try-restart|reload|force-reload|configtest}" exit 2esac1
[root@vm_101 nginx-1.6.1]# chmod +x /etc/init.d/nginx1
2
[root@vm_101 nginx-1.6.1]# /etc/init.d/nginx startStarting nginx: [ OK ]1
2
3
4
[root@vm_101 nginx-1.6.1]# chkconfig --add nginx [root@vm_101 nginx-1.6.1]# chkconfig nginx on[root@vm_101 nginx-1.6.1]# chkconfig nginx --listnginx 0:off1:off2:on3:on4:on5:on6:off1
2
3
4
5
6
[root@vm_101 nginx-1.6.1]# lsof -i :80COMMAND PID USER FD TYPE DEVICE SIZE/OFF NODE NAMEnginx 17211 root 6u IPv4 124804 0t0 TCP *:http (LISTEN)nginx 17212 nginx 6u IPv4 124804 0t0 TCP *:http (LISTEN)[root@vm_101 nginx-1.6.1]# netstat -tunlp | grep 80tcp 0 0 0.0.0.0:80 0.0.0.0:* LISTEN 17211/nginx1
2
3
4
5
[root@vm_101 ~]# vim /etc/nginx/nginx.conf ##在HTTP段添加一条配置项:http { include mime.types; include server.conf; ###添加这一行 default_type application/octet-stream;1
2
3
4
5
6
7
8
9
10
11
[root@vm_101 ~]# vim /etc/nginx/server.confserver { listen 80; server_name www.test.com;location / { root /home/html; index index.html; }}[root@vm_101 ~]# vim /home/html/index.html<h1>test file</h1>1
2
3
4
[root@vm_101 ~]# /etc/init.d/nginx reloadnginx: the configuration file /etc/nginx/nginx.conf syntax is oknginx: configuration file /etc/nginx/nginx.conf test is successfulReloading nginx: [ OK ]1
2
3
4
5
[root@vm_101 ~]# groupadd -r mysql [root@vm_101 ~]# useradd -r -g mysql -s /sbin/nologin mysql[root@vm_101 ~]# mkdir /home/mysql #mysql的数据目录[root@vm_101 ~]# chown -R mysql:mysql /home/mysql/[root@vm_101 ~]# mkdir /usr/local/mysql #mysql的安装目录1
2
[root@vm_101 ~]# tar zxvf mysql-5.6.20.tar.gz -C /opt/[root@vm_101 ~]# cd /opt/mysql-5.6.20/1
2
3
4
5
6
7
8
9
10
11
12
13
14
[root@vm_101 mysql-5.6.20]# cmake . -DCMAKE_INSTALL_PREFIX=/usr/local/mysql \-DMYSQL_DATADIR=/home/mysql \-DSYSCONFDIR=/etc \-DWITH_INNOBASE_STORAGE_ENGINE=1 \-DWITH_ARCHIVE_STORAGE_ENGINE=1 \-DWITH_BLACKHOLE_STORAGE_ENGINE=1 \-DWITH_READLINE=1 \-DWITH_SSL:STRING=bundled \-DWITH_ZLIB:STRING=bundled \-DENABLE_DOWNLOADS=1 \-DWITH_LIBWRAP=0 \-DMYSQL_UNIX_ADDR=/tmp/mysql.sock \-DDEFAULT_CHARSET=utf8 \-DDEFAULT_COLLATION=utf8_general_ci1
2
3
4
5
6
7
8
-- Library mysqlclient depends on OSLIBS -lpthread;m;rt;dl-- Download failed, error: 7;"couldn't connect to server"-- To enable google test, please download http://googlemock.googlecode.com/files/gmock-1.6.0.zip to the directory /opt/mysql-5.6.20/source_downloads-- If you are inside a firewall, you may need to use an http proxy: export http_proxy=http://example.com:80-- Library mysqlserver depends on OSLIBS -lpthread;m;rt;crypt;dl-- Configuring done-- Generating done-- Build files have been written to: /opt/mysql-5.6.201
2
CMake Error: Problem with tar_extract_all(): Invalid argumentCMake Error: Problem extracting tar: /usr/local/src/mysql-5.6.13/source_downloads/gmock-1.6.0.zip1
2
3
4
5
6
[root@vm_101 mysql-5.6.20]# cd source_downloads/[root@vm_101 source_downloads]# unzip gmock-1.6.0.zip [root@vm_101 source_downloads]# cd gmock-1.6.0[root@vm_101 source_downloads]# cd gmock-1.6.0[root@vm_101 gmock-1.6.0]# ./configure[root@vm_101 gmock-1.6.0]# make1
2
[root@vm_101 gmock-1.6.0]# cd /opt/mysql-5.6.20/[root@vm_101 mysql-5.6.20]# rm CMakeCache.txt -f1
[root@vm_101 mysql-5.6.20]# make && make install1
2
3
4
5
6
7
8
9
10
11
12
13
14
15
16
17
18
19
20
21
22
23
24
25
26
27
##指定安装文件的安装路径时常用的选项-DCMAKE_INSTALL_PREFIX=/usr/local/mysql ##指定残可安装路径(默认的就是/usr/local/mysql)-DMYSQL_DATADIR=/home/mysql ##mysql的数据文件路径-DSYSCONFDIR=/etc ##配置文件路径 ##编译过程中启用其他存储引擎时指令介绍-DWITH_INNOBASE_STORAGE_ENGINE=1 ##使用INNOBASE存储引擎-DWITH_ARCHIVE_STORAGE_ENGINE=1 ##常应用于日志记录和聚合分析,不支持索引-DWITH_BLACKHOLE_STORAGE_ENGINE=1 ##黑洞存储引擎 ##编译过程中取消一些存储引擎指令介绍-DWITHOUT_<ENGINE>_STORAGE_ENGINE=1-DWITHOUT_EXAMPLE_STORAGE_ENGINE=1-DWITHOUT_FEDERATED_STORAGE_ENGINE=1-DWITHOUT_PARTITION_STORAGE_ENGINE=1 ##编译进过程中功能启用的指令介绍-DWITH_READLINE=1 ##支持批量导入mysql数据-DWITH_SSL=system ##mysql支持ssl会话,实现基于ssl的数据复-DWITH_ZLIB=system ##压缩库-DWITH_LIBWRAP=0 ##是否可以基于WRAP实现访问控制 ##其他功能指令-DMYSQL_TCP_PORT=3306 ##默认端口-DMYSQL_UNIX_ADDR=/tmp/mysql.sock ##默认套接字文件路径-DENABLED_LOCAL_INFILE=1 ##是否启用LOCAL_INFILE功能-DEXTRA_CHARSETS=all ##是否支持额外的字符集-DDEFAULT_CHARSET=utf8 ##默认编码机制-DDEFAULT_COLLATION=utf8_general_ci ##设定默认语言的排序规则-DWITH_DEBUG=0 ##DEBUG功能设置-DENABLE_PROFILING=1 ##性能分析功能是否启用1
2
3
[root@vm_101 mysql-5.6.20]# cd /usr/local/mysql/[root@vm_101 mysql]# ls bin COPYING data docs include INSTALL-BINARY lib man mysql-test README scripts share sql-bench support-files1
2
3
4
5
[root@vm_101 mysql]# cp support-files/mysql.server /etc/init.d/mysqld[root@vm_101 mysql]# chkconfig --add mysqld #添加进服务列表[root@vm_101 mysql]# chkconfig mysqld on #设置为开机自启[root@vm_101 mysql]# chkconfig mysqld --list mysqld 0:off1:off2:on3:on4:on5:on6:off1
2
3
4
5
6
7
8
[root@vm_101 mysql]# /usr/local/mysql/scripts/mysql_install_db \--basedir=/usr/local/mysql \--datadir=/home/mysql/ \--user=mysqlNew default config file was created as /usr/local/mysql/my.cnf andwill be used by default by the server when you start it.You may edit this file to change server settings[root@vm_101 mysql]# cp my.cnf /etc/ #为mysql提供配置文件1
2
[root@vm_101 mysql]# /etc/init.d/mysqld startStarting MySQL. [ OK ]1
2
3
[root@vm_101 mysql]# vim /etc/profile.d/mysql.shexport PATH=$PATH:/usr/local/mysql/bin ##在新建的文件中加入这一行[root@vm_101 mysql]# source /etc/profile1
2
[root@vm_101 mysql]# vim /etc/man.configMANPATH /usr/local/mysql/man ##添加这一行1
2
3
[root@vm_101 mysql]# vim /etc/ld.so.conf.d/mysql.conf/usr/local/mysql/lib ##添加这一行[root@vm_101 mysql]# ldconfig1
2
[root@vm_101 mysql]# ln -sv /usr/local/mysql/include/ /usr/include/mysqlcreate symbolic link `/usr/include/mysql' to `/usr/local/mysql/include/'1
2
3
4
5
6
7
8
9
10
[root@vm_101 mysql]# mysql Welcome to the MySQL monitor. Commands end with ; or \g.Your MySQL connection id is 1Server version: 5.6.20 Source distributionCopyright (c) 2000, 2014, Oracle and/or its affiliates. All rights reserved.Oracle is a registered trademark of Oracle Corporation and/or itsaffiliates. Other names may be trademarks of their respectiveowners.Type 'help;' or '\h' for help. Type '\c' to clear the current input statement.mysql>1
2
3
4
5
6
7
8
9
10
11
12
13
14
15
[root@vm_101 mysql]# /usr/local/mysql/bin/mysqladmin -uroot password "123456"Warning: Using a password on the command line interface can be insecure.[root@vm_101 mysql]# mysqlERROR 1045 (28000): Access denied for user 'root'@'localhost' (using password: NO)[root@vm_101 mysql]# mysql -uroot -p Enter password: Welcome to the MySQL monitor. Commands end with ; or \g.Your MySQL connection id is 4Server version: 5.6.20 Source distributionCopyright (c) 2000, 2014, Oracle and/or its affiliates. All rights reserved.Oracle is a registered trademark of Oracle Corporation and/or itsaffiliates. Other names may be trademarks of their respectiveowners.Type 'help;' or '\h' for help. Type '\c' to clear the current input statement.mysql>1
2
3
[root@vm_101 ~]# tar xf php-5.4.32.tar.bz2 -C /opt/[root@vm_101 ~]# cd /opt/php-5.4.32/[root@vm_101 php-5.4.32]# mkdir /usr/local/php ###创建安装目录1
2
3
4
5
6
7
8
9
10
11
12
13
14
15
16
[root@vm_101 php-5.4.32]# ./configure --prefix=/usr/local/php \ --with-config-file-path=/usr/local/php/etc \ --with-mysql=/usr/local/mysql \ --with-mysqli=/usr/local/mysql/bin/mysql_config \ --disable-debug --disable-ipv6 --with-iconv-dir \ --with-freetype-dir=/usr/local/phpextend \ --with-jpeg-dir=/usr/local/phpextend \ --with-png-dir=/usr/local/phpextend \ --with-zlib --with-libxml-dir=/usr \ --enable-xml --disable-rpath --enable-bcmath \ --enable-shmop --enable-sysvsem \ --enable-inline-optimization --with-curl \ --enable-mbregex --enable-fpm --enable-mbstring \ --with-gd --enable-gd-native-ttf --with-openssl \ --with-mhash --enable-pcntl \ --enable-sockets --with-xmlrpc --enable-zip --enable-soap1
2
3
4
5
6
7
8
9
10
11
12
13
14
15
16
17
18
19
20
21
22
23
24
25
26
27
28
29
30
31
Generating filesconfigure: creating ./config.statuscreating main/internal_functions.ccreating main/internal_functions_cli.c+--------------------------------------------------------------------+| License: || This software is subject to the PHP License, available in this || distribution in the file LICENSE. By continuing this installation || process, you are bound by the terms of this license agreement. || If you do not agree with the terms of this license, you must abort || the installation process at this point. |+--------------------------------------------------------------------+Thank you for using PHP.config.status: creating php5.specconfig.status: creating main/build-defs.hconfig.status: creating scripts/phpizeconfig.status: creating scripts/man1/phpize.1config.status: creating scripts/php-configconfig.status: creating scripts/man1/php-config.1config.status: creating sapi/cli/php.1config.status: creating sapi/fpm/php-fpm.confconfig.status: creating sapi/fpm/init.d.php-fpmconfig.status: creating sapi/fpm/php-fpm.serviceconfig.status: creating sapi/fpm/php-fpm.8config.status: creating sapi/fpm/status.htmlconfig.status: creating sapi/cgi/php-cgi.1config.status: creating ext/phar/phar.1config.status: creating ext/phar/phar.phar.1config.status: creating main/php_config.hconfig.status: main/php_config.h is unchangedconfig.status: executing default commands1
[root@vm_101 php-5.4.32]# make && make install1
[root@vm_101 php-5.4.32]# cp php.ini-production /usr/local/php/etc/php.ini1
2
3
4
5
6
7
8
9
10
11
12
13
14
15
16
17
18
19
20
[root@vm_101 php-5.4.32]# cp sapi/fpm/init.d.php-fpm /etc/init.d/php-fpm[root@vm_101 php-5.4.32]# chmod +x /etc/init.d/php-fpm[root@vm_101 php-5.4.32]# chkconfig --add php-fpm[root@vm_101 php-5.4.32]# chkconfig php-fpm on[root@vm_101 php-5.4.32]# chkconfig php-fpm --list php-fpm 0:off1:off2:on3:on4:on5:on6:off[root@vm_101 php-5.4.32]# cd /usr/local/php/etc/[root@vm_101 etc]# ls pear.conf php-fpm.conf.default php.ini[root@vm_101 etc]# cp php-fpm.conf.default php-fpm.conf[root@vm_101 etc]# vim php-fpm.confuser = nginx #为了保持跟nginx一致,避免以后出现因为文件权限的问题,group = nginx #导致网页访问异常。[root@vm_101 etc]# /etc/init.d/php-fpm startStarting php-fpm done[root@vm_101 etc]# ps -ef | grep php root 13466 1 0 19:56 ? 00:00:00 php-fpm: master process (/usr/local/php/etc/php-fpm.conf) nginx 13467 13466 0 19:56 ? 00:00:00 php-fpm: pool www nginx 13468 13466 0 19:56 ? 00:00:00 php-fpm: pool www root 13471 13367 0 19:57 pts/0 00:00:00 grep php1
2
3
4
5
6
7
8
9
10
11
12
13
14
15
16
17
18
19
[root@vm_101 ~]# tar xf xcache-3.2.0.tar.gz -C /opt/[root@vm_101 ~]# cd /opt/xcache-3.2.0 2、安装:(安装过程可以参考官方提供的./INSTALL)[root@vm_101 xcache-3.2.0]# /usr/local/php/bin/phpize --clean && /usr/local/php/bin/phpizeCleaning..Configuring for:PHP Api Version: 20100412Zend Module Api No: 20100525Zend Extension Api No: 220100525[root@vm_101 xcache-3.2.0]# ./configure --enable-xcache --with-php-config=/usr/local/php/bin/php-config...[root@vm_101 xcache-3.2.0]# make && make install Build complete.Don't forget to run 'make test'.Installing shared extensions: /usr/local/php/lib/php/extensions/no-debug-non-zts-20100525/[root@vm_101 xcache-3.2.0]# make test 0 0
- LNMP的编译安装与xcache、memcached的安装配置
- xcache安装与配置
- LNMP的编译安装
- Xcache的安装
- LNMP的安装配置
- 编译安装LNMP配置
- memcached 的编译安装
- LNMP 1.2缓存加速类扩展(xcache/Redis/memcached/eAccelerator)、imageMagick、ionCube安装教程
- LNMP 1.2缓存加速类扩展(xcache/Redis/memcached/eAccelerator)、imageMagick、ionCube安装教程
- XCache安装配置
- LNMP的安装和配置
- lnmp安装与配置
- win2003+IIS下安装Xcache加速的配置方法分享
- Windows下Memcached的安装与配置
- windows下memcached的安装与配置
- Xcache安装与使用
- LNMP框架的搭建(nginx的安装与配置)
- 【centos】LNMP集成环境 的 安装 与 配置
- Python中常见的数据类型总结
- 如何在springcloud分布式系统中实现分布式锁?
- 单例模式与静态变量的区别
- LeetCode部分题解
- IOC实现之XML元素解析过程(三)
- LNMP的编译安装与xcache、memcached的安装配置
- 【Shiro】SpringMVC Mybatis Shiro RestTemplate的实现客户端无状态验证及访问控制
- 2957: 楼房重建
- 用requestAnimationFrame做轮播
- Java基础知识点总结
- Linux下编译代码错误-warning: deprecated conversion from string constant to 'char*
- 静态库和动态库
- 离心泵安全操作规程
- LeetCode部分题解
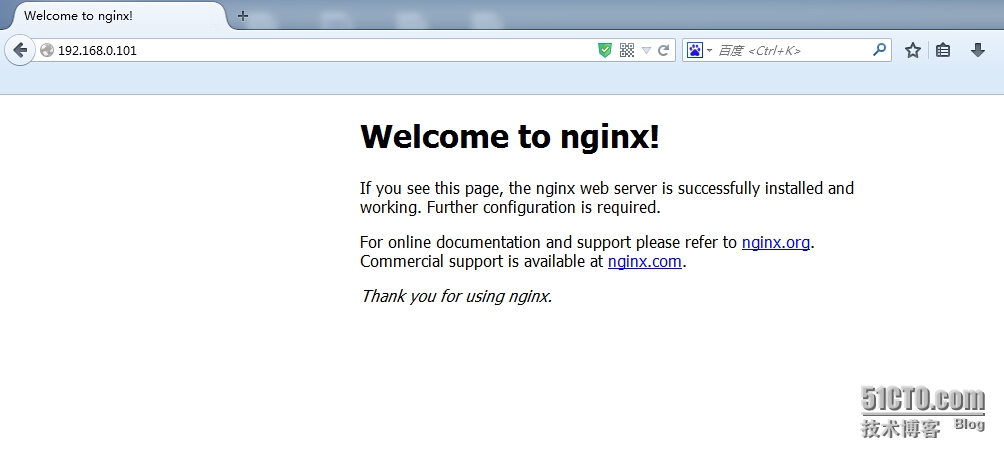
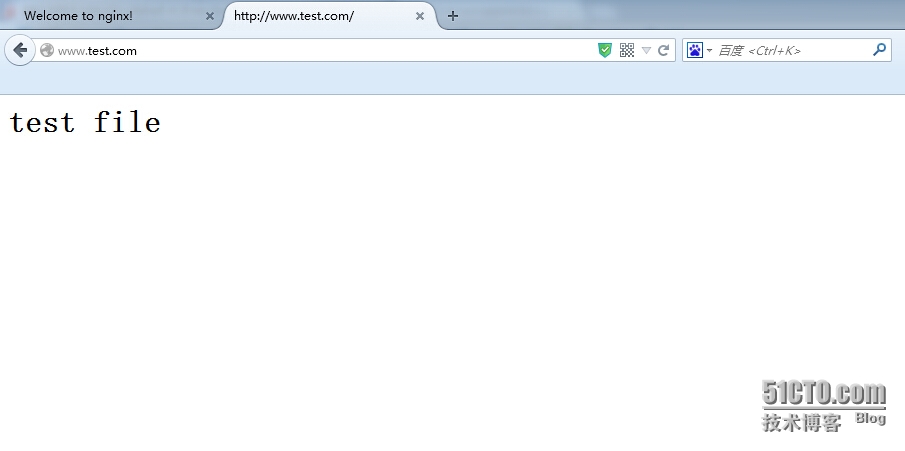
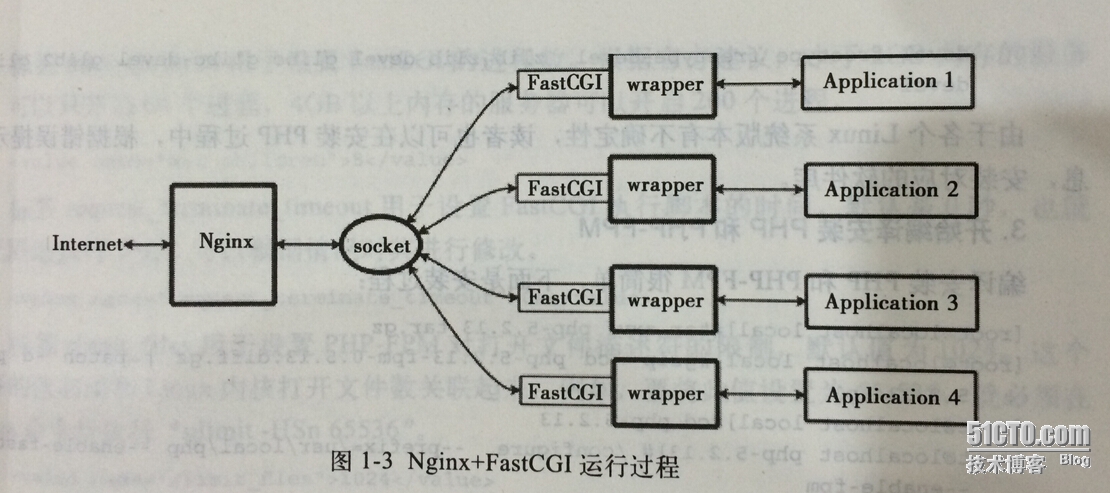
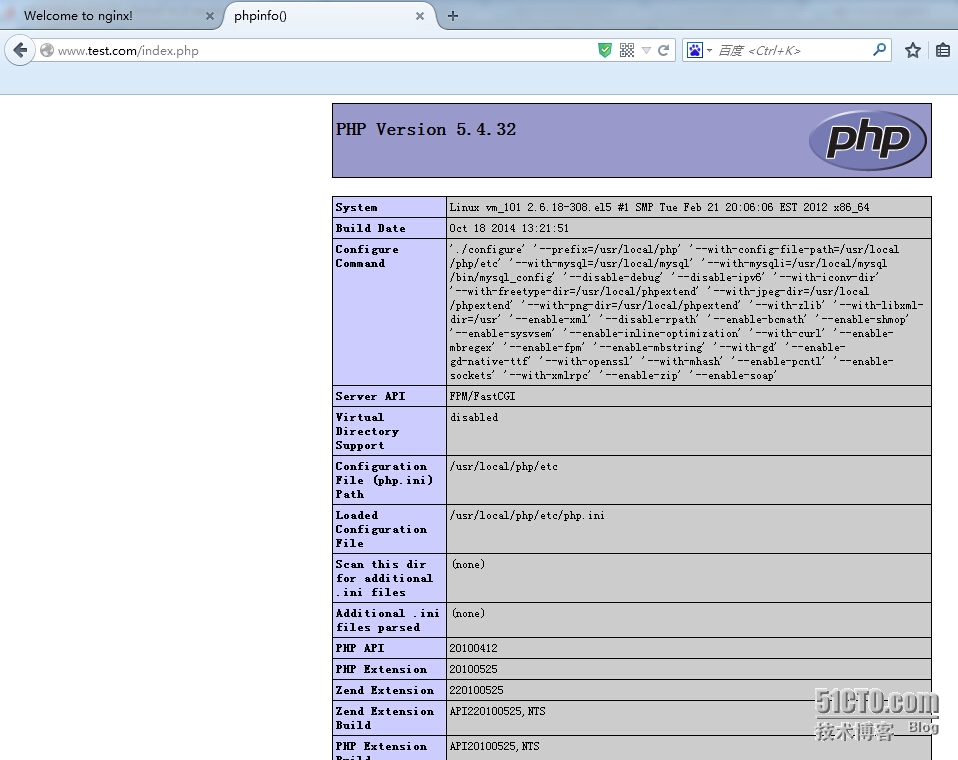
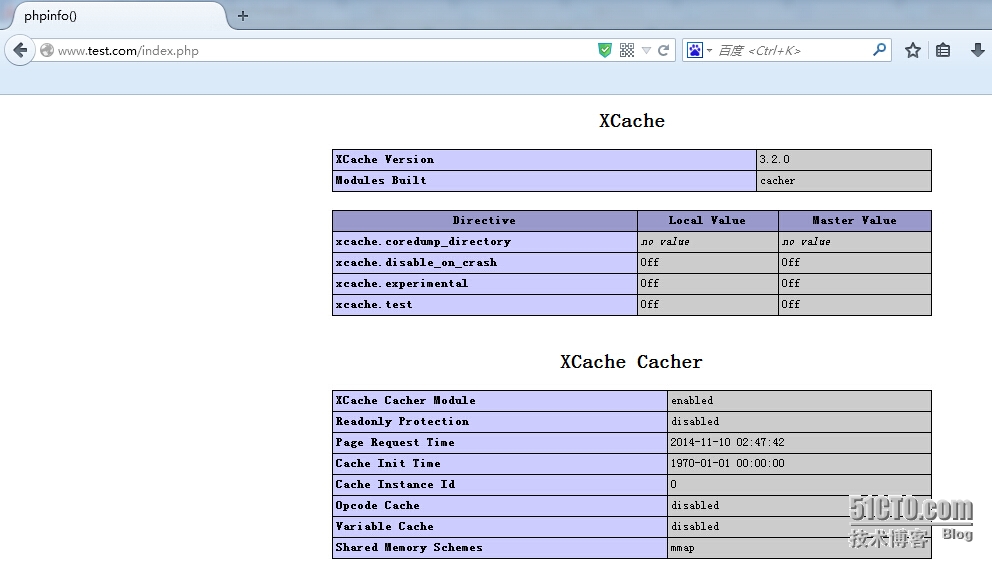
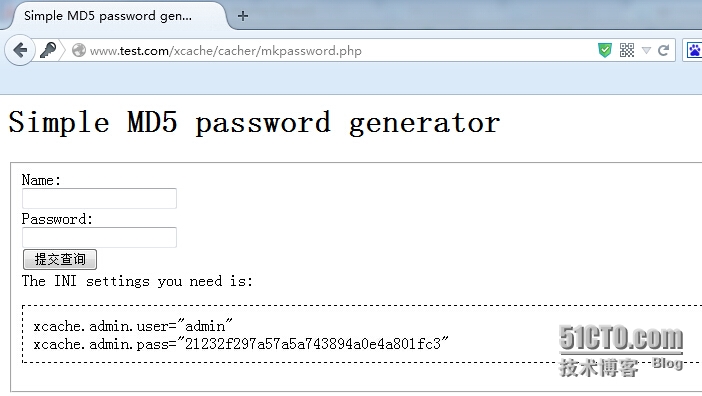

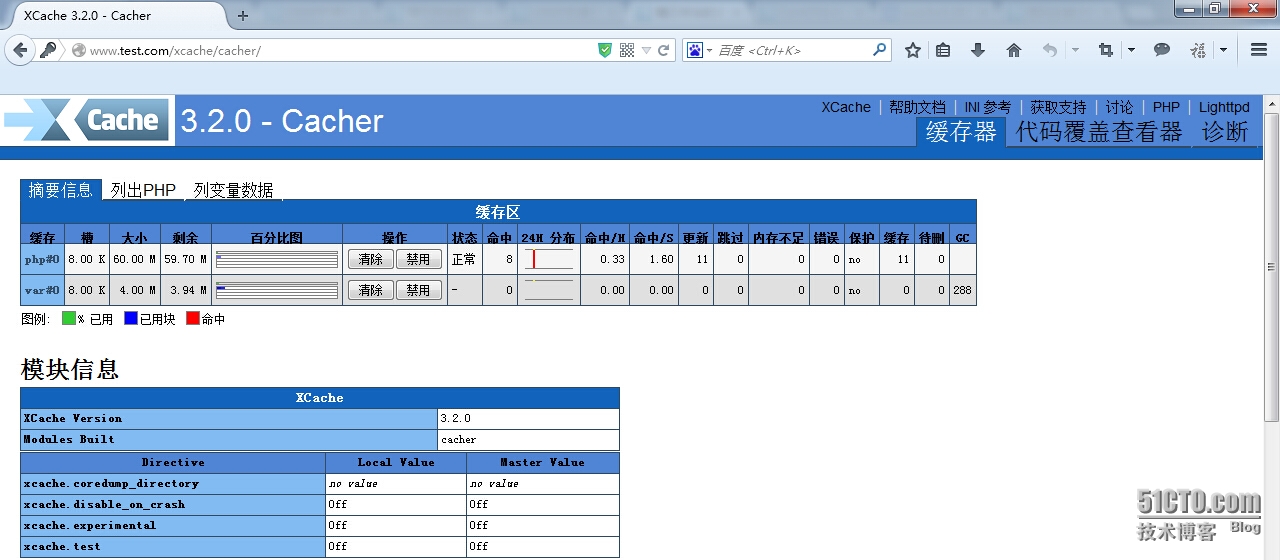 到此,xcache的安装配置就好了,有关xcache的详细配置及其使用请查看其官网

