Android中ImageView控件ScaleType属性使用小结
来源:互联网 发布:数控车用什么软件编程 编辑:程序博客网 时间:2024/06/05 23:41
编写不易,如有转载,请声明出处: 梦回河口:http://blog.csdn.net/zxc514257857/article/details/70163346
今天工作时,需要让一个图片不按比例进行拉伸,结果想了蛮久没有想到ScaleType这个简单的属性设置,于是就写这篇进行加深巩固一下记忆。
ScaleType就是用来表示ImageView限定的宽高和图片实际的宽高之间相互妥协而产生的不同表现形式,一共八种表现形式,分别为:fitCenter,center,centerCrop,centerInside,fitEnd,fitStart,fitXY和matrix,下面就结合实例演示,详细的学习一下。
没有设置ScaleType属性前Demo代码:
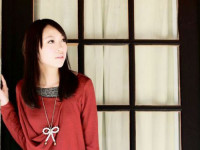
<?xml version="1.0" encoding="utf-8"?><LinearLayout xmlns:android="http://schemas.android.com/apk/res/android" xmlns:tools="http://schemas.android.com/tools" android:id="@+id/activity_main" android:layout_width="match_parent" android:layout_height="match_parent" android:orientation="vertical" tools:context="com.test.scaletype.MainActivity"> <ImageView android:id="@+id/iv1" android:src="@mipmap/pic1" android:background="@color/colorAccent" android:layout_width="wrap_content" android:layout_height="wrap_content"/> <ImageView android:id="@+id/iv2" android:src="@mipmap/pic2" android:background="@color/colorPrimary" android:layout_width="wrap_content" android:layout_height="wrap_content"/></LinearLayout> Demo展示图片:

这里将ImageView设置了背景色,能够更加清晰地体会ScaleType属性
可以看出,iv1图片实际的宽度大于ImageView限定的宽度,iv2图片的实际宽高和ImageView的宽高相吻合,所以没看到ImageView的背景色露出,从这张图可以让大家直观感受到iv1图片和iv2图片的大概宽高
但,只是感受宽高,我们接下来的案例代码是这样的:
<LinearLayout xmlns:android="http://schemas.android.com/apk/res/android" xmlns:tools="http://schemas.android.com/tools" android:id="@+id/activity_main" android:layout_width="match_parent" android:layout_height="match_parent" android:orientation="vertical" tools:context="com.test.scaletype.MainActivity"> <ImageView android:id="@+id/iv1" android:src="@mipmap/pic1" android:scaleType="fitCenter" android:background="@color/colorAccent" android:layout_width="250dp" android:layout_height="250dp"/> <ImageView android:id="@+id/iv2" android:src="@mipmap/pic2" android:scaleType="fitCenter" android:background="@color/colorPrimary" android:layout_width="250dp" android:layout_height="250dp"/></LinearLayout> Demo展示图片:
设置这两个ImageView控件的长宽都为250dp,最终显示效果就是这个样子,但可以明显看出,上面的图片比下面的图片清楚,但是没有设置ScaleType,为什么小的图片可以放大,大的图片可以缩小呢?
fitCenter
如果给以上两张图片各添加上
android:scaleType="fitCenter" 这个属性,会有什么样的效果?
没错!
噔噔噔噔~~~ 
因为fitCenter是ImageView控件的默认ScaleType。
它表示把一个图片缩放到当前ImageView大小,小于ImageView的图片会放大,大于ImageView的图片会缩小。
center
添加上
android:scaleType="center" 后看效果,大家先猜一猜

直接把图片居中显示,不进行任何缩放。如果图片有宽或高有大于ImageView的部分,就裁掉超出部分并居中显示,如果图片宽高均小于ImageView宽高,直接居中显示
centerCrop
如果是centerCrop呢?
我也不知道,运行一下看看呗

居中显示图片,并对图片进行缩放,以大的宽或高的值去匹配ImageView控件。如果图片有宽或高有大于ImageView的部分就裁掉,适应控件并居中显示,如果图片宽高均小于ImageView宽高,适应控件并居中显示
centerInside
直接上图:

居中显示图片,并对图片进行缩放,以小的宽或高的值进行匹配ImageView控件。它与fitCenter的区别在于,如果是小于该控件的图,则不会放大,而是维持图的大小直接居中显示。
fitEnd
直接上图:

这个简单,放大或缩小图片到正好可以放入到空间中的大小,与fitCenter的不同点在于,把图片居下(长大于宽时)或居右(宽大于长时)显示。
fitStart
都会抢答啦! 
与fitEnd基本相同,只是图片会居左或居上显示。
fitXY
这个是比较特殊的一个,用得也相对较多,唯一不等比例的一个 
不固定长宽比例地缩小或放大图片,直到用图片把控件区域全部填满。
matrix
最后一个,矩阵:

与center相似,都是不缩放图片进行显示。不同点在于,用矩阵的方式绘制,从控件的左上角开始,而不是像center一样,从中间开始显示。
算啦,总结完感觉记不住多少,只是理解了一些,以后需要的时候再翻博客吧!
———-因本人才疏学浅,如博客或Demo中有错误的地方请大家随意指出,与大家一起讨论,共同进步,谢谢!———-
- Android中ImageView控件ScaleType属性使用小结
- Android 中 ImageView 控件 scaleType 属性
- android中 ImageView scaleType属性
- Android的ImageView控件ScaleType属性详解
- ImageView控件ScaleType属性的使用
- android ImageView scaleType属性
- android ImageView scaleType属性
- android ImageView scaleType属性
- android ImageView scaleType属性
- android ImageView scaleType属性
- android ImageView scaleType属性
- android ImageView scaleType属性
- android ImageView scaleType属性
- android ImageView scaleType属性
- android ImageView scaleType属性
- android ImageView scaleType属性
- android ImageView scaleType属性
- android ImageView scaleType属性
- memcached 使用笔记
- Java 泛型小记
- unit13 练习题
- 原子性操作(atomic operation)
- ThinkPHP如何引入扩展类?
- Android中ImageView控件ScaleType属性使用小结
- 流网络的切割
- ZOJ3767 Elevator
- 查看linux系统常用的命令,Linux查看系统配置常用命令
- 安装linux和配置java,tomcat
- 数据降维1--------PCA主成分分析原理和应用实现
- 使用util.concurrent并发包下的工具类,实现实时通知对方线程
- POJ
- Java编程思想-04控制执行流程