iOS 测试 SwiftMonkey :iOS 上的 monkey
来源:互联网 发布:网络直播危害的事例 编辑:程序博客网 时间:2024/05/16 17:41
从前有种测试叫瞎点测试,哦不,随机测试。Android 上有 Monkey。我们以前用 Monkey 来跑 Android 机顶盒,跑出了一堆非常难解决的 kernel 问题,帮助还是很大的。市场上随便挑个 Android 应用,monkey 能跑个 30 分钟应该算是了不起了。苹果没有给 iOS 提供 Monkey。大概 iOS 应用质量比较好吧。。
好在很多无聊的人研究测试技术,于是就有了很多 iOS 上的 monkey 工具。比如基于 UIAutomation 的 monkey —— https://github.com/jonathanpenn/ui-auto-monkey。通过 copy from stackoverflow 和 copy from github 模式,我们也熟练掌握了 iOS 上的 monkey。不幸的是,iOS 和 Xcode 升级之后,UIAutomation 框架被砍掉了,于是很长时间 iOS 没有 monkey 的说法了。然后无聊的外国人又整了一个基于 XCUITesting 框架的 monkey 工具 —— https://github.com/zalando/SwiftMonkey。社区里早就有人用过了,但是都藏着掖着。那我是最近才知道,所以拿过来用用。
安装配置
现在每天都有人来问我 Appium 的问题,90%是安装配置问题,10%是不知所谓。所以想对所有创造自动化工具的人说,你解决了安装配置问题,你就已经成功了。
SwiftMonkey 的配置挺简单的。用 CocoaPods —— 这个我没试过:
target "App" do pod "SwiftMonkeyPaws", "~> 1.0"endtarget "Tests" do pod "SwiftMonkey", "~> 1.0"end手动安装
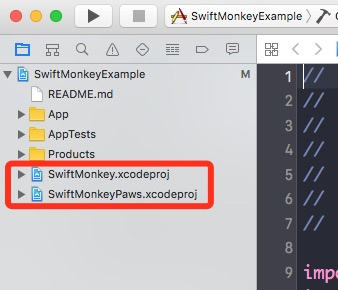
把 https://github.com/zalando/SwiftMonkey 下载下来。把 SwiftMonkey 和 SwiftMonkeyPaws 目录粘贴到你的项目目录下去。然后把他们两的 xcodeproj 拖到项目中去。
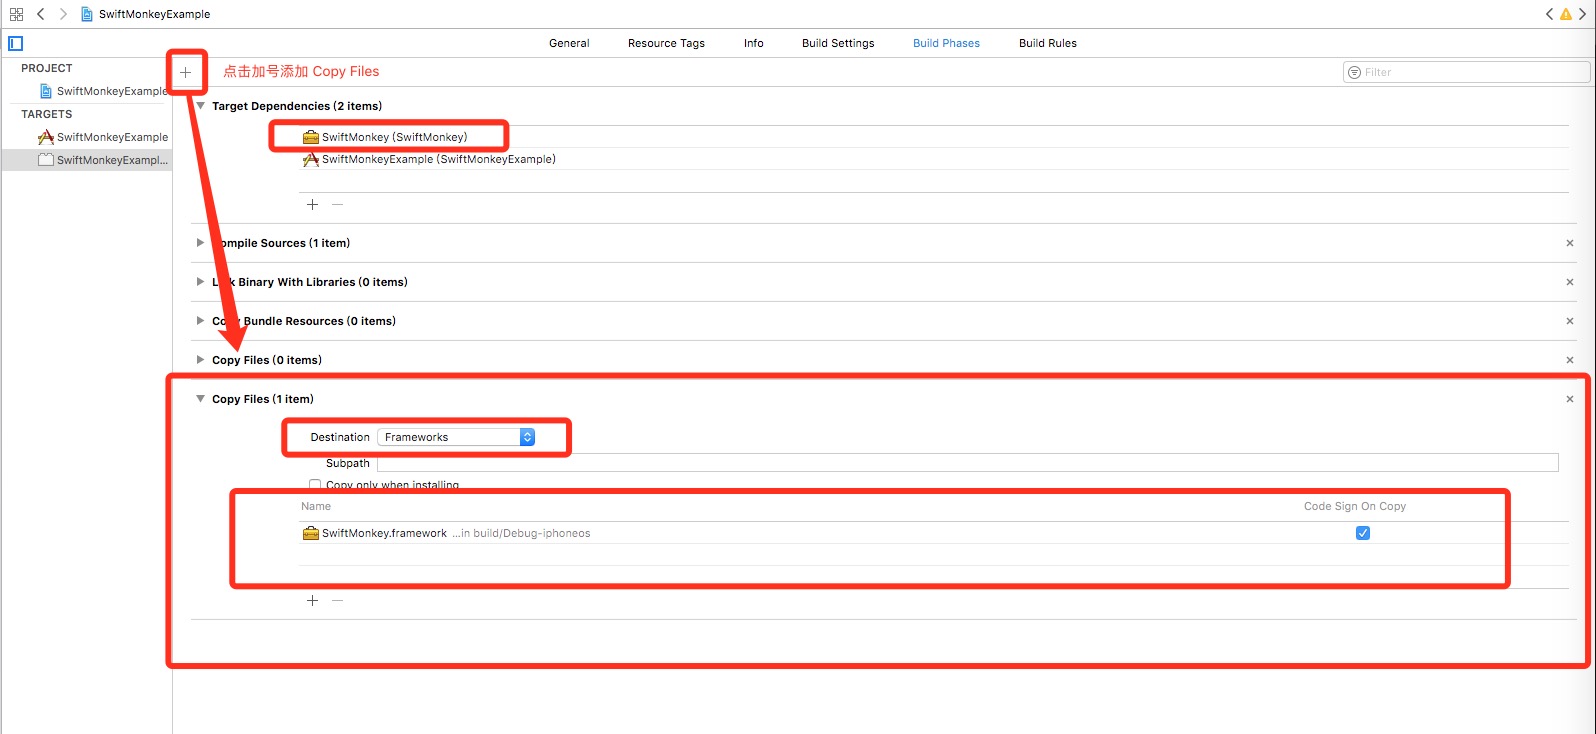
然后呢,把 SwiftMonkey.framework 添加为你的 test target 的依赖。在 test 的 build phase 那里添加 Copy Files。如图:
然后其实就可以用了。
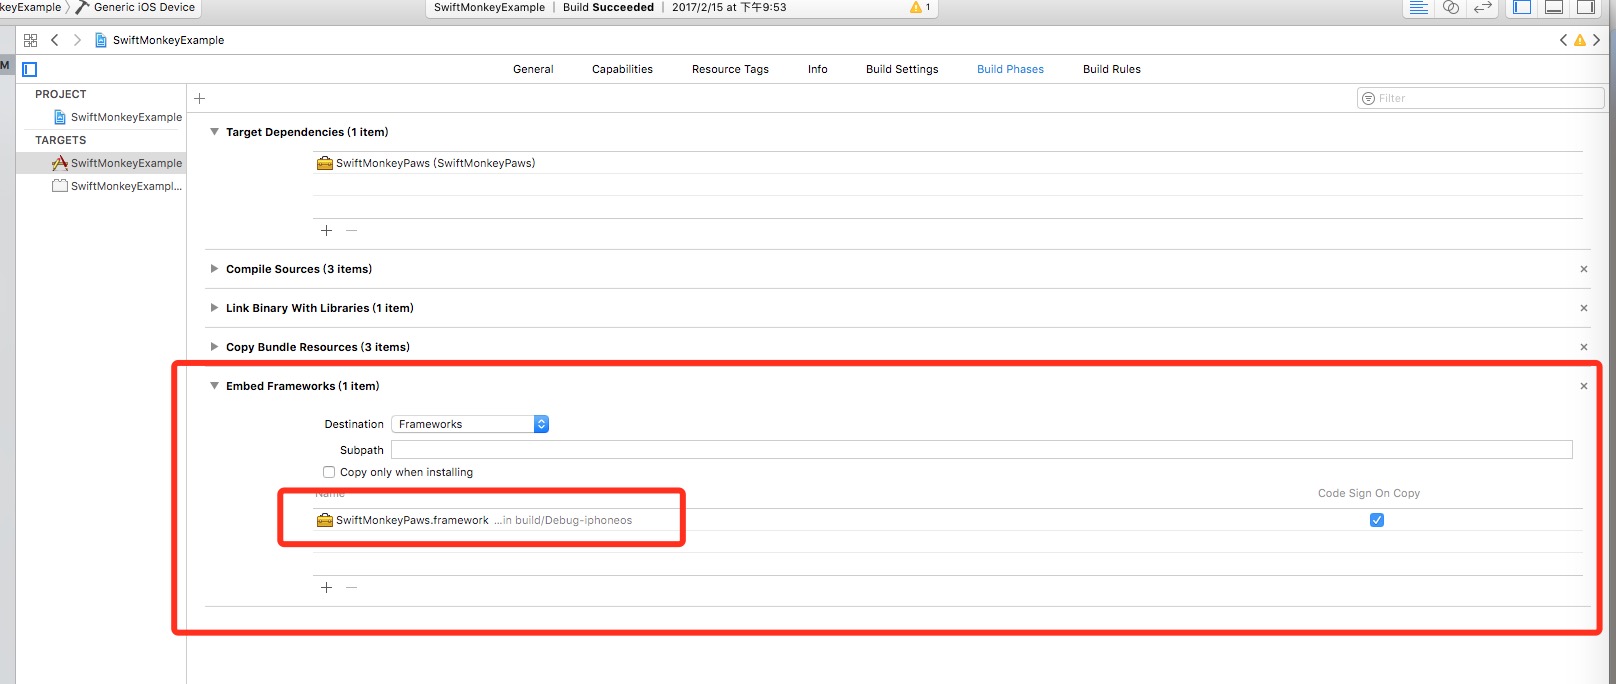
对于 SwiftMonkeyPaws,这个玩意就是让你的事件会有一个熊掌的反馈,这个得放到 app 的 target 里去,因为是 app 使用的。放到 Embedded Binaries 即可,如图:
然后在你应用里任何地方导入 SwiftMonkeyPaws,初始化它就可以了。
import SwiftMonkeyPawsvar paws: MonkeyPaws?func application(_ application: UIApplication, didFinishLaunchingWithOptions launchOptions: [UIApplicationLaunchOptionsKey: Any]?) -> Bool { if CommandLine.arguments.contains("--MonkeyPaws") { paws = MonkeyPaws(view: window!) } return true}SwiftMonkeyPaws的效果就是那些熊掌,如下图:

遇到的坑
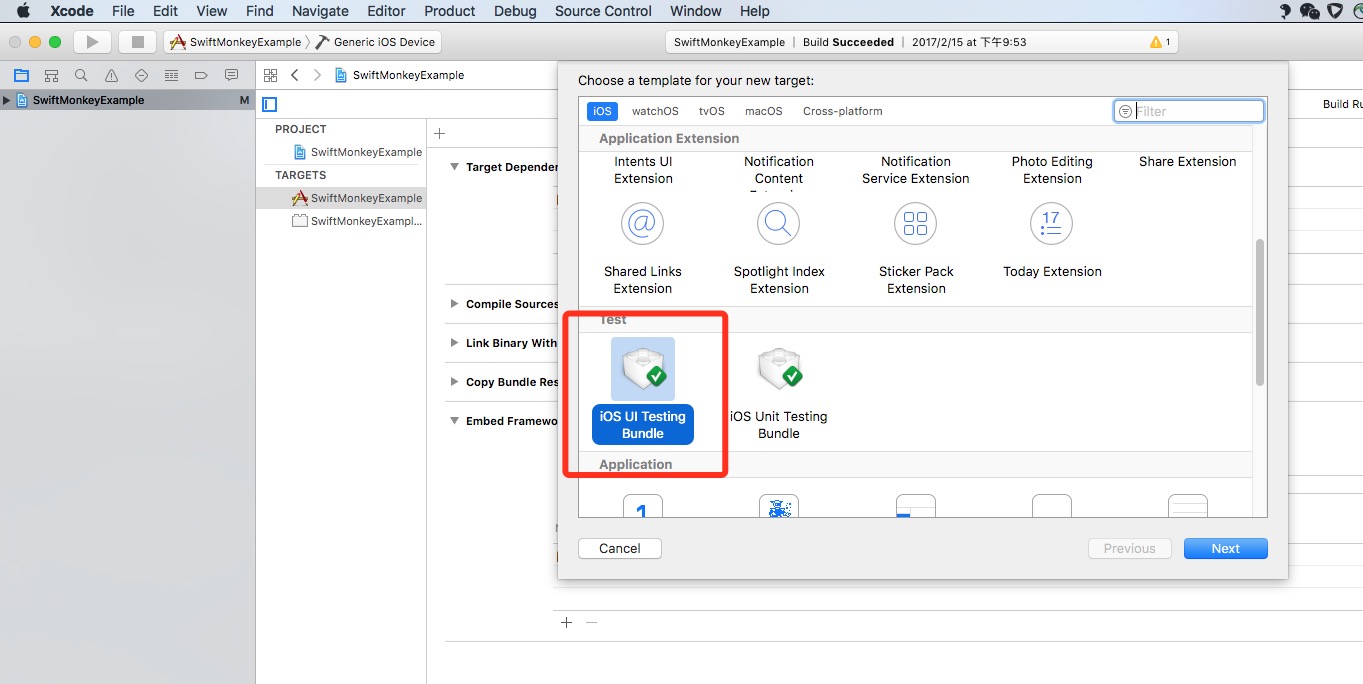
原来是 objc 的代码能否使用?
- 可以,只要新建一个 XCUITesting 的新项目即可。如图:
然后在,在测试用例里加入代码:
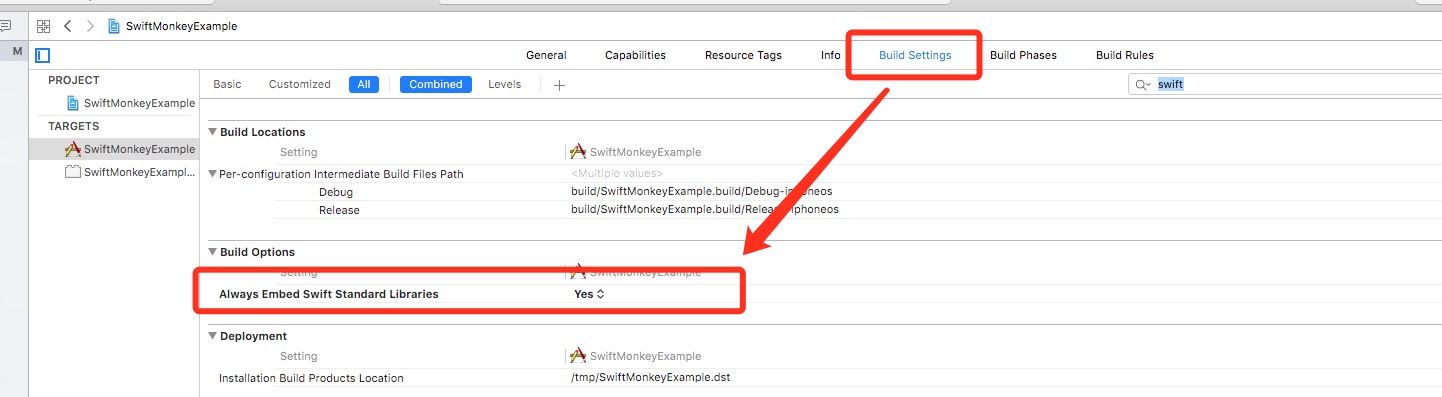
//// SwiftMonkeyExampleUITests.swift// SwiftMonkeyExampleUITests//// Created by Dag Agren on 07/11/2016.// Copyright © 2016 Zalando SE. All rights reserved.//import XCTestimport SwiftMonkeyclass SwiftMonkeyExampleUITests: XCTestCase { override func setUp() { super.setUp() XCUIApplication().launch() } override func tearDown() { super.tearDown() } func testMonkey() { let application = XCUIApplication() // Workaround for bug in Xcode 7.3. Snapshots are not properly updated // when you initially call app.frame, resulting in a zero-sized rect. // Doing a random query seems to update everything properly. // TODO: Remove this when the Xcode bug is fixed! _ = application.descendants(matching: .any).element(boundBy: 0).frame // Initialise the monkey tester with the current device // frame. Giving an explicit seed will make it generate // the same sequence of events on each run, and leaving it // out will generate a new sequence on each run. let monkey = Monkey(frame: application.frame) //let monkey = Monkey(seed: 123, frame: application.frame) // Add actions for the monkey to perform. We just use a // default set of actions for this, which is usually enough. // Use either one of these but maybe not both. // XCTest private actions seem to work better at the moment. // UIAutomation actions seem to work only on the simulator. monkey.addDefaultXCTestPrivateActions() //monkey.addDefaultUIAutomationActions() // Occasionally, use the regular XCTest functionality // to check if an alert is shown, and click a random // button on it. monkey.addXCTestTapAlertAction(interval: 100, application: application) // Run the monkey test indefinitely. monkey.monkeyAround() }}同时,别忘记在 build setting 里勾选上 Swift 的标准库,如图:
然后运行测试就可以了。
登录相关:
这事情其实不难,因为 iOS 的这个 monkey 其实就是你自己写的测试用例嘛。在开始之间用 XCUITesting 搞定登陆的事情就可以了。申明,这个我没试过,我是理论家。
一句话原理
其实你用就可以了,知道原理干嘛呢?人糊涂一点过的好一点。SwiftMonkey 把 XCTesting 的私有 API 拿出来用了,直接通过 XCEventGenerator 来模拟事件。所以如果你的应用植入了 SwiftMonkey 千万不要拿去提交 AppStore。
总结
感谢老外,让我们 copy from stackoverflow 和 copy from github 走的更好。SwiftMonkey 真机和模拟器都可以使用,亲测。
- iOS 测试 SwiftMonkey :iOS 上的 monkey
- iOS 测试 SwiftMonkey :iOS 上的 monkey
- ios稳定性测试工具-swiftMonkey
- iOS 上基于js的monkey的测试
- iOS客户端monkey测试
- IOS Monkey测试1
- IOS Monkey 测试
- IOS Monkey测试UI AutoMonkey
- IOS Monkey测试UI AutoMonkey
- 如何用monkey测试IOS
- !!! IOS monkey测试+命令行运行+日志收集
- IOS monkey测试+命令行运行+日志收集
- IOS Monkey测试UI AutoMonkey
- Android平台上Monkey测试的用法
- iOS上的一个自动化测试工具
- 分享同事整理的 关于"iOS 无限monkey测试解决方案" 的记录
- ios Monkey 的Macaca实现,Java代码
- Macaca Macaca 实现 IOS Monkey 测试 (支持 macaca2.x 版本)
- Linux之find命令详解
- 现代前端技术解析:现代前端交互框架
- Android基础:异步消息处理机制Handler
- Android 对ListView和RecyclerView的两个BaseAdapter封装分享
- 翻译:Distributed Representations of Words and Phrases and their Compositionality
- iOS 测试 SwiftMonkey :iOS 上的 monkey
- hdu4597
- iconv命令
- 7.8noip测试
- 实现List和Map数据的转换
- 我的小小学习笔记(5)之C++-----缺省函数
- Java8的HashMap详解(存储结构,功能实现,扩容优化,线程安全,遍历方法)
- C++输入输出格式--保留n位小数
- Shiro 采用注解方式无法进入自定义Realm类的授权方法 解决方案