spring配置文件加载
来源:互联网 发布:科比生涯数据图 编辑:程序博客网 时间:2024/06/03 20:11
Spring配置文件是集成了Spring框架的项目的核心,引擎从哪里开始,中间都执行了哪些操作,小谈一下它的执行流程。
容器先是加载web.xml
接着是applicationContext.xml在web.xml里的注册
一种方法是加入ContextLoaderServlet这个servlet

2 <param-name>contextConfigLocation</param-name>
3 <param-value>/WEB-INF/applicationContext.xml</param-value>
4 </context-param>
5 <servlet>
6 <servlet-name>context</servlet-name>
7 <servlet-class>
8 org.springframework.web.context.ContextLoaderServlet
9 </servlet-class>
10 <load-on-startup>0</load-on-startup>
11 </servlet>
还有一种是添加ContextLoaderListener这个监听器
2 <param-name>contextConfigLocation</param-name>
3 <param-value>/WEB-INF/applicationContext.xml</param-value>
4 </context-param>
5
6 <listener>
7 <listener-class>org.springframework.web.context.ContextLoaderListener</listener-class>
8 </listener>
ContextLoaderServlet和ContextLoaderListener都是先创建ContextLoader的一个对象,然后调用它的initWebApplicationContex方法初始化WebApplicationContext获得一个对象;
spring加载多个配置文件,在web.xml中
2 <param-name>contextConfigLocation</param-name>
3 <param-value>classpath*:spring/*.xml</param-value>
4 </context-param>
5
6 <servlet>
7 <servlet-name>SpringContextServlet</servlet-name>
8 <servlet-class>
9 org.springframework.web.context.ContextLoaderServlet
10 </servlet-class>
11 <load-on-startup>3</load-on-startup>
12 </servlet>
Spring配置文件是集成了Spring框架的项目的核心,引擎从哪里开始,中间都执行了哪些操作,小谈一下它的执行流程。
容器先是加载web.xml
接着是applicationContext.xml在web.xml里的注册
一种方法是加入ContextLoaderServlet这个servlet
2 <param-name>contextConfigLocation</param-name>
3 <param-value>/WEB-INF/applicationContext.xml</param-value>
4 </context-param>
5 <servlet>
6 <servlet-name>context</servlet-name>
7 <servlet-class>
8 org.springframework.web.context.ContextLoaderServlet
9 </servlet-class>
10 <load-on-startup>0</load-on-startup>
11 </servlet>
还有一种是添加ContextLoaderListener这个监听器
2 <param-name>contextConfigLocation</param-name>
3 <param-value>/WEB-INF/applicationContext.xml</param-value>
4 </context-param>
5
6 <listener>
7 <listener-class>org.springframework.web.context.ContextLoaderListener</listener-class>
8 </listener>
ContextLoaderServlet和ContextLoaderListener都是先创建ContextLoader的一个对象,然后调用它的initWebApplicationContex方法初始化WebApplicationContext获得一个对象;
spring加载多个配置文件,在web.xml中
2 <param-name>contextConfigLocation</param-name>
3 <param-value>classpath*:spring/*.xml</param-value>
4 </context-param>
5
6 <servlet>
7 <servlet-name>SpringContextServlet</servlet-name>
8 <servlet-class>
9 org.springframework.web.context.ContextLoaderServlet
10 </servlet-class>
11 <load-on-startup>3</load-on-startup>
12 </servlet>
一、Spring配置文件在类路径下面
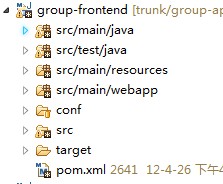
在Spring的java应用程序中,一般我们的Spring的配置文件都是放在放在类路径下面(也即编译后会进入到classes目录下)。
以下是我的项目,因为是用maven管理的,所以配置文件都放在“src/main/resources”目录下
这时候,在代码中可以通过
- ApplicationContext applicationContext = new ClassPathXmlApplicationContext("applicationContext.xml");
如果代码想用Junit测试框架来测试,则Spring提供了对Junit支持,还可以使用注解的方式:
- @RunWith(SpringJUnit4ClassRunner.class)
- @ContextConfiguration(locations={"classpath:applicationContext.xml"})
只需要在相应的Test类前面加上此两个注解(第二个注解用来指明Spring的配置文件位置),就可以在Junit Test类使用中Spring提供的依赖注入功能。
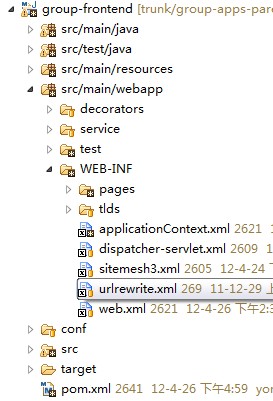
二、Spring配置文件在WEB-INF下面
当然在做J2EE开发时,有些人习惯把Spring文件放在WEB-INF目录(虽然更多人习惯放在类路径下面)下面;或者有些Spring配置文件是放在类路径下面,而有些又放在
WEB-INF目录下面,如下图。
这时候,在代码中就不可以使用ClassPathXmlApplicationContext来加载配置文件了,而应使用FileSystemXmlApplicationContext。
- ApplicationContext applicationContext = new FileSystemXmlApplicationContext("src/main/webapp/WEB-INF/applicationContext.xml");
然后获取相应的bean。
如果代码想用Junit测试框架来测试,则Spring提供了对Junit支持,还可以使用注解的方式:
- @RunWith(SpringJUnit4ClassRunner.class)
- @ContextConfiguration(locations={"file:src/main/webapp/WEB-INF/applicationContext.xml"})
下面是我的一个Spring管理下的Junit测试类:
- package com.sohu.group.service.external;
- import java.util.List;
- import org.junit.Test;
- import org.junit.runner.RunWith;
- import org.springframework.beans.factory.annotation.Autowired;
- import org.springframework.test.context.ContextConfiguration;
- import org.springframework.test.context.junit4.SpringJUnit4ClassRunner;
- @RunWith(SpringJUnit4ClassRunner.class)
- @ContextConfiguration({"file:src/main/webapp/WEB-INF/applicationContext.xml"})
- public class SuFriendServiceImplOverRMITest {
- @Autowired
- private SuFriendService suFriendService;
- @Test
- public void getUserFollowerListTest(){
- List list = suFriendService.getUserFollowerList("liug_talk@163.com");
- System.out.println("------"+list);
- }
- }
原文地址:http://blog.csdn.net/hbccgg/article/details/6358591
Spring配置文件是集成了Spring框架的项目的核心,引擎从哪里开始,中间都执行了哪些操作,小谈一下它的执行流程。
容器先是加载web.xml
接着是applicationContext.xml在web.xml里的注册
一种方法是加入ContextLoaderServlet这个servlet
2 <param-name>contextConfigLocation</param-name>
3 <param-value>/WEB-INF/applicationContext.xml</param-value>
4 </context-param>
5 <servlet>
6 <servlet-name>context</servlet-name>
7 <servlet-class>
8 org.springframework.web.context.ContextLoaderServlet
9 </servlet-class>
10 <load-on-startup>0</load-on-startup>
11 </servlet>
还有一种是添加ContextLoaderListener这个监听器
2 <param-name>contextConfigLocation</param-name>
3 <param-value>/WEB-INF/applicationContext.xml</param-value>
4 </context-param>
5
6 <listener>
7 <listener-class>org.springframework.web.context.ContextLoaderListener</listener-class>
8 </listener>
ContextLoaderServlet和ContextLoaderListener都是先创建ContextLoader的一个对象,然后调用它的initWebApplicationContex方法初始化WebApplicationContext获得一个对象;
spring加载多个配置文件,在web.xml中
2 <param-name>contextConfigLocation</param-name>
3 <param-value>classpath*:spring/*.xml</param-value>
4 </context-param>
5
6 <servlet>
7 <servlet-name>SpringContextServlet</servlet-name>
8 <servlet-class>
9 org.springframework.web.context.ContextLoaderServlet
10 </servlet-class>
11 <load-on-startup>3</load-on-startup>
12 </servlet>
- Spring配置文件加载外部配置文件
- spring配置文件加载
- spring多配置文件加载
- spring 加载配置文件
- Spring配置文件加载流程
- spring加载xml配置文件
- spring加载配置文件
- spring 配置文件加载方式
- spring配置文件加载流程
- 自定义加载Spring配置文件
- spring classpath 加载配置文件
- Spring:加载xml配置文件
- spring加载properties配置文件
- Spring加载配置文件
- Spring动态加载配置文件
- spring 加载配置文件
- 【spring】动态加载配置文件
- spring加载配置文件方式
- car identify Location
- 使用IDEA搭建Maven+SpringMVC+Spring+Hibernate环境
- POJ 1456 Supermarket
- JAVA继承
- leetcode 68. Text Justification
- spring配置文件加载
- css滚动条使用
- 全新的.NET解释器
- sql函数笔记
- 【第十一周项目3】图遍历算法实现(2)广度优先遍历(BFS)
- 停顿几秒
- 第十一周 项目4 — 利用遍历思想求解图问题(5)
- 关于javax.crypto.BadPaddingException: Blocktype错误的几种解决方法
- 对象和句柄