使用iText库创建PDF文件
来源:互联网 发布:淘宝产品组合策略案例 编辑:程序博客网 时间:2024/05/19 23:10
iText库概述
好的一面是,iText是开源的API,但是需要注意,虽然iText是开源,如果你出于商业目的使用它,仍然需要购买商业许可证。你可以从http://itextpdf.com上免费获取iText的Java类库,iText库非常强大,支持HTML、RTF、XML以及PDF文件的生产,你可以在文档中使用各种各样的字体,并且,还可以使用同样的代码生成上述不同类型的文件,这真的是一个很棒的特性,不是吗?
iText库包含一系列接口,可以生成不同字体的PDF文件,在PDF中创建表格,添加水印等等功能。当然,iText还有许许多多其它的功能,这将留给读者去探索。
如果你的项目是maven工程的话,在pom.xml文件中添加如下依赖,即可以给自己的应用程序添加iText库支持。
<dependency> <groupId>com.itextpdf</groupId> <artifactId>itextpdf</artifactId> <version>5.0.6</version></dependency>
当然,你也可以自己去下载最新的jar文件,然后添加到工程里,下载地址。
iText库常用类
让我们先列出几个接下来例子中要用到的重要的类,熟悉熟悉。
com.itextpdf.text.Document:这是iText库中最常用的类,它代表了一个pdf实例。如果你需要从零开始生成一个PDF文件,你需要使用这个Document类。首先创建(new)该实例,然后打开(open)它,并添加(add)内容,最后关闭(close)该实例,即可生成一个pdf文件。
com.itextpdf.text.Paragraph:表示一个缩进的文本段落,在段落中,你可以设置对齐方式,缩进,段落前后间隔等。
com.itextpdf.text.Chapter:表示PDF的一个章节,他通过一个Paragraph类型的标题和整形章数创建。
com.itextpdf.text.Font:这个类包含了所有规范好的字体,包括family of font,大小,样式和颜色,所有这些字体都被声明为静态常量。
com.itextpdf.text.List:表示一个列表;
com.itextpdf.text.pdf.PDFPTable:表示一个表格;
com.itextpdf.text.Anchor:表示一个锚,类似于HTML页面的链接。
com.itextpdf.text.pdf.PdfWriter:当这个PdfWriter被添加到PdfDocument后,所有添加到Document的内容将会写入到与文件或网络关联的输出流中。
com.itextpdf.text.pdf.PdfReader:用于读取PDF文件;
iText Hello World示例
让我们先从简单的“Hello World”程序开始,在这个程序中,我将会创建一个PDF文件,里面的内容为一条简单的语句。

package cn.edu.hdu.chenpi.cpdemo.itext;import java.io.FileNotFoundException;import java.io.FileOutputStream;import com.itextpdf.text.Document;import com.itextpdf.text.DocumentException;import com.itextpdf.text.Paragraph;import com.itextpdf.text.pdf.PdfWriter;public class JavaPdfHelloWorld { public static void main(String[] args) { Document document = new Document(); try { PdfWriter writer = PdfWriter.getInstance(document, new FileOutputStream("HelloWorld.pdf")); document.open(); document.add(new Paragraph("A Hello World PDF document.")); document.close(); writer.close(); } catch (DocumentException e) { e.printStackTrace(); } catch (FileNotFoundException e) { e.printStackTrace(); } }}
给PDF文件设置文件属性
这个例子将展示如何给PDF文件设置各种属性,如作者名字,创建日期,创建者,或者标题。
Document document = new Document(); try { PdfWriter writer = PdfWriter.getInstance(document, new FileOutputStream("SetAttributeExample.pdf")); document.open(); document.add(new Paragraph("Some content here")); //Set attributes here document.addAuthor("Lokesh Gupta"); document.addCreationDate(); document.addCreator("HowToDoInJava.com"); document.addTitle("Set Attribute Example"); document.addSubject("An example to show how attributes can be added to pdf files."); document.close(); writer.close(); } catch (Exception e) { e.printStackTrace(); }

PDF中添加图片
下面例子展示如何往PDF文件中添加图片。例子中图片来源包含了两种方式:本地图片或URL。
并且,我添加了一些代码,用于设置图片在文档中的位置。
Document document = new Document(); try { PdfWriter writer = PdfWriter.getInstance(document, new FileOutputStream("AddImageExample.pdf")); document.open(); document.add(new Paragraph("Image Example")); //Add Image Image image1 = Image.getInstance("C:\\temp.jpg"); //Fixed Positioning image1.setAbsolutePosition(100f, 550f); //Scale to new height and new width of image image1.scaleAbsolute(200, 200); //Add to document document.add(image1); String imageUrl = "http://www.eclipse.org/xtend/images/java8_logo.png"; Image image2 = Image.getInstance(new URL(imageUrl)); document.add(image2); document.close(); writer.close(); } catch (Exception e) { e.printStackTrace(); }
PDF中创建表格
以下代码展示了如何在PDF文件中创建表格
Document document = new Document(); try { PdfWriter writer = PdfWriter.getInstance(document, new FileOutputStream("AddTableExample.pdf")); document.open(); PdfPTable table = new PdfPTable(3); // 3 columns. table.setWidthPercentage(100); // Width 100% table.setSpacingBefore(10f); // Space before table table.setSpacingAfter(10f); // Space after table // Set Column widths float[] columnWidths = { 1f, 1f, 1f }; table.setWidths(columnWidths); PdfPCell cell1 = new PdfPCell(new Paragraph("Cell 1")); cell1.setBorderColor(BaseColor.BLUE); cell1.setPaddingLeft(10); cell1.setHorizontalAlignment(Element.ALIGN_CENTER); cell1.setVerticalAlignment(Element.ALIGN_MIDDLE); PdfPCell cell2 = new PdfPCell(new Paragraph("Cell 2")); cell2.setBorderColor(BaseColor.GREEN); cell2.setPaddingLeft(10); cell2.setHorizontalAlignment(Element.ALIGN_CENTER); cell2.setVerticalAlignment(Element.ALIGN_MIDDLE); PdfPCell cell3 = new PdfPCell(new Paragraph("Cell 3")); cell3.setBorderColor(BaseColor.RED); cell3.setPaddingLeft(10); cell3.setHorizontalAlignment(Element.ALIGN_CENTER); cell3.setVerticalAlignment(Element.ALIGN_MIDDLE); // To avoid having the cell border and the content overlap, if you // are having thick cell borders // cell1.setUserBorderPadding(true); // cell2.setUserBorderPadding(true); // cell3.setUserBorderPadding(true); table.addCell(cell1); table.addCell(cell2); table.addCell(cell3); document.add(table); document.close(); writer.close(); } catch (Exception e) { e.printStackTrace(); }

PDF中创建列表
这个例子将会帮助你理解iText库是如何在PDF文件里创建列表的。
 View Code
PDF中设置样式/格式化输出
让我们来看一些给PDF文件内容设置样式的例子,例子中包含了字体、章、节的使用。
Font blueFont = FontFactory.getFont(FontFactory.HELVETICA, 8, Font.NORMAL, new CMYKColor(255, 0, 0, 0)); Font redFont = FontFactory.getFont(FontFactory.COURIER, 12, Font.BOLD, new CMYKColor(0, 255, 0, 0)); Font yellowFont = FontFactory.getFont(FontFactory.COURIER, 14, Font.BOLD, new CMYKColor(0, 0, 255, 0)); Document document = new Document(); try { PdfWriter writer = PdfWriter.getInstance(document, new FileOutputStream("StylingExample.pdf")); document.open(); //document.add(new Paragraph("Styling Example")); //Paragraph with color and font styles Paragraph paragraphOne = new Paragraph("Some colored paragraph text", redFont); document.add(paragraphOne); //Create chapter and sections Paragraph chapterTitle = new Paragraph("Chapter Title", yellowFont); Chapter chapter1 = new Chapter(chapterTitle, 1); chapter1.setNumberDepth(0); Paragraph sectionTitle = new Paragraph("Section Title", redFont); Section section1 = chapter1.addSection(sectionTitle); Paragraph sectionContent = new Paragraph("Section Text content", blueFont); section1.add(sectionContent); document.add(chapter1); document.close(); writer.close(); } catch (Exception e) { e.printStackTrace(); }

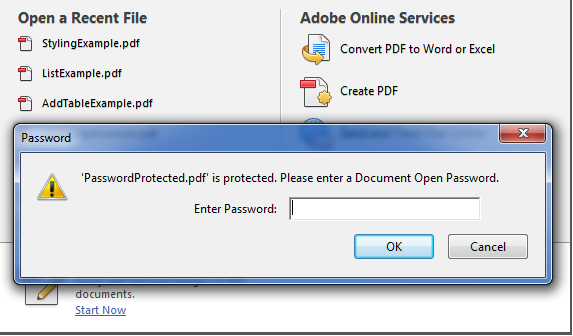
给PDF文件设置密码
接下来,让我们看下如何给pdf文件生产保护密码,如下,使用writer.setEncryption()方法即可给pdf文件设置密码。
private static String USER_PASSWORD = "password"; private static String OWNER_PASSWORD = "lokesh"; public static void main(String[] args) { try { OutputStream file = new FileOutputStream(new File("PasswordProtected.pdf")); Document document = new Document(); PdfWriter writer = PdfWriter.getInstance(document, file); writer.setEncryption(USER_PASSWORD.getBytes(), OWNER_PASSWORD.getBytes(), PdfWriter.ALLOW_PRINTING, PdfWriter.ENCRYPTION_AES_128); document.open(); document.add(new Paragraph("Password Protected pdf example !!")); document.close(); file.close(); } catch (Exception e) { e.printStackTrace(); } }
给PDF文件设置权限
在这个例子中,我将设置一些权限用于限制其它用户访问PDF文件,如下是一些权限设置值:
PdfWriter.ALLOW_PRINTING PdfWriter.ALLOW_ASSEMBLY PdfWriter.ALLOW_COPY PdfWriter.ALLOW_DEGRADED_PRINTING PdfWriter.ALLOW_FILL_IN PdfWriter.ALLOW_MODIFY_ANNOTATIONS PdfWriter.ALLOW_MODIFY_CONTENTS PdfWriter.ALLOW_SCREENREADERS
你可以通过对不同的值执行或操作来实现多权限设置,举个例子:PdfWriter.ALLOW_PRINTING | PdfWriter.ALLOW_COPY。
public static void main(String[] args) { try { OutputStream file = new FileOutputStream(new File( "LimitedAccess.pdf")); Document document = new Document(); PdfWriter writer = PdfWriter.getInstance(document, file); writer.setEncryption("".getBytes(), "".getBytes(), PdfWriter.ALLOW_PRINTING , //Only printing allowed; Try to copy text !! PdfWriter.ENCRYPTION_AES_128); document.open(); document.add(new Paragraph("Limited Access File !!")); document.close(); file.close(); } catch (Exception e) { e.printStackTrace(); } }
读取/修改已有的PDF文件
本例子将展示如何使用iText库实现PDF文件的读取和修改。在这个例子中,我将读取一个PDF文件,并往每一页添加一些内容。
public static void main(String[] args) { try { //Read file using PdfReader PdfReader pdfReader = new PdfReader("HelloWorld.pdf"); //Modify file using PdfReader PdfStamper pdfStamper = new PdfStamper(pdfReader, new FileOutputStream("HelloWorld-modified.pdf")); Image image = Image.getInstance("temp.jpg"); image.scaleAbsolute(100, 50); image.setAbsolutePosition(100f, 700f); for(int i=1; i<= pdfReader.getNumberOfPages(); i++) { PdfContentByte content = pdfStamper.getUnderContent(i); content.addImage(image); } pdfStamper.close(); } catch (IOException e) { e.printStackTrace(); } catch (DocumentException e) { e.printStackTrace(); }}

往HTTP response输出流中写入PDF内容
这是本篇文章的最后一个例子,我将会往HttpServletResponse的输出流中写入一些PDF内容。在CS环境中,当你需要将PDF文件转成流的形式的时候,这非常有用。
Document document = new Document();try{ response.setContentType("application/pdf"); PdfWriter.getInstance(document, response.getOutputStream()); document.open(); document.add(new Paragraph("howtodoinjava.com")); document.add(new Paragraph(new Date().toString())); //Add more content here}catch(Exception e){ e.printStackTrace();} document.close();}
iText库概述
好的一面是,iText是开源的API,但是需要注意,虽然iText是开源,如果你出于商业目的使用它,仍然需要购买商业许可证。你可以从http://itextpdf.com上免费获取iText的Java类库,iText库非常强大,支持HTML、RTF、XML以及PDF文件的生产,你可以在文档中使用各种各样的字体,并且,还可以使用同样的代码生成上述不同类型的文件,这真的是一个很棒的特性,不是吗?
iText库包含一系列接口,可以生成不同字体的PDF文件,在PDF中创建表格,添加水印等等功能。当然,iText还有许许多多其它的功能,这将留给读者去探索。
如果你的项目是maven工程的话,在pom.xml文件中添加如下依赖,即可以给自己的应用程序添加iText库支持。
<dependency> <groupId>com.itextpdf</groupId> <artifactId>itextpdf</artifactId> <version>5.0.6</version></dependency>
当然,你也可以自己去下载最新的jar文件,然后添加到工程里,下载地址。
iText库常用类
让我们先列出几个接下来例子中要用到的重要的类,熟悉熟悉。
com.itextpdf.text.Document:这是iText库中最常用的类,它代表了一个pdf实例。如果你需要从零开始生成一个PDF文件,你需要使用这个Document类。首先创建(new)该实例,然后打开(open)它,并添加(add)内容,最后关闭(close)该实例,即可生成一个pdf文件。
com.itextpdf.text.Paragraph:表示一个缩进的文本段落,在段落中,你可以设置对齐方式,缩进,段落前后间隔等。
com.itextpdf.text.Chapter:表示PDF的一个章节,他通过一个Paragraph类型的标题和整形章数创建。
com.itextpdf.text.Font:这个类包含了所有规范好的字体,包括family of font,大小,样式和颜色,所有这些字体都被声明为静态常量。
com.itextpdf.text.List:表示一个列表;
com.itextpdf.text.pdf.PDFPTable:表示一个表格;
com.itextpdf.text.Anchor:表示一个锚,类似于HTML页面的链接。
com.itextpdf.text.pdf.PdfWriter:当这个PdfWriter被添加到PdfDocument后,所有添加到Document的内容将会写入到与文件或网络关联的输出流中。
com.itextpdf.text.pdf.PdfReader:用于读取PDF文件;
iText Hello World示例
让我们先从简单的“Hello World”程序开始,在这个程序中,我将会创建一个PDF文件,里面的内容为一条简单的语句。
package cn.edu.hdu.chenpi.cpdemo.itext;import java.io.FileNotFoundException;import java.io.FileOutputStream;import com.itextpdf.text.Document;import com.itextpdf.text.DocumentException;import com.itextpdf.text.Paragraph;import com.itextpdf.text.pdf.PdfWriter;public class JavaPdfHelloWorld { public static void main(String[] args) { Document document = new Document(); try { PdfWriter writer = PdfWriter.getInstance(document, new FileOutputStream("HelloWorld.pdf")); document.open(); document.add(new Paragraph("A Hello World PDF document.")); document.close(); writer.close(); } catch (DocumentException e) { e.printStackTrace(); } catch (FileNotFoundException e) { e.printStackTrace(); } }}

给PDF文件设置文件属性
这个例子将展示如何给PDF文件设置各种属性,如作者名字,创建日期,创建者,或者标题。
Document document = new Document(); try { PdfWriter writer = PdfWriter.getInstance(document, new FileOutputStream("SetAttributeExample.pdf")); document.open(); document.add(new Paragraph("Some content here")); //Set attributes here document.addAuthor("Lokesh Gupta"); document.addCreationDate(); document.addCreator("HowToDoInJava.com"); document.addTitle("Set Attribute Example"); document.addSubject("An example to show how attributes can be added to pdf files."); document.close(); writer.close(); } catch (Exception e) { e.printStackTrace(); }
PDF中添加图片
下面例子展示如何往PDF文件中添加图片。例子中图片来源包含了两种方式:本地图片或URL。
并且,我添加了一些代码,用于设置图片在文档中的位置。
Document document = new Document(); try { PdfWriter writer = PdfWriter.getInstance(document, new FileOutputStream("AddImageExample.pdf")); document.open(); document.add(new Paragraph("Image Example")); //Add Image Image image1 = Image.getInstance("C:\\temp.jpg"); //Fixed Positioning image1.setAbsolutePosition(100f, 550f); //Scale to new height and new width of image image1.scaleAbsolute(200, 200); //Add to document document.add(image1); String imageUrl = "http://www.eclipse.org/xtend/images/java8_logo.png"; Image image2 = Image.getInstance(new URL(imageUrl)); document.add(image2); document.close(); writer.close(); } catch (Exception e) { e.printStackTrace(); }

PDF中创建表格
以下代码展示了如何在PDF文件中创建表格
Document document = new Document(); try { PdfWriter writer = PdfWriter.getInstance(document, new FileOutputStream("AddTableExample.pdf")); document.open(); PdfPTable table = new PdfPTable(3); // 3 columns. table.setWidthPercentage(100); // Width 100% table.setSpacingBefore(10f); // Space before table table.setSpacingAfter(10f); // Space after table // Set Column widths float[] columnWidths = { 1f, 1f, 1f }; table.setWidths(columnWidths); PdfPCell cell1 = new PdfPCell(new Paragraph("Cell 1")); cell1.setBorderColor(BaseColor.BLUE); cell1.setPaddingLeft(10); cell1.setHorizontalAlignment(Element.ALIGN_CENTER); cell1.setVerticalAlignment(Element.ALIGN_MIDDLE); PdfPCell cell2 = new PdfPCell(new Paragraph("Cell 2")); cell2.setBorderColor(BaseColor.GREEN); cell2.setPaddingLeft(10); cell2.setHorizontalAlignment(Element.ALIGN_CENTER); cell2.setVerticalAlignment(Element.ALIGN_MIDDLE); PdfPCell cell3 = new PdfPCell(new Paragraph("Cell 3")); cell3.setBorderColor(BaseColor.RED); cell3.setPaddingLeft(10); cell3.setHorizontalAlignment(Element.ALIGN_CENTER); cell3.setVerticalAlignment(Element.ALIGN_MIDDLE); // To avoid having the cell border and the content overlap, if you // are having thick cell borders // cell1.setUserBorderPadding(true); // cell2.setUserBorderPadding(true); // cell3.setUserBorderPadding(true); table.addCell(cell1); table.addCell(cell2); table.addCell(cell3); document.add(table); document.close(); writer.close(); } catch (Exception e) { e.printStackTrace(); }
PDF中创建列表
这个例子将会帮助你理解iText库是如何在PDF文件里创建列表的。
View Code
PDF中设置样式/格式化输出
让我们来看一些给PDF文件内容设置样式的例子,例子中包含了字体、章、节的使用。
Font blueFont = FontFactory.getFont(FontFactory.HELVETICA, 8, Font.NORMAL, new CMYKColor(255, 0, 0, 0)); Font redFont = FontFactory.getFont(FontFactory.COURIER, 12, Font.BOLD, new CMYKColor(0, 255, 0, 0)); Font yellowFont = FontFactory.getFont(FontFactory.COURIER, 14, Font.BOLD, new CMYKColor(0, 0, 255, 0)); Document document = new Document(); try { PdfWriter writer = PdfWriter.getInstance(document, new FileOutputStream("StylingExample.pdf")); document.open(); //document.add(new Paragraph("Styling Example")); //Paragraph with color and font styles Paragraph paragraphOne = new Paragraph("Some colored paragraph text", redFont); document.add(paragraphOne); //Create chapter and sections Paragraph chapterTitle = new Paragraph("Chapter Title", yellowFont); Chapter chapter1 = new Chapter(chapterTitle, 1); chapter1.setNumberDepth(0); Paragraph sectionTitle = new Paragraph("Section Title", redFont); Section section1 = chapter1.addSection(sectionTitle); Paragraph sectionContent = new Paragraph("Section Text content", blueFont); section1.add(sectionContent); document.add(chapter1); document.close(); writer.close(); } catch (Exception e) { e.printStackTrace(); }
给PDF文件设置密码
接下来,让我们看下如何给pdf文件生产保护密码,如下,使用writer.setEncryption()方法即可给pdf文件设置密码。
private static String USER_PASSWORD = "password"; private static String OWNER_PASSWORD = "lokesh"; public static void main(String[] args) { try { OutputStream file = new FileOutputStream(new File("PasswordProtected.pdf")); Document document = new Document(); PdfWriter writer = PdfWriter.getInstance(document, file); writer.setEncryption(USER_PASSWORD.getBytes(), OWNER_PASSWORD.getBytes(), PdfWriter.ALLOW_PRINTING, PdfWriter.ENCRYPTION_AES_128); document.open(); document.add(new Paragraph("Password Protected pdf example !!")); document.close(); file.close(); } catch (Exception e) { e.printStackTrace(); } }
给PDF文件设置权限
在这个例子中,我将设置一些权限用于限制其它用户访问PDF文件,如下是一些权限设置值:
PdfWriter.ALLOW_PRINTING PdfWriter.ALLOW_ASSEMBLY PdfWriter.ALLOW_COPY PdfWriter.ALLOW_DEGRADED_PRINTING PdfWriter.ALLOW_FILL_IN PdfWriter.ALLOW_MODIFY_ANNOTATIONS PdfWriter.ALLOW_MODIFY_CONTENTS PdfWriter.ALLOW_SCREENREADERS
你可以通过对不同的值执行或操作来实现多权限设置,举个例子:PdfWriter.ALLOW_PRINTING | PdfWriter.ALLOW_COPY。
public static void main(String[] args) { try { OutputStream file = new FileOutputStream(new File( "LimitedAccess.pdf")); Document document = new Document(); PdfWriter writer = PdfWriter.getInstance(document, file); writer.setEncryption("".getBytes(), "".getBytes(), PdfWriter.ALLOW_PRINTING , //Only printing allowed; Try to copy text !! PdfWriter.ENCRYPTION_AES_128); document.open(); document.add(new Paragraph("Limited Access File !!")); document.close(); file.close(); } catch (Exception e) { e.printStackTrace(); } }
读取/修改已有的PDF文件
本例子将展示如何使用iText库实现PDF文件的读取和修改。在这个例子中,我将读取一个PDF文件,并往每一页添加一些内容。
public static void main(String[] args) { try { //Read file using PdfReader PdfReader pdfReader = new PdfReader("HelloWorld.pdf"); //Modify file using PdfReader PdfStamper pdfStamper = new PdfStamper(pdfReader, new FileOutputStream("HelloWorld-modified.pdf")); Image image = Image.getInstance("temp.jpg"); image.scaleAbsolute(100, 50); image.setAbsolutePosition(100f, 700f); for(int i=1; i<= pdfReader.getNumberOfPages(); i++) { PdfContentByte content = pdfStamper.getUnderContent(i); content.addImage(image); } pdfStamper.close(); } catch (IOException e) { e.printStackTrace(); } catch (DocumentException e) { e.printStackTrace(); }}
往HTTP response输出流中写入PDF内容
这是本篇文章的最后一个例子,我将会往HttpServletResponse的输出流中写入一些PDF内容。在CS环境中,当你需要将PDF文件转成流的形式的时候,这非常有用。
Document document = new Document();try{ response.setContentType("application/pdf"); PdfWriter.getInstance(document, response.getOutputStream()); document.open(); document.add(new Paragraph("howtodoinjava.com")); document.add(new Paragraph(new Date().toString())); //Add more content here}catch(Exception e){ e.printStackTrace();} document.close();}
- 使用iText库创建PDF文件
- 使用iText创建PDF文件
- 使用iText输出PDF文件
- 使用iText操作pdf文件
- 使用iText操作pdf文件
- 使用iText操作pdf文件
- 使用iText操作pdf文件
- 使用iText操作pdf文件
- 使用iText操作pdf文件
- 使用iText操作pdf文件
- 使用iText操作pdf文件
- 使用 iText 操作pdf文件
- 使用Itext导出PDF文件
- 使用iText生成pdf文件
- 使用iText生成PDF文件
- 使用iText读取PDF文件
- 利用itext创建pdf表格文件(java)
- 利用java操作Itext创建pdf文件
- k-means算法、性能及优化
- ionic cordova-plugin-file-transfer插件 Skipping 'cordova-plugin-file' for android
- 数据库后台数据在前台ECharts显示
- 浅谈MOSFET驱动电路
- 将项目打包成jar,将jar还原成项目
- 使用iText库创建PDF文件
- Android低功耗蓝牙译文(五)
- Easyui的easyui-textbox输入框失焦事件获取输入值错误问题
- 用js来实现栈的对象
- IT风投
- Proxy Server源码及分析
- 算法设计与分析 模拟考 Percolation
- wx.navigateBack携带参数
- JAVA JNI在LIUNX下编译SO库或找不到SO库问题解决no xxx on java.library.path