Asp.net动态生成Word文档并填充数据 转
来源:互联网 发布:新疆电网络ipo 编辑:程序博客网 时间:2024/04/29 19:21
"
操作步骤如下:
首先要添加引用:
1、添加引用->COM->Microsoft Word 11.0 Object Library (注意不要错选了Microsoft Office 11.0 Object Library,我就是因为这个低级错误,浪费了好长时间。)
2、在.cs文件中添加 using Word;
代码如下:

public string CreateWordFile(string CheckedInfo){string message = "";try{Object Nothing = System.Reflection.Missing.Value;Directory.CreateDirectory("C:/CNSI"); //创建文件所在目录string name = "CNSI.doc";object filename = "C://CNSI//" + name; //文件保存路径//创建Word文档Word.Application WordApp = new Word.ApplicationClass();Word.Document WordDoc = WordApp.Documents.Add(ref Nothing, ref Nothing, ref Nothing, ref Nothing); //添加页眉WordApp.ActiveWindow.View.Type = WdViewType.wdOutlineView;WordApp.ActiveWindow.View.SeekView = WdSeekView.wdSeekPrimaryHeader;WordApp.ActiveWindow.ActivePane.Selection.InsertAfter("[页眉内容]");WordApp.Selection.ParagraphFormat.Alignment = Word.WdParagraphAlignment.wdAlignParagraphRight;//设置右对齐WordApp.ActiveWindow.View.SeekView = WdSeekView.wdSeekMainDocument;//跳出页眉设置WordApp.Selection.ParagraphFormat.LineSpacing = 15f;//设置文档的行间距/*WordDoc.PageSetup.Orientation = Word.WdOrientation.wdOrientLandscape; //设置页面为纵向 WordDoc.PageSetup.PageHeight = WordApp.CentimetersToPoints(21F); WordDoc.PageSetup.PageWidth = WordApp.CentimetersToPoints(29.7F); WordDoc.PageSetup.TopMargin = 57; //设置上边距 WordDoc.PageSetup.BottomMargin = 57;//设置下边距 WordDoc.PageSetup.LeftMargin = 57;//设置左边距 WordDoc.PageSetup.RightMargin = 57;//设置右边距*///移动焦点并换行object count = 14;object WdLine = Word.WdUnits.wdLine;//换一行;WordApp.Selection.MoveDown(ref WdLine, ref count, ref Nothing);//移动焦点WordApp.Selection.TypeParagraph();//插入段落//文档中创建表格Word.Table newTable = WordDoc.Tables.Add(WordApp.Selection.Range, 12, 3, ref Nothing, ref Nothing);//设置表格样式newTable.Borders.OutsideLineStyle = Word.WdLineStyle.wdLineStyleThickThinLargeGap;newTable.Borders.InsideLineStyle = Word.WdLineStyle.wdLineStyleSingle;newTable.Columns[1].Width = 100f;newTable.Columns[2].Width = 220f;newTable.Columns[3].Width = 105f;//填充表格内容newTable.Cell(1, 1).Range.Text = "产品详细信息表";newTable.Cell(1, 1).Range.Bold = 2;//设置单元格中字体为粗体//合并单元格newTable.Cell(1, 1).Merge(newTable.Cell(1, 3));WordApp.Selection.Cells.VerticalAlignment = Word.WdCellVerticalAlignment.wdCellAlignVerticalCenter;//垂直居中WordApp.Selection.ParagraphFormat.Alignment = Word.WdParagraphAlignment.wdAlignParagraphCenter;//水平居中 //填充表格内容newTable.Cell(2, 1).Range.Text = "产品基本信息";newTable.Cell(2, 1).Range.Font.Color = Word.WdColor.wdColorDarkBlue;//设置单元格内字体颜色//合并单元格newTable.Cell(2, 1).Merge(newTable.Cell(2, 3));WordApp.Selection.Cells.VerticalAlignment = Word.WdCellVerticalAlignment.wdCellAlignVerticalCenter; //填充表格内容newTable.Cell(3, 1).Range.Text = "品牌名称:";newTable.Cell(3, 2).Range.Text = CheckedInfo;//纵向合并单元格newTable.Cell(3, 3).Select();//选中一行object moveUnit = Word.WdUnits.wdLine;object moveCount = 5;object moveExtend = Word.WdMovementType.wdExtend;WordApp.Selection.MoveDown(ref moveUnit, ref moveCount, ref moveExtend);WordApp.Selection.Cells.Merge();//插入图片string FileName = @"C:\1.jpg";//图片所在路径object LinkToFile = false;object SaveWithDocument = true;object Anchor = WordDoc.Application.Selection.Range;WordDoc.Application.ActiveDocument.InlineShapes.AddPicture(FileName, ref LinkToFile, ref SaveWithDocument, ref Anchor);WordDoc.Application.ActiveDocument.InlineShapes[1].Width = 100f;//图片宽度WordDoc.Application.ActiveDocument.InlineShapes[1].Height = 100f;//图片高度//将图片设置为四周环绕型Word.Shape s = WordDoc.Application.ActiveDocument.InlineShapes[1].ConvertToShape();s.WrapFormat.Type = Word.WdWrapType.wdWrapSquare;newTable.Cell(12, 1).Range.Text = "产品特殊属性";newTable.Cell(12, 1).Merge(newTable.Cell(12, 3));//在表格中增加行WordDoc.Content.Tables[1].Rows.Add(ref Nothing); WordDoc.Paragraphs.Last.Range.Text = "文档创建时间:" + DateTime.Now.ToString();//“落款”WordDoc.Paragraphs.Last.Alignment = Word.WdParagraphAlignment.wdAlignParagraphRight; //文件保存WordDoc.SaveAs(ref filename, ref Nothing, ref Nothing, ref Nothing, ref Nothing, ref Nothing, ref Nothing, ref Nothing, ref Nothing, ref Nothing, ref Nothing, ref Nothing, ref Nothing, ref Nothing, ref Nothing, ref Nothing);WordDoc.Close(ref Nothing, ref Nothing, ref Nothing);WordApp.Quit(ref Nothing, ref Nothing, ref Nothing);message = name + "文档生成成功,以保存到C:CNSI下";}catch{message = "文件导出异常!";}return message;}
有几点需要注意的地方如下:
1、在调整合并后的单元格中的内容的位置时,原先我是先向单元格中写数据,然后选中单元格,再合并单元格,最后调整水平和垂直位置。但是结果发现,不管我怎么调位置,单元格的内容始终都显示在最下方。经过一番尝试后,我发现应该先合并单元格,再往合并后的单元格中添加数据,然后选中合并后的单元格,最后设置水平位置和垂直位置。这样才可行。举例如下:
newTable.Cell(12, 1).Merge(newTable.Cell(18, 1));
newTable.Cell(12, 1).Range.Text = "范例";
newTable.Cell(12, 1).Select();
WordApp.Selection.Cells.VerticalAlignment = Word.WdCellVerticalAlignment.wdCellAlignVerticalCenter; //垂直居中
WordApp.Selection.ParagraphFormat.Alignment = Word.WdParagraphAlignment.wdAlignParagraphCenter; //水平居中
2、网站发布前,Word导出正常,但发布之后就Word导出异常,则可能是权限的问题,最简单的解决办法是在<system.web></system.web>之间添加如下语句:
<identity impersonate="true" userName="你自己的账户" password="密码"/>,注意密码不能为空或者是弱密码。
3、如果出现如下错误:
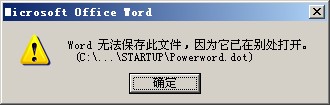
"word 无法保存此文件, 因为它已在别处打开。(C:\...\STARTUP\Powerword.dot)"
或
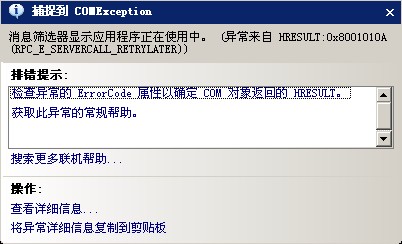
"捕捉到COMException
消息筛选器显示应用程序正在使用中。(异常来自HRESULT:0X8001010A(RPC_E_SERVERCALL_RETRYLATER))
"
请结束winword.exe进程.
"
- Asp.net动态生成Word文档并填充数据 转
- Asp.net动态生成Word文档并填充数据
- .net 动态生成Word文档并填充数据
- C#也能动态生成Word文档并填充数据
- C#也能动态生成Word文档并填充数据
- C#也能动态生成Word文档并填充数据
- C#也能动态生成Word文档并填充数据
- C#也能动态生成Word文档并填充数据
- C#也能动态生成Word文档并填充数据
- C#动态生成Word文档并填充数据
- C#动态生成”Word文档“并填充数据
- C#动态生成Word文档并填充数据
- C#也能动态生成Word文档并填充数据
- C#也能动态生成Word文档并填充数据
- C#动态生成Word文档并填充数据
- C#也能动态生成Word文档并填充数据
- C#动态生成Word文档并填充数据(一)
- C#动态生成Word文档并填充数据(二)
- JAVA 回调实例
- 爱的另一种诠释
- 高精度除法
- c++ 中的 new ,opertaor new和placement new
- 工具类代码
- Asp.net动态生成Word文档并填充数据 转
- ReportStudio入门教程(七) - 计算项
- leetcode: Linked List Cycle
- Linux文件共享(六)——描述符传递
- java第二课了解java
- 数据库报错总结
- IP地址的分类
- Objective-C语法之异常处理
- 淘宝技术发展