使用MyEclipse构建MAVEN项目
来源:互联网 发布:水果连连看软件 编辑:程序博客网 时间:2024/05/19 08:05
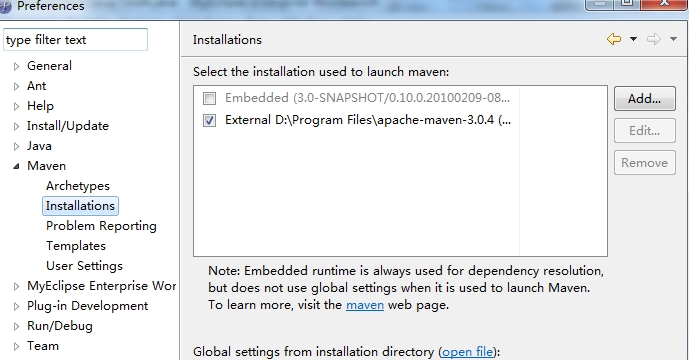
这里用的是MyEclpise的自带的MAVEN插件。
Maven最好配置成你自己安装的那个,MyEclipse自带会有些许Bug。
用nexus代理Maven的中央仓库,setting.xml的配置文件修改内容如下:
打下MyEclipse新建工程的界面,选择Maven下的Maven Project,打开如下图的向导:
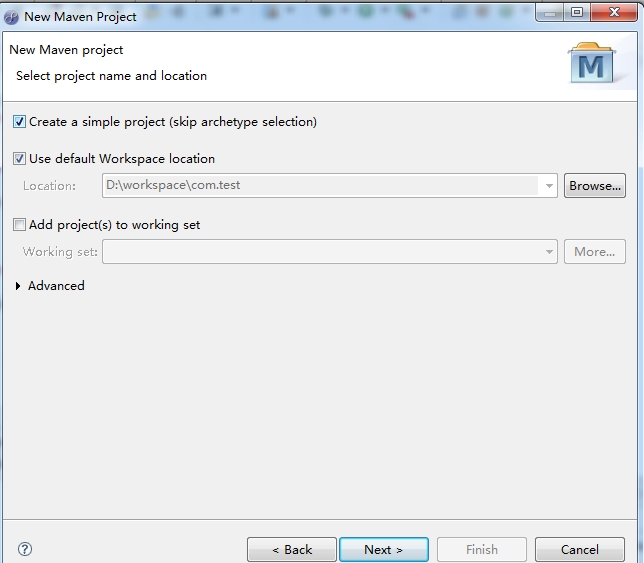
这里我们要选中create a simple project。
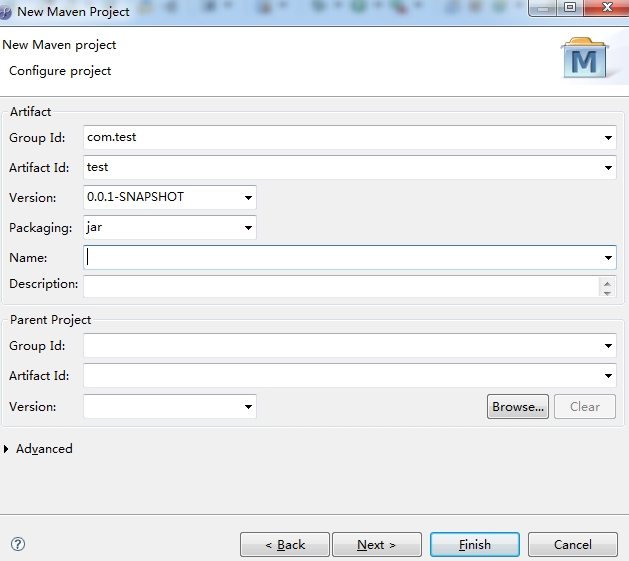
点击下一步,填写GAV相关内容。
点击完成后,我们就已经成功创建了一个Maven project了。
工程的默认目录结构如下:
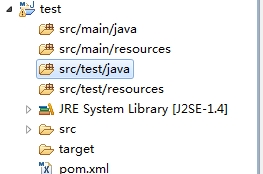
所有的Java源文件都要写在src/main/java目录下,所有的测试类都要写在src/test/java下面,这是Maven的默认值。
此时,pom.xml里只有默认的属性
这时我们加入junit的支持,新建一个测试类。
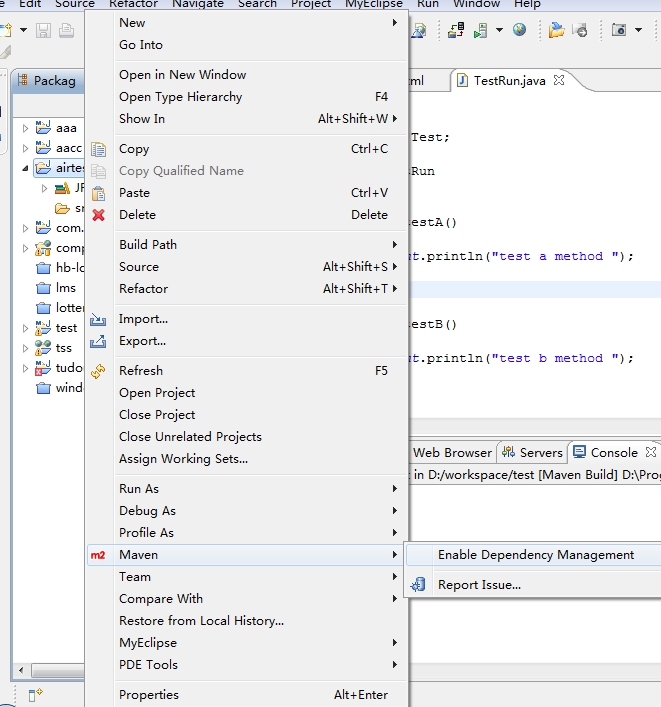
在项目上右键Maven-Add Dependency,显示如下界面:
输入junit加入测试支持类库。
在src/test/java下新建一个测试类如下:
右键Run As ----- Maven test,进行测试,显示结果如下:
[INFO] Scanning for projects
[INFO]
[INFO] ------------------------------------------------------------------------
[INFO] Building test 0.0.1-SNAPSHOT
[INFO] ------------------------------------------------------------------------
[INFO]
[INFO] --- maven-resources-plugin:2.5:resources (default-resources) @ test ---
[debug] execute contextualize
[WARNING] Using platform encoding (GBK actually) to copy filtered resources, i.e. build is platform dependent!
[INFO] Copying 0 resource
[INFO]
[INFO] --- maven-compiler-plugin:2.3.2:compile (default-compile) @ test ---
[INFO] Nothing to compile - all classes are up to date
[INFO]
[INFO] --- maven-resources-plugin:2.5:testResources (default-testResources) @ test ---
[debug] execute contextualize
[WARNING] Using platform encoding (GBK actually) to copy filtered resources, i.e. build is platform dependent!
[INFO] Copying 0 resource
[INFO]
[INFO] --- maven-compiler-plugin:2.3.2:testCompile (default-testCompile) @ test ---
[INFO] Nothing to compile - all classes are up to date
[INFO]
[INFO] --- maven-surefire-plugin:2.10:test (default-test) @ test ---
[INFO] Surefire report directory: D:\workspace\test\target\surefire-reports
-------------------------------------------------------
T E S T S
-------------------------------------------------------
Running com.TestRun
test a method
test b method
Tests run: 2, Failures: 0, Errors: 0, Skipped: 0, Time elapsed: 0.071 sec
Results :
Tests run: 2, Failures: 0, Errors: 0, Skipped: 0
[INFO] ------------------------------------------------------------------------
[INFO] BUILD SUCCESS
[INFO] ------------------------------------------------------------------------
[INFO] Total time: 1.847s
[INFO] Finished at: Tue Sep 11 14:20:59 CST 2012
[INFO] Final Memory: 3M/6M
[INFO] ------------------------------------------------------------------------ok,一个基本的maven项目已经构建完成。我们还可以将现存的java项目利用myclipse方便的转换成maven project,此部分内容我们在下一节里讨论。
Maven最好配置成你自己安装的那个,MyEclipse自带会有些许Bug。
用nexus代理Maven的中央仓库,setting.xml的配置文件修改内容如下:
<mirrors>
<mirror>
<id>nexus</id>
<mirrorOf>*</mirrorOf>
<name>Nexus Mirror</name>
<url>http://localhost:8081/nexus/content/groups/public</url>
</mirror>
</mirrors>
<profiles>
<profile>
<id>nexus</id>
<repositories>
<repository>
<id>central</id>
<url>http://central</url>
<releases><enabled>true</enabled></releases>
<snapshots><enabled>true</enabled></snapshots>
</repository>
</repositories>
<pluginRepositories>
<pluginRepository>
<id>central</id>
<url>http://central</url>
<releases><enabled>true</enabled></releases>
<snapshots><enabled>true</enabled></snapshots>
</pluginRepository>
</pluginRepositories>
</profile>
</profiles>
<activeProfiles>
<activeProfile>nexus</activeProfile>
</activeProfiles>
http://localhost:8081/nexus/content/groups/public 是仓库组的地址。<mirror>
<id>nexus</id>
<mirrorOf>*</mirrorOf>
<name>Nexus Mirror</name>
<url>http://localhost:8081/nexus/content/groups/public</url>
</mirror>
</mirrors>
<profiles>
<profile>
<id>nexus</id>
<repositories>
<repository>
<id>central</id>
<url>http://central</url>
<releases><enabled>true</enabled></releases>
<snapshots><enabled>true</enabled></snapshots>
</repository>
</repositories>
<pluginRepositories>
<pluginRepository>
<id>central</id>
<url>http://central</url>
<releases><enabled>true</enabled></releases>
<snapshots><enabled>true</enabled></snapshots>
</pluginRepository>
</pluginRepositories>
</profile>
</profiles>
<activeProfiles>
<activeProfile>nexus</activeProfile>
</activeProfiles>
打下MyEclipse新建工程的界面,选择Maven下的Maven Project,打开如下图的向导:
这里我们要选中create a simple project。
点击下一步,填写GAV相关内容。
点击完成后,我们就已经成功创建了一个Maven project了。
工程的默认目录结构如下:
所有的Java源文件都要写在src/main/java目录下,所有的测试类都要写在src/test/java下面,这是Maven的默认值。
此时,pom.xml里只有默认的属性
<project xmlns="http://maven.apache.org/POM/4.0.0" xmlns:xsi="http://www.w3.org/2001/XMLSchema-instance" xsi:schemaLocation="http://maven.apache.org/POM/4.0.0 http://maven.apache.org/maven-v4_0_0.xsd">
<modelVersion>4.0.0</modelVersion>
<groupId>com.test</groupId>
<artifactId>test</artifactId>
<version>0.0.1-SNAPSHOT</version>
</project>
这是最精简的pom.xml了。<modelVersion>4.0.0</modelVersion>
<groupId>com.test</groupId>
<artifactId>test</artifactId>
<version>0.0.1-SNAPSHOT</version>
</project>
这时我们加入junit的支持,新建一个测试类。
在项目上右键Maven-Add Dependency,显示如下界面:
输入junit加入测试支持类库。
在src/test/java下新建一个测试类如下:
package com;
import org.junit.Test;
public class TestRun
{
@Test
public void testA()
{
System.out.println("test a method ");
}
@Test
public void testB()
{
System.out.println("test b method ");
}
}
[INFO] Scanning for projects
[INFO]
[INFO] ------------------------------------------------------------------------
[INFO] Building test 0.0.1-SNAPSHOT
[INFO] ------------------------------------------------------------------------
[INFO]
[INFO] --- maven-resources-plugin:2.5:resources (default-resources) @ test ---
[debug] execute contextualize
[WARNING] Using platform encoding (GBK actually) to copy filtered resources, i.e. build is platform dependent!
[INFO] Copying 0 resource
[INFO]
[INFO] --- maven-compiler-plugin:2.3.2:compile (default-compile) @ test ---
[INFO] Nothing to compile - all classes are up to date
[INFO]
[INFO] --- maven-resources-plugin:2.5:testResources (default-testResources) @ test ---
[debug] execute contextualize
[WARNING] Using platform encoding (GBK actually) to copy filtered resources, i.e. build is platform dependent!
[INFO] Copying 0 resource
[INFO]
[INFO] --- maven-compiler-plugin:2.3.2:testCompile (default-testCompile) @ test ---
[INFO] Nothing to compile - all classes are up to date
[INFO]
[INFO] --- maven-surefire-plugin:2.10:test (default-test) @ test ---
[INFO] Surefire report directory: D:\workspace\test\target\surefire-reports
-------------------------------------------------------
T E S T S
-------------------------------------------------------
Running com.TestRun
test a method
test b method
Tests run: 2, Failures: 0, Errors: 0, Skipped: 0, Time elapsed: 0.071 sec
Results :
Tests run: 2, Failures: 0, Errors: 0, Skipped: 0
[INFO] ------------------------------------------------------------------------
[INFO] BUILD SUCCESS
[INFO] ------------------------------------------------------------------------
[INFO] Total time: 1.847s
[INFO] Finished at: Tue Sep 11 14:20:59 CST 2012
[INFO] Final Memory: 3M/6M
[INFO] ------------------------------------------------------------------------
0 0
- 使用MyEclipse构建MAVEN项目
- 使用MyEclipse构建MAVEN项目
- 使用MyEclipse构建MAVEN项目
- maven(1)------使用myeclipse构建maven项目
- 使用MyEclipse构建MAVEN项目(WEB项目)
- myeclipse使用maven构建struts2项目详解
- 使用myeclipse构建maven web项目
- myeclipse使用Maven构建web项目
- maven入门及使用myeclipse构建maven项目
- maven入门及myeclipse中使用maven构建项目
- maven安装及使用myeclipse构建maven项目
- maven入门及使用myeclipse构建maven项目
- maven安装及使用myeclipse构建maven项目
- 使用MyEclipse构建MAVEN项目(非WEB项目)
- 使用myeclipse构建maven项目(web项目)
- Maven+SVN+Myeclipse项目构建
- myeclipse 构建springMvc maven项目
- MyEclipse+Maven构建Web项目
- jsp页面点击删除按钮弹出删除确认
- 【C语言】02-C语言字符串长度和OC字符串对象长度计算的比较
- 黑马程序员_Java高新技术_泛型
- Linux多线程编程—初步
- 第十六周项目二——用指针玩字符串(3.求字符串str的长度并返回)
- 使用MyEclipse构建MAVEN项目
- spring.net中HibernateTemplate查询若干方法简介
- x86 详解Linux启动工程
- Android socket 编程 实现消息推送(二)
- apache架构
- 第十六周 项目二--用指针玩字符串(2.2.2去除字符串中特定字符--指针作形参)
- 算法与数据结构面试题(7)-链表“香蕉”问题
- hibernate调用删除和保存函数出错
- File I/O source code--Pipe 相关方法阅读