How to show a Power View report at the SharePoint page (Silverlight Web Part)
来源:互联网 发布:6u网络机柜 编辑:程序博客网 时间:2024/04/28 02:32
How to show a Power View report at the SharePoint page (Silverlight Web Part)
转自:http://plexhosted.com/billing/knowledgebase/297/How-to-show-a-Power-View-report-at-the-SharePoint-page-Silverlight-Web-Part.html
Synopsis
This guide will show you how show a Power View report at the SharePoint 2013 page using Silverlight Web Part.Applicable to
All PlexHosted accounts subscribed to SharePoint 2013 Business Intelligence plan.Prerequisite
- a PlexHosted SharePoint 2013 Business Intelligence account
- a PlexHosted SharePoint 2013 Business Intelligence site
How to
- Login to the SharePoint 2013 site as an administrator.
- Navigate to the page on which you want to show your Power View report or create a new page.
- If you have created new page, go to the Insert tab and click onWeb Part. If want to add a Power View Report to the existing page, first check out this page, and click the Edit button on the ribbon.
- From the Media and Content category choose Silverlight Web Part and clickAdd.
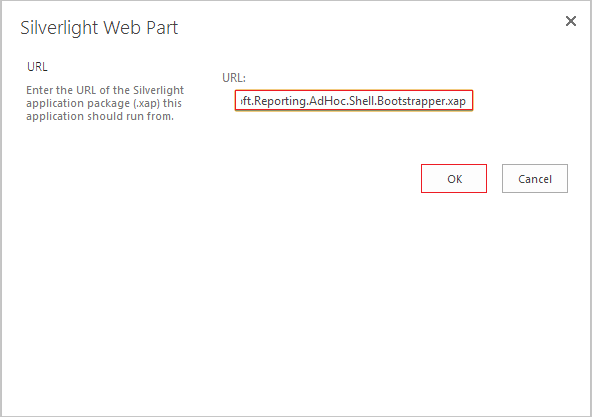
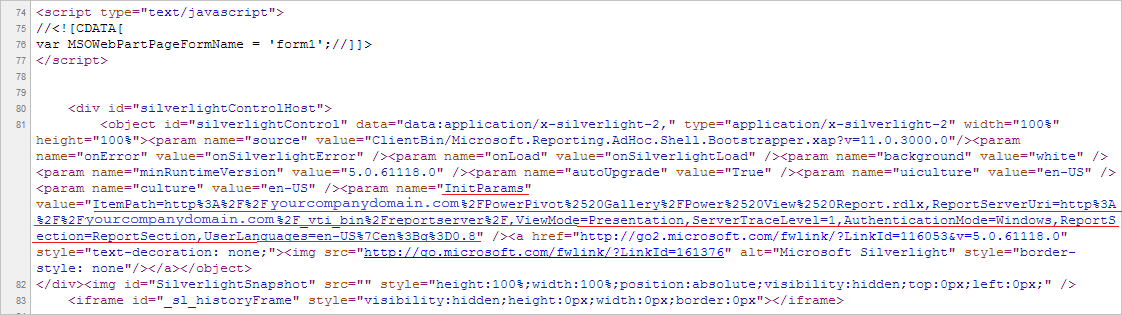
- You will be prompted to enter the URL path for the Silverlight application. (That setting and address is also available when editing web part settings in the Application section when you click on the ‘Configure…’ button.) Enter the URL and clickOK. The URL path to the Silverlight application is the following:
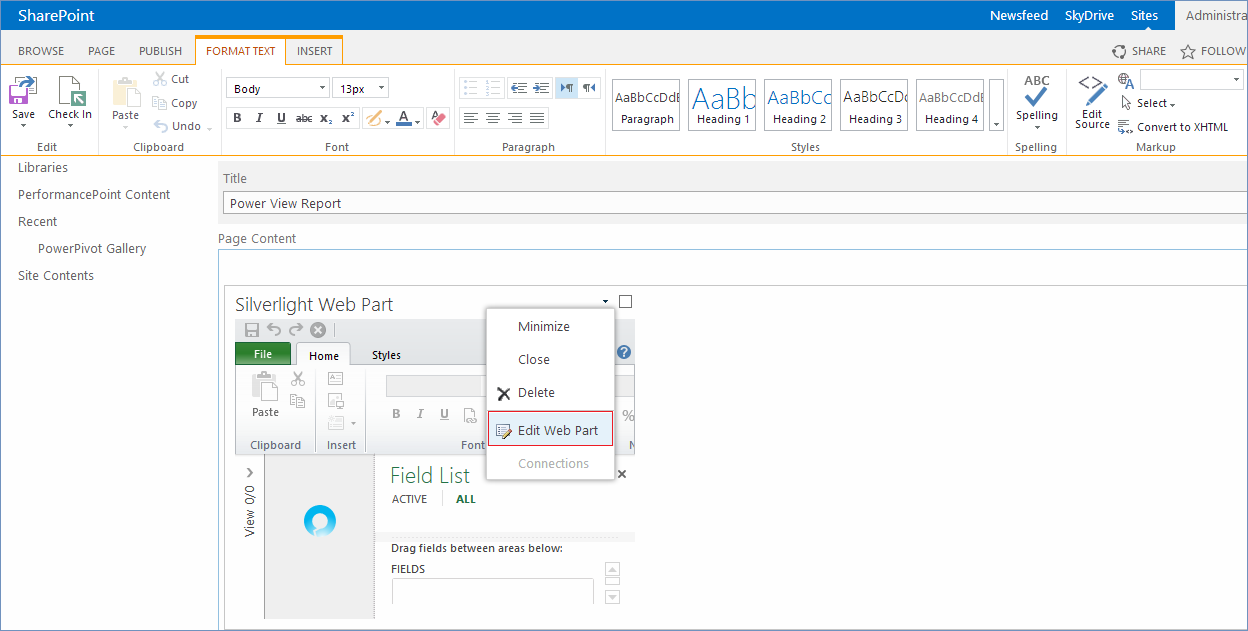
http://yourcompanydomain.com/_layouts/ReportServer/ClientBin/Microsoft.Reporting.AdHoc.Shell.Bootstrapper.xap- SharePoint will load the Silverlight component. If it fails – no worries, there are several settings that need to be entered to make it work. Click on"Edit Web Part" from the Web Part drop down menu.
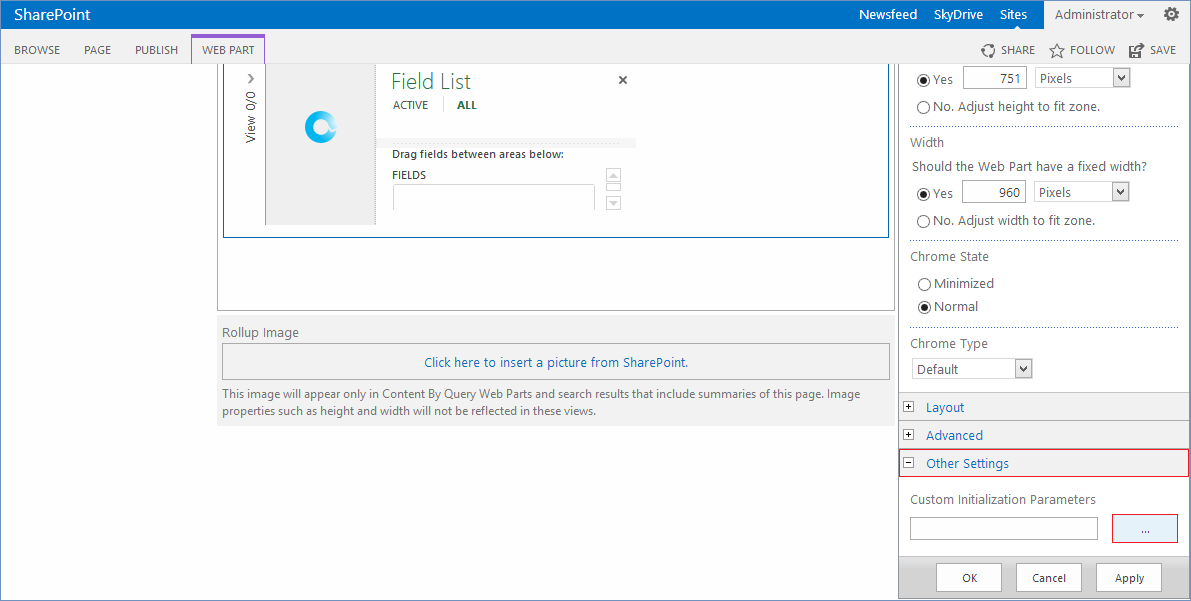
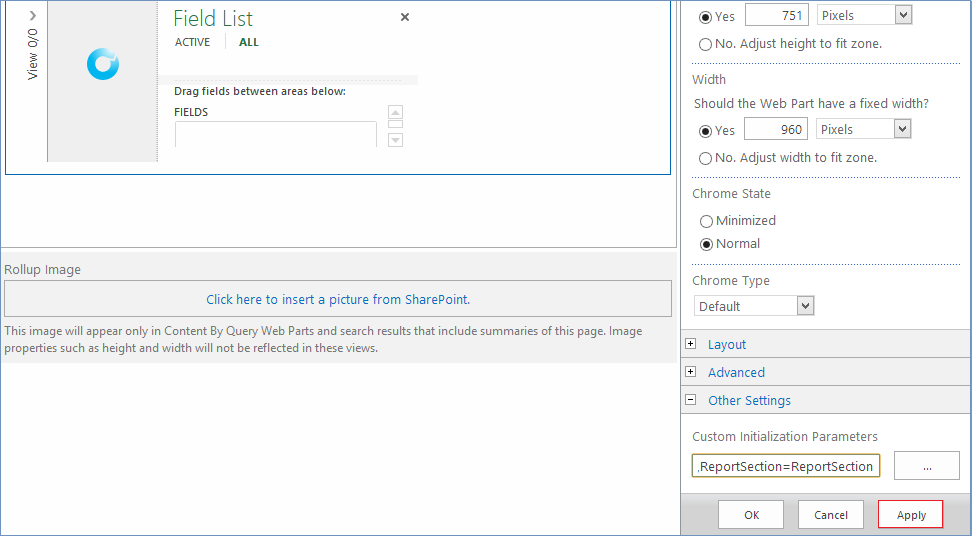
- Specify the title, height and width for the web part in the Appearance section.
- Under Other Settings click on the button with the ellipsis (...) near theCustom Initialization Parameters box.
- In the text editor enter the initialization parameters for your report. The initialization parameters have the following format:
ItemPath=http://yourcompanydomain.com/yoursite/YourReport.rdlx,ReportServerUri=http://yourcompanydomain.com/_vti_bin/report
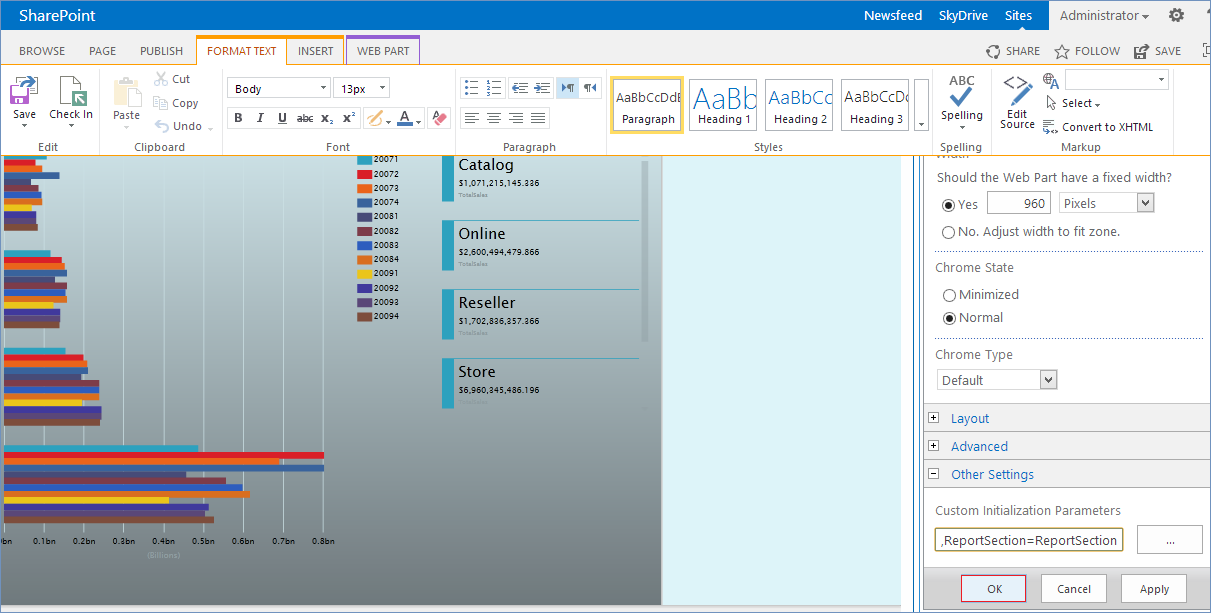
We have used the following parameters in our web part:ItemPath=http://yourcompanydomain.com/PowerPivot%2520Gallery%2FPower%2520View%2520Report.rdlx,ReportServerUri=http://yourcompanydomain.com/_vti_bin/reportserver/,ViewMode=Presentation,ServerTraceLevel=1,AuthenticationMode=Windows,ReportSection=ReportSection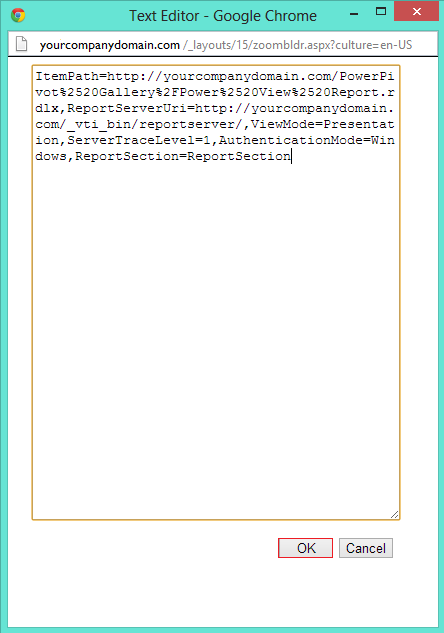
Additionally, you can find these parameters if you open the "View Source" of the Power View editor in browser. There you can see the "InitParams" and the necessary parameters after it. (If you have used this method, make sure that you have replaced the encoded characters like %20 or %2F to the appropriate symbols – space, / etc.)- Click Apply to make sure that your initialization parameters work and you can see the report.
- If everything works, click OK.
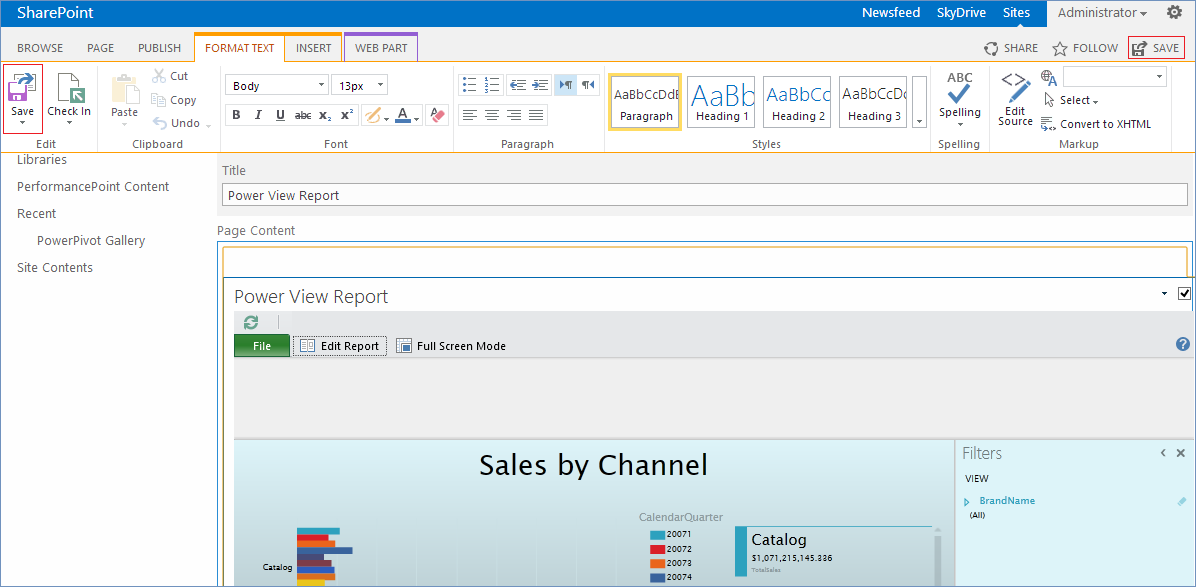
- Click on Save button either from Format Text tab or from the ribbon to save the changes on the page.
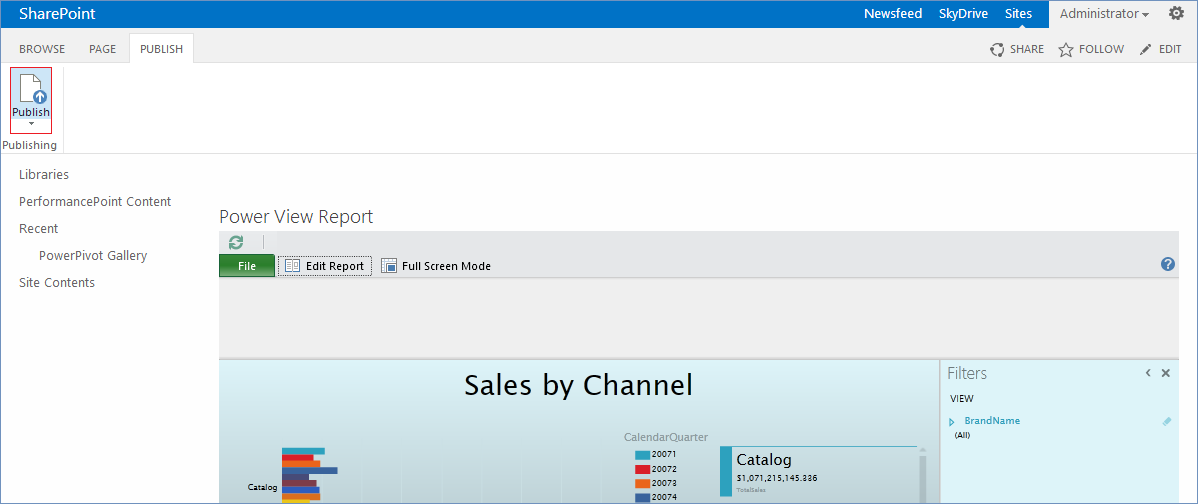
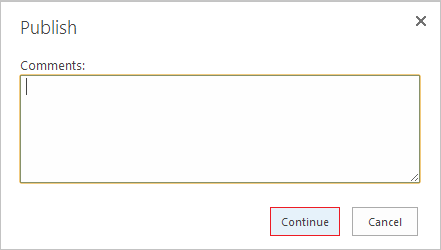
- Go to the Publish tab and click on Publish button.
- A publish window will pop up where you can add your comments. Click Continue.
- Now you can see the published page with your Power View report.
If you need further assistance, please do not hesitate to contact us.
Keywords
SharePoint 2013, Enterprise, Business Intelligence, page, report, Power View, Silverlight Web Part, Report, show


0 0
- How to show a Power View report at the SharePoint page (Silverlight Web Part)
- How to show a Power View report at the SharePoint page
- SharePoint At Work----Hyperlinks in the Data View Web Part
- SharePoint 2013 How to create a Power View Map
- SharePoint At Work----SharePoint Data View Web Part
- Show how to print a table in a html page
- How to hide the web part toolbar
- How To Sort Items in a CListCtrl in Report View
- How to show a Detail View via code
- How To Retrieve the URL of a Web Page from an ActiveX Control
- How to get files to show up in the Process Monitor/Report Repository
- SharePoint关于publish page, WiKi page, Web part page区别
- How to show related products in product view page with magento?
- How to remove a block from the particular page?
- How to save a web page as HTML or MHT
- How to get a web page content type
- To deploy the Web Part(Cab Files) to SharePoint Server 2007(Sharepoint 2007 SDK)
- How to redirect to a Custom Page for Event Receiver in SharePoint 2010
- Android 全屏设置
- How to show a Power View report at the SharePoint page
- c#线程同步(3)----monitor
- 正则表达式/i,/g,/ig,/gi,/m
- 谈下自己曾经做过的2个项目,经验丰富了不少
- How to show a Power View report at the SharePoint page (Silverlight Web Part)
- log4j:WARN No appenders could be found for logger
- 编写命令解释器(二)
- gdb调试命令
- objective-c第十二章练习答案
- iOS开发笔记--去掉Navigation下方的黑线(分割线)
- 黑马程序员—【Java基础篇】之集合框架工具类
- C语言运算符优先级
- Centos下防火墙的操作