windows系统下Python环境的搭建
来源:互联网 发布:淘宝服务器租用 编辑:程序博客网 时间:2024/04/29 17:11
2、安装下载包,一路next。
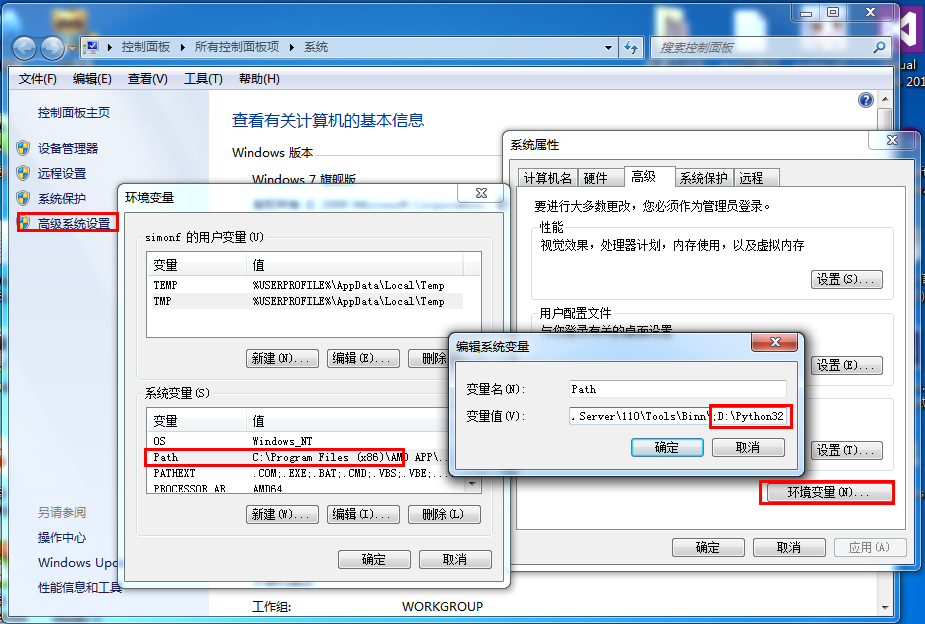
3、为计算机添加安装目录搭到环境变量,如图把python的安装目录添加到pth系统变量中即可。
4、测试python安装是否成功,cmd打开命令行输入 python 命令,如下图即成功了

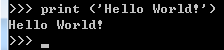
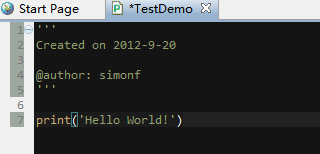
5、Hello World! 按照很多资料上写的,输入 print 'Hello World!'
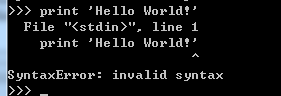
居然是不成功,说语法错误!这是一个坑了,很多资料是都是python 1.*/2.*的写法,现在我们装的是3.2版本,要采用这种写法 print ('Hello World!'),需要用括号把字符串包含
6、经过以上测试,python环境算是装好了,但是怎么开发呢,难道用这种命令行?同样有IDE可以应用,请下载Aptana Studio这款IDE工具,这款工具是在Eclipse的基础上加插件集改的,支持python开发。到http://aptana.com/products/studio3/download下载安装,然后运行
或者也可以装好Eclipse后自己搜索PyDev插件安装。
7、ok,在开始之前,也要为这款IDE配置一下环境变量。
打开 窗口->首选项(Window->Preferences...) 对话框,从右侧的树形列表中选择" PyDev"->"Interpreter Python", 点击新建(New)按钮,从Python的安装路径下选择Python.exe,然后会弹出一个对话框让你勾选System PYTHONPATH,点确定,大功告成。
也可以点Auto Config自动配置,据说会搜索安装好的python自动配置,不过我没成功。

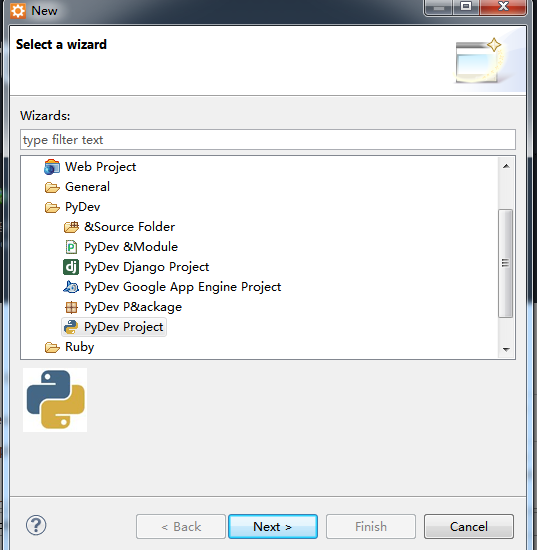
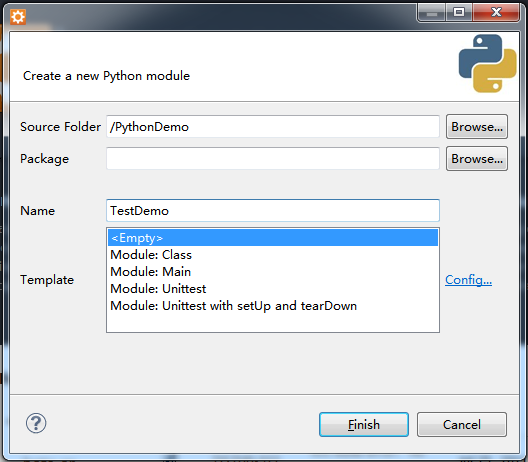
8、新建一个项目
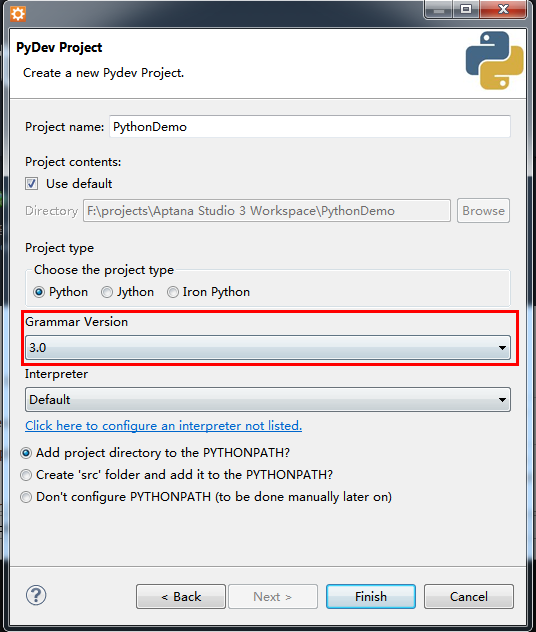
注意一下,因为安装的python是3.2版本,所以这里的语法版本选择3.0(默认2.6)
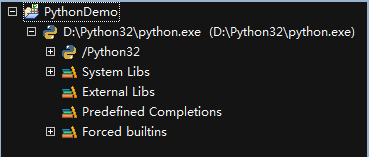
项目建立成功
9、在目录下新建一个python文件,输出Hello World!
输入代码
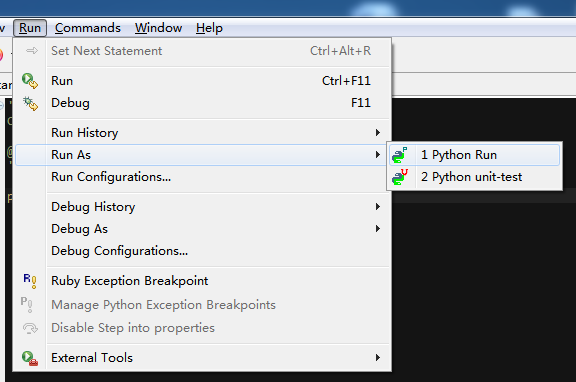
开始运行
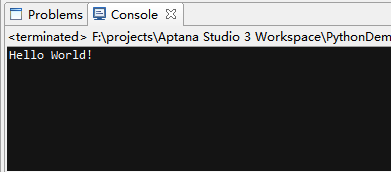
然后在下方的Console面板中会出现结果
ok,初期工作就是这样了。
- windows系统下Python环境的搭建
- windows系统下Python环境的搭建
- windows系统下Python环境的搭建
- windows系统下Python环境的搭建
- windows系统下Python环境的搭建
- windows系统下Python环境的搭建
- windows系统下Python环境的搭建
- windows系统下Python环境的搭建
- windows系统下Python环境的搭建
- windows系统下Python环境的搭建
- windows系统下Python环境的搭建
- windows系统下Python环境的搭建
- windows系统下Python环境的搭建
- windows系统下Python环境的搭建
- windows系统下Python环境的搭建
- windows系统下Python环境的搭建
- windows系统下Python环境的搭建
- windows系统下Python环境的搭建
- leetcode笔记--Odd Even Linked List
- 枚举设备栈
- 一次服务器环境搭建的记录(nginx+php+subversion)
- 手动编译源码升级gcc4.8.2
- 关于eclipse中recycleview/cardview的引入(环境搭建)
- windows系统下Python环境的搭建
- RGB转Lab的相关知识和方法
- http://www.oschina.net/question/2367675_236222
- 4-9 统计个位数字
- ZOJ 2971 Give Me the Number(模拟)
- synchronized
- ios自定义归档解档
- hive入门学习:数据倾斜的解决方案
- Form身份验证Authrize特性授权