liunx 安装和遇到问题
来源:互联网 发布:岗位优化人员优化方案 编辑:程序博客网 时间:2024/05/21 19:57
1、上传好文件mysql-5.7.12-linux-glibc2.5-x86_64.tar.gz 到 服务器/data/software/
2、# tar -xzvf /data/software/mysql-5.7.13-linux-glibc2.5-x86_64.tar.gz
3、# mv mysql-5.7.13-linux-glibc2.5-x86_64 mysql
4、# cp /mysql /usr/local/ 拷贝
5、# mkdir /data/mysql
6、# ---新建一个msyql组
# useradd -r -s /sbin/nologin -g mysql mysql -d /usr/local/mysql ---新建msyql用户禁止登录shell
#cd /usr/local/mysql
#pwd
#chown –R mysql . (注意后面点)
#chgrp –R mysql .(注意后面点)
#chown -R mysql /data/mysql
# bin/mysqld --initialize --user=mysql --basedir=/usr/local/mysql --datadir=/data/mysql
这一步可能执行错误error while loading shared libraries: libaio.s
如果出现错误执行
ubuntu:apt-get install libaio-dev
centos:yum install libaio
如果成功继续
此处需要注意记录生成的临时密码,如上文:t:pk=Gr(t7Co
#bin/mysql_ssl_rsa_setup --datadir=/data/mysql
修改系统配置文件
#cd support-files/
# cp my-default.cnf /etc/my.cnf
# cp mysql.server /etc/init.d/mysql
# vim /etc/init.d/mysql
# vim /etc/my.cnf
查阅资料
启动mysql
#bin/mysqld_safe --user=mysql &

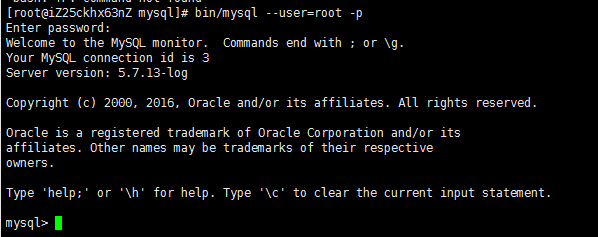
bin/mysql --user=root –p
--输入第6步生成的临时密码

mysql> set password=password('A123456');

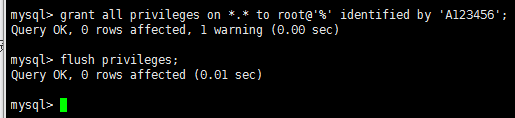
mysql>grant all privileges on *.* to root@'%' identified by 'A123456';
mysql> flush privileges;
mysql> use mysql;
mysql> select host,user from user;

10添加系统路径
# vim /etc/profile
添加:
export PATH=/usr/local/mysql/bin:$PATH
如下:

# source /etc/profile
11配置mysql自动启动
# chmod 755 /etc/init.d/mysql
# chkconfig --add mysql
# chkconfig --level 345 mysql on
- liunx 安装和遇到问题
- liunx下安装oracle10g所遇到的一些问题
- 用virtualbox安装redHat9 liunx系统遇到的问题及解决办法
- vmware liunx 遇到的联网问题
- liunx下mysql遇到的简单问题
- liunx systemtap install 遇到一些问题
- Liunx下Nginx安装问题
- LIUNX安装和VMware使用
- liunx 安装和配置 nginx
- 怎样解决liunx应用程序无法安装问题
- Liunx 上面使用Python连接Redis遇到的一些问题
- linux 安装遇到的问题和解决
- 安装PrintManager和所遇到的问题
- 安装VMtools 遇到的问题和解决
- openfire 安装 和 遇到的一些问题
- APPframework安装遇到的问题和解决方法
- vagrant和viturlbox安装遇到的问题
- CocoaPods的安装和遇到的问题
- 设置npm安装程序时的默认目录
- Eclipse自定义注释(另一个账号)
- CocoaPods的安装使用和常见问题
- NSUserDefaults
- Android_自实现用户行为统计
- liunx 安装和遇到问题
- PHP PDO的简单使用(query(),exec(),prepare(),Transaction,行锁)
- sublime host key verification failed
- iOS WKWebView添加网页加载进度条
- ios10 部分app无法连接到网络
- MySQL数据库:SQL语句
- 使用Maven
- getDimension,getDimensionPixelOffset和getDimensionPixelSize
- Canvas基础图形的绘制