Solr拼写检查示例
来源:互联网 发布:鞋子折痕淘宝不让退 编辑:程序博客网 时间:2024/05/22 00:30
本文英文版地址:https://examples.javacodegeeks.com/enterprise-java/apache-solr/solr-spellcheck-example/
在这个Solr Spellcheck示例中,我们将讨论如何实现Apache Solr提供的拼写检查功能。我们将向您展示如何在Solr中配置拼写检查,并讨论用于获取拼写检查建议的查询参数。为了演示Solr Spellcheck示例,我们将使用基本配置在Solr中创建一个核心,并索引与Solr安装一起提供的示例文件。
这个例子的首选环境是solr-5.0.0。在开始Solr安装之前,请确保已安装JDK并已正确设置Java_Home。
1.安装Apache Solr
首先,让我们从以下位置下载最新版本的Apache Solr:
http://lucene.apache.org/solr/downloads.html
Apache Solr已经经历了从4.xx到5.0.0的各种更改,因此如果您有不同版本的Solr,则需要下载5.xx版本以遵循此示例。
下载Solr zip文件后,将其解压缩到文件夹中。 提取的文件夹将如下所示:
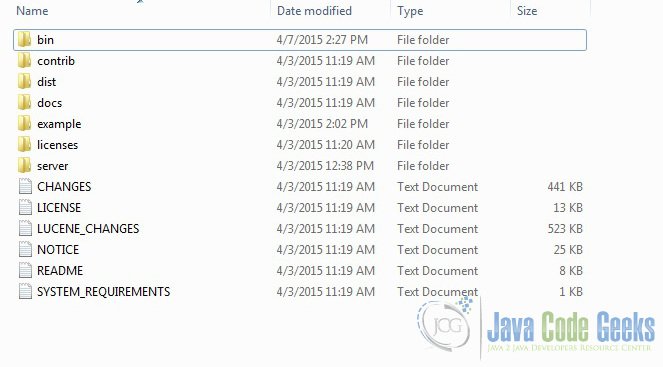
Solr文件夹
bin文件夹包含用于启动和停止服务器的脚本。 example文件夹包含几个示例文件。 我们将使用其中一个来演示Solr如何对数据进行索引。server文件夹包含用于写入所有Solr日志的logs文件夹。在索引期间检查日志中的任何错误将有所帮助。服务器下的solr文件夹包含不同的集合或核心。 每个核/集合的配置和数据存储在相应的核/集合文件夹中。
Apache Solr附带了一个内置的Jetty服务器。 但在我们启动solr实例之前,我们必须验证JAVA_HOME是否在机器上设置。
我们可以使用命令行脚本启动服务器。 让我们从命令提示符转到bin目录并发出以下命令:
solr start
这将在默认端口8983下启动Solr服务器。
我们现在可以在浏览器中打开以下URL,并验证我们的Solr实例正在运行。 solr管理工具的具体细节超出了示例的范围。
http://localhost:8983/solr/
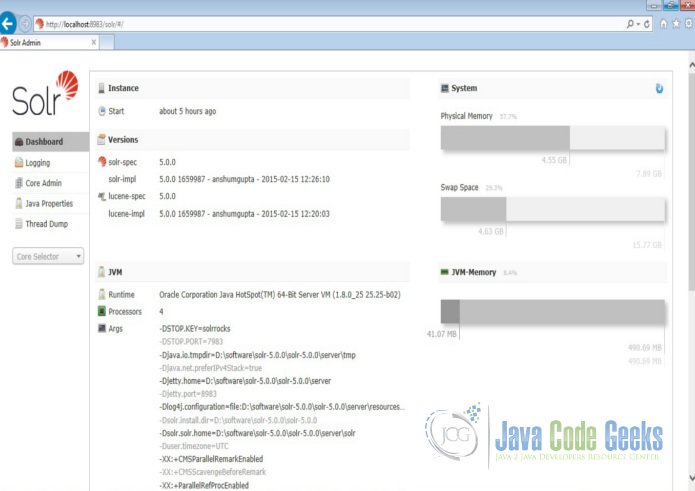
Solr管理控制台
2.配置Apache Solr
在本节中,我们将向您展示如何配置solr实例的核心/集合以及如何定义字段。 Apache Solr附带一个名为Schemaless模式的选项。 此选项允许用户构建有效的模式,而无需手动编辑模式文件。但是对于这个例子,我们将使用Schema配置来理解Solr的内部。
当Solr服务器在独立模式下启动时,配置被称为核心,当它在SolrCloud模式下启动时,配置称为集合。在这个例子中,我们将讨论独立的服务器和核心。我们将暂停SolrCloud讨论以供日后使用。
首先,我们需要创建一个用于索引数据的Core。 Solr create命令有以下选项:
- -c <name> - 要创建的核心或集合的名称(必需)。
- -d <confdir> - 配置目录,在SolrCloud模式下有用。
- -n <configName> - 配置名称。 此默认值与核心或集合的名称相同。
- -p <port> - 要向其发送create命令的本地Solr实例的端口;默认情况下,脚本尝试通过查找正在运行的Solr实例来检测端口。
- -s <shards> - 将集合拆分为的分片数,默认值为1。
- -rf <replicas> - 集合中每个文档的副本数。默认值为1。
在本例中,我们将使用-c参数作为核心名称,使用-d参数作为配置目录。 对于所有其他参数,我们使用默认设置。
现在,在命令窗口中导航到solr-5.0.0\bin文件夹,并发出以下命令:
solr create -c jcg -d basic_configs
我们可以在命令窗口中看到以下输出。
1<span class="notranslate"onmouseover="_tipon(this)"onmouseout="_tipoff()"><span class="google-src-text"style="direction: ltr; text-align: left">Creating new core'jcg'using command:</span>使用命令创建新核心'jcg':</span>2<span class="notranslate"onmouseover="_tipon(this)"onmouseout="_tipoff()"><span class="google-src-text"style="direction: ltr; text-align: left">http://localhost:8983/solr/admin/cores?action=CREATE&name=jcg&instanceDir=jcg</span> http:// localhost:8983 / solr / admin / cores?action = CREATE&name = jcg&instanceDir = jcg</span>3 4<span class="notranslate"onmouseover="_tipon(this)"onmouseout="_tipoff()"><span class="google-src-text"style="direction: ltr; text-align: left">{</span> {</span>5 <span class="notranslate"onmouseover="_tipon(this)"onmouseout="_tipoff()"><span class="google-src-text"style="direction: ltr; text-align: left">"responseHeader":{</span> “responseHeader”:{</span>6 <span class="notranslate"onmouseover="_tipon(this)"onmouseout="_tipoff()"><span class="google-src-text"style="direction: ltr; text-align: left">"status":0,</span> “status”:0,</span>7 <span class="notranslate"onmouseover="_tipon(this)"onmouseout="_tipoff()"><span class="google-src-text"style="direction: ltr; text-align: left">"QTime":663},</span> “QTime”:663},</span>8 <span class="notranslate"onmouseover="_tipon(this)"onmouseout="_tipoff()"><span class="google-src-text"style="direction: ltr; text-align: left">"core":"jcg"}</span> “core”:“jcg”}</span>现在我们导航到以下URL,我们可以看到jcg core被填充在核心选择器中。 您还可以查看核心的统计信息。
http://localhost:8983/solr
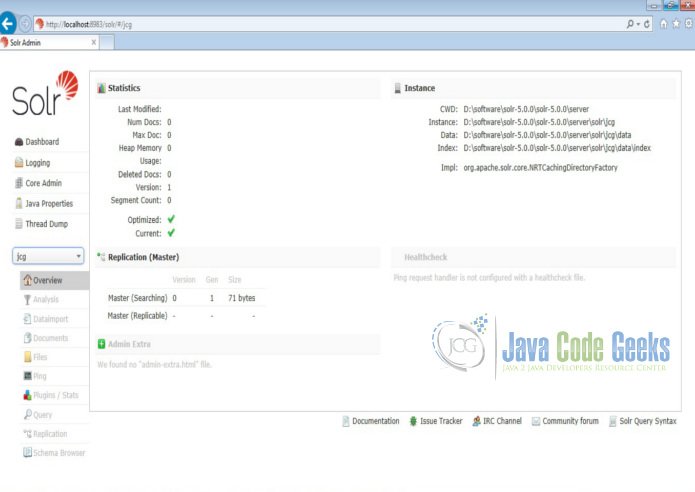
Solr jcg core
3.修改schema.xml文件
我们需要修改文件夹server\solr\jcg\conf下的schema.xml文件,以包含字段。我们将使用随同Solr安装一起提供的示例文件“books.csv”中的一个进行索引。该文件位于文件夹solr-5.0.0\example\exampledocs 。
现在我们导航到文件夹server\solr目录。 您将看到一个名为jcg的文件夹。 子文件夹即conf和data分别具有核心的配置和索引数据。
现在编辑\server\solr\jcg\conf文件夹中的schema.xml文件,并在uniqueKey元素后面添加以下内容。
schema.xml
1<spanclass="notranslate"onmouseover="_tipon(this)"onmouseout="_tipoff()"><spanclass="google-src-text"style="direction: ltr; text-align: left"><uniqueKey>id</uniqueKey></span> <uniqueKey> id </ uniqueKey></span>2<spanclass="notranslate"onmouseover="_tipon(this)"onmouseout="_tipoff()"><spanclass="google-src-text"style="direction: ltr; text-align: left"><!-- Fields added for books.csv load--></span> <! - 为books.csv加载添加的字段 - ></span>3<spanclass="notranslate"onmouseover="_tipon(this)"onmouseout="_tipoff()"><spanclass="google-src-text"style="direction: ltr; text-align: left"><fieldname="cat"type="text_general"indexed="true"stored="true"/></span> <fieldname =“cat”type =“text_general”indexed =“true”stored =“true”/></span>4<spanclass="notranslate"onmouseover="_tipon(this)"onmouseout="_tipoff()"><spanclass="google-src-text"style="direction: ltr; text-align: left"><fieldname="name"type="text_general"indexed="true"stored="true"/></span> <fieldname =“name”type =“text_general”indexed =“true”stored =“true”/></span>5<spanclass="notranslate"onmouseover="_tipon(this)"onmouseout="_tipoff()"><spanclass="google-src-text"style="direction: ltr; text-align: left"><fieldname="price"type="tdouble"indexed="true"stored="true"/></span> <fieldname =“price”type =“tdouble”indexed =“true”stored =“true”/></span>6<spanclass="notranslate"onmouseover="_tipon(this)"onmouseout="_tipoff()"><spanclass="google-src-text"style="direction: ltr; text-align: left"><fieldname="inStock"type="boolean"indexed="true"stored="true"/></span> <fieldname =“inStock”type =“boolean”indexed =“true”stored =“true”/></span>7<spanclass="notranslate"onmouseover="_tipon(this)"onmouseout="_tipoff()"><spanclass="google-src-text"style="direction: ltr; text-align: left"><fieldname="author"type="text_general"indexed="true"stored="true"/></span> <fieldname =“author”type =“text_general”indexed =“true”stored =“true”/></span>我们已将indexed的属性设置为true。 这指定了用于索引的字段,并且可以使用索引检索记录。 将值设置为false将使该字段只存储,但不能查询。
还要注意,我们有另一个属性叫stored并设置为true。 这指定字段存储并可以在输出中返回。 将此字段设置为false将使该字段仅编入索引,并且无法在输出中检索。
我们已经为“books.csv”文件中的字段分配了类型。 CSV文件“id”中的第一个字段由schema.xml文件的uniqueKey元素自动处理,用于建立索引。
4.配置拼写检查
Solr拼写检查组件旨在基于其他类似术语提供内联查询建议。 这些建议的源可以是Solr中的字段中的术语,外部创建的文本文件或其他Lucene索引中的字段。 在这个例子中,我们将看到如何从Solr中索引的术语中提取建议,并将讨论放在外部文件和其他索引上,以供稍后讨论。
在这个例子中,我们将使用DirectSolrSpellChecker 。拼写检查器使用Solr索引中的术语,而不构建并行索引。此拼写检查器具有不必定期构建的优点,这意味着术语在索引中始终是最新的。
让我们在文件夹\server\solr\jcg\conf以添加组件和处理程序。在以下配置中,我们使用字段name (书名)作为示例文件中使用的术语之一。其他配置在每个字段的注释部分解释。
solrconfig.xml
01<spanclass="notranslate"onmouseover="_tipon(this)"onmouseout="_tipoff()"><spanclass="google-src-text"style="direction: ltr; text-align: left"><searchComponentname="spellcheck"class="solr.SpellCheckComponent"></span> <searchComponentname =“spellcheck”class =“solr.SpellCheckComponent”></span>02<spanclass="notranslate"onmouseover="_tipon(this)"onmouseout="_tipoff()"><spanclass="google-src-text"style="direction: ltr; text-align: left"><!-- a spellchecker built from a field of the main index --></span> <! - 从主索引的字段构建的拼写检查 - ></span>03<spanclass="notranslate"onmouseover="_tipon(this)"onmouseout="_tipoff()"><spanclass="google-src-text"style="direction: ltr; text-align: left"><lstname="spellchecker"></span> <lstname =“spellchecker”></span>04<spanclass="notranslate"onmouseover="_tipon(this)"onmouseout="_tipoff()"><spanclass="google-src-text"style="direction: ltr; text-align: left"><strname="name">default</str></span> <strname =“name”> default </str></span>05<spanclass="notranslate"onmouseover="_tipon(this)"onmouseout="_tipoff()"><spanclass="google-src-text"style="direction: ltr; text-align: left"><strname="field">name</str></span> <strname =“field”> name </str></span>06<spanclass="notranslate"onmouseover="_tipon(this)"onmouseout="_tipoff()"><spanclass="google-src-text"style="direction: ltr; text-align: left"><strname="classname">solr.DirectSolrSpellChecker</str></span> <str name =“classname”> solr.DirectSolrSpellChecker </str></span>07<spanclass="notranslate"onmouseover="_tipon(this)"onmouseout="_tipoff()"><spanclass="google-src-text"style="direction: ltr; text-align: left"><!-- minimum accuracy needed to be considered a valid spellcheck suggestion --></span> <! - 最低准确度需要被视为有效的拼写检查建议 - ></span>08<spanclass="notranslate"onmouseover="_tipon(this)"onmouseout="_tipoff()"><spanclass="google-src-text"style="direction: ltr; text-align: left"><floatname="accuracy">0.5</float></span> <floatname =“accuracy”> 0.5 </float></span>09<spanclass="notranslate"onmouseover="_tipon(this)"onmouseout="_tipoff()"><spanclass="google-src-text"style="direction: ltr; text-align: left"><!-- the minimum shared prefix when enumerating terms --></span> <! - 枚举项 - >时的最小共享前缀</span>10<spanclass="notranslate"onmouseover="_tipon(this)"onmouseout="_tipoff()"><spanclass="google-src-text"style="direction: ltr; text-align: left"><intname="minPrefix">1</int></span> <intname =“minPrefix”> 1 </int></span>11<spanclass="notranslate"onmouseover="_tipon(this)"onmouseout="_tipoff()"><spanclass="google-src-text"style="direction: ltr; text-align: left"><!-- minimum length of a query term to be considered for correction --></span> <! - 要考虑校正的查询项的最小长度 - ></span>12<spanclass="notranslate"onmouseover="_tipon(this)"onmouseout="_tipoff()"><spanclass="google-src-text"style="direction: ltr; text-align: left"><intname="minQueryLength">3</int></span> <intname =“minQueryLength”> 3 </int></span>13<spanclass="notranslate"onmouseover="_tipon(this)"onmouseout="_tipoff()"><spanclass="google-src-text"style="direction: ltr; text-align: left"></lst></span> </lst></span>14<spanclass="notranslate"onmouseover="_tipon(this)"onmouseout="_tipoff()"><spanclass="google-src-text"style="direction: ltr; text-align: left"></searchComponent></span> </searchComponent></span>现在让我们配置requestHandler。 使用的参数定义如下:
- spellcheck.dictionary - 指定应用于拼写检查的字典。
- spellcheck - 打开或关闭对请求的SpellCheck建议。如果为true,则会生成拼写建议。
- spellcheck.extendedResults - 导致Solr返回关于拼写检查结果的其他信息,例如索引中每个原始术语的频率。
- spellcheck.count - 指定要返回的拼写建议的最大数量。
- spellcheck.alternativeTermCount - 为索引和/或字典中存在的每个查询项返回的建议计数。
- spellcheck.maxResultsForSuggest - 请求可返回的最大命中数,以便同时生成拼写建议并将“correctlySpelled”元素设置为“false”。
solrconfig.xml
01<spanclass="notranslate"onmouseover="_tipon(this)"onmouseout="_tipoff()"><spanclass="google-src-text"style="direction: ltr; text-align: left"><requestHandlername="/spell"class="solr.SearchHandler"startup="lazy"></span> <requestHandlername =“/ spell”class =“solr.SearchHandler”startup =“lazy”></span>02<spanclass="notranslate"onmouseover="_tipon(this)"onmouseout="_tipoff()"><spanclass="google-src-text"style="direction: ltr; text-align: left"><lstname="defaults"></span> <lstname =“defaults”></span>03<spanclass="notranslate"onmouseover="_tipon(this)"onmouseout="_tipoff()"><spanclass="google-src-text"style="direction: ltr; text-align: left"><strname="spellcheck.dictionary">default</str></span> <str name =“spellcheck.dictionary”> default </str></span>04<spanclass="notranslate"onmouseover="_tipon(this)"onmouseout="_tipoff()"><spanclass="google-src-text"style="direction: ltr; text-align: left"><strname="spellcheck">on</str></span> <strname =“spellcheck”> on </str></span>05<spanclass="notranslate"onmouseover="_tipon(this)"onmouseout="_tipoff()"><spanclass="google-src-text"style="direction: ltr; text-align: left"><strname="spellcheck.extendedResults">true</str></span> <str name =“spellcheck.extendedResults”> true </str></span>06<spanclass="notranslate"onmouseover="_tipon(this)"onmouseout="_tipoff()"><spanclass="google-src-text"style="direction: ltr; text-align: left"><strname="spellcheck.count">10</str></span> <spanname =“spellcheck.count”> 10 </str></span>07<spanclass="notranslate"onmouseover="_tipon(this)"onmouseout="_tipoff()"><spanclass="google-src-text"style="direction: ltr; text-align: left"><strname="spellcheck.alternativeTermCount">5</str></span> <str name =“spellcheck.alternativeTermCount”> 5 </str></span>08<spanclass="notranslate"onmouseover="_tipon(this)"onmouseout="_tipoff()"><spanclass="google-src-text"style="direction: ltr; text-align: left"><strname="spellcheck.maxResultsForSuggest">5</str></span> <str name =“spellcheck.maxResultsForSuggest”> 5 </str></span>09<spanclass="notranslate"onmouseover="_tipon(this)"onmouseout="_tipoff()"><spanclass="google-src-text"style="direction: ltr; text-align: left"></lst></span> </lst></span>10<spanclass="notranslate"onmouseover="_tipon(this)"onmouseout="_tipoff()"><spanclass="google-src-text"style="direction: ltr; text-align: left"><arrname="last-components"></span> <arrname =“last-components”></span>11<spanclass="notranslate"onmouseover="_tipon(this)"onmouseout="_tipoff()"><spanclass="google-src-text"style="direction: ltr; text-align: left"><str>spellcheck</str></span> <str> spellcheck </ str></span>12<spanclass="notranslate"onmouseover="_tipon(this)"onmouseout="_tipoff()"><spanclass="google-src-text"style="direction: ltr; text-align: left"></arr></span> </arr></span>13<spanclass="notranslate"onmouseover="_tipon(this)"onmouseout="_tipoff()"><spanclass="google-src-text"style="direction: ltr; text-align: left"></requestHandler></span> </requestHandler></span>由于我们已经修改了配置,我们必须停止和启动服务器。 为此,我们需要通过命令行从bin目录发出以下命令:
solr stop -all
服务器将立即停止。 现在启动服务器通过命令行从bin目录发出以下命令:
solr start
5.索引数据
Apache Solr附带一个名为SimplePostTool的独立Java程序。 该程序打包到JAR中,安装在example\exampledocs文件夹下。
现在,我们导航到命令提示符中的example\exampledocs文件夹,并键入以下命令。您将看到一堆使用该工具的选项。
java -jar post.jar -h
使用格式一般如下:
Usage: java [SystemProperties] -jar post.jar [-h|-] [<file|folder|url|arg>
[<file|folder|url|arg>...]]
正如我们前面所说,我们将索引solr安装附带的“books.csv”文件中的数据。 我们将在命令提示符中导航到solr-5.0.0\example\exampledocs并发出以下命令。
java -Dtype=text/csv -Durl=http://localhost:8983/solr/jcg/update -jar post.jar books.csv
这里使用的SystemProperties是:
- -Dtype - 数据文件的类型。
- -Durl - jcg核心的URL。
文件“books.csv”现在将被索引,并且命令提示符将显示以下输出。
1<span class="notranslate"onmouseover="_tipon(this)"onmouseout="_tipoff()"><span class="google-src-text"style="direction: ltr; text-align: left">SimplePostTool version 5.0.0</span> SimplePostTool版本5.0.0</span>2<span class="notranslate"onmouseover="_tipon(this)"onmouseout="_tipoff()"><span class="google-src-text"style="direction: ltr; text-align: left">Posting files to [base] urlhttp://localhost:8983/solr/jcg/update using content-</span>将文件发布到[base] url http:// localhost:8983 / solr / jcg / update using content-</span>3<span class="notranslate"onmouseover="_tipon(this)"onmouseout="_tipoff()"><span class="google-src-text"style="direction: ltr; text-align: left">typetext/csv...</span>键入text / csv ...</span>4<span class="notranslate"onmouseover="_tipon(this)"onmouseout="_tipoff()"><span class="google-src-text"style="direction: ltr; text-align: left">POSTingfilebooks.csv to [base]</span>将文件books.csv发布到[base]</span>5<span class="notranslate"onmouseover="_tipon(this)"onmouseout="_tipoff()"><span class="google-src-text"style="direction: ltr; text-align: left">1 files indexed.</span> 1个文件已索引。</span>6<span class="notranslate"onmouseover="_tipon(this)"onmouseout="_tipoff()"><span class="google-src-text"style="direction: ltr; text-align: left">COMMITting Solr index changes tohttp://localhost:8983/solr/jcg/update...</span>提交Solr索引更改为http:// localhost:8983 / solr / jcg / update ...</span>7<span class="notranslate"onmouseover="_tipon(this)"onmouseout="_tipoff()"><span class="google-src-text"style="direction: ltr; text-align: left">Time spent: 0:00:00.647</span>所用时间:0:00:00.647</span>6.使用拼写检查查询
现在,我们将启动以下URL来验证拼写检查功能。 你可以注意到,“Jhereg”书的拼写错误地“Jherag”来测试我们的例子。 spellcheck.q参数用于指定要进行拼写检查的查询。我们也可以使用q参数,而不是spellcheck.q,但它建议使用拼写检查前缀在我们做拼写检查的地方,以提供清晰度。
http://localhost:8983/solr/jcg/spell?spellcheck.q=Jherag&spellcheck=true
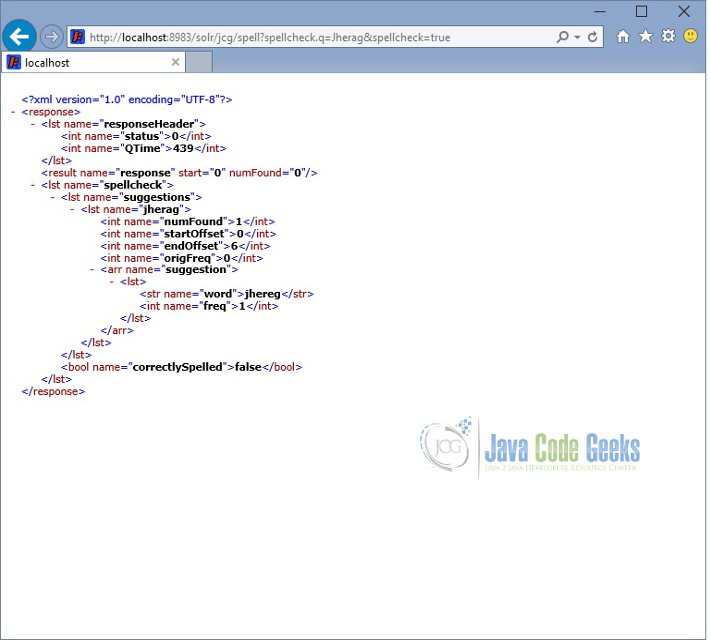
Solr拼写检查输出
7.下载配置
这是Solr Spellcheck的一个例子。
您可以在此下载此示例中使用的配置文件: solr_spell_config
- Solr拼写检查示例
- solr拼写检查实例
- solr spell拼写检查
- Solr之拼写检查。
- solr开发之拼写检查spellcheck
- 拼写检查C#类库调用示例
- solr 1.4 的分布式请求过程 和 拼写检查过程
- solr高亮、拼写检查及匹配相似简单实践
- Solr.NET快速入门(四)【相似查询,拼写检查】
- 拼写检查
- 拼写检查
- solr入门之solr的拼写检查功能的应用级别尝试
- solr入门之solr的拼写检查功能的应用级别尝试
- solr高亮(highlight),拼写检查(spellCheck),匹配相似(moreLikeThis) 应用实践
- java操作solr实现索引,查询,删除,拼写检查等功能
- AS SpellCheck拼写检查
- Hunspell拼写检查器
- 拼写检查设计
- UML静态图—机房
- eclipse 安装svn插件
- Android串口操作-基于tiny4412
- 导入Servlet源码jar包教程
- leecode 解题总结:75. Sort Colors
- Solr拼写检查示例
- Vue.js 系列教程 2:组件,Props,Slots
- C语言编程-指针遍历二维数组
- springMVC--SSM整合
- Solr Join(加入)示例
- python opencv 学习之视频输入之一
- linux 动态库文件stripped属性理解
- 集合上的函数式编程 示例
- 谷哥的小弟学后台(13)——Cookie