A wizard’s guide to Adversarial Autoencoders: Part 3, Disentanglement of style and content.
来源:互联网 发布:javascript focus用法 编辑:程序博客网 时间:2024/06/05 12:11
“If you’ve read the previous two parts you’ll feel right at home implementing this one.”
← Part 2: Exploring latent space with Adversarial Autoencoders.
Parts 1 and 2 were mainly concerned with getting started on Autoencoders and Adversarial Autoencoders. We began with a simple AE (vanilla one) made some changes to its architecture and training algorithm to end up with an AAE. This part continues that trend by changing AAE’s architecture along with a small change in the way it’s trained.
I have created all the python files in my repo such that each one required for a part can be obtained from the previous one with some minor modifications. I would recommend you to read the theoretical aspects from this post and try to modify the code from part 2 to implement part 3.
Each and every one of us have our own unique style of writing, be it writing a letter or even a signature. The way in which we write certain characters, words we use often to create sentences, even the amount of pressure one exerts on paper are all characteristics which define a unique handwriting. With all these things coming into play, forging a handwriting can become very difficult and expensive. Let’s try to learn the style of writing from the MNIST dataset and use that to output images which all have the same style. We’ll only focus on the style of writing and not on the way sentences are framed or the thought process a writer goes through.
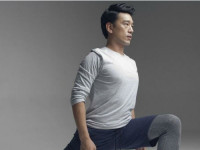
To get a clear picture of what style and content is, look at the image below:
Each of the texts has the same content “ Autoencoder”, but are in different styles. We now have the task of separating the style (Myriad Pro, MV Boil,…) and content from the images.
Disentanglement of various features is very important in representation learning (More on it here).
The Autoencoder and Adversarial Autoencoder we have come across are all trained in an unsupervised manner (there weren’t any labels used during training). Using the label info from an image allows an AAE to focus on learning to extract the style in an image without considering its content. Making use of image labels makes it a supervised model.
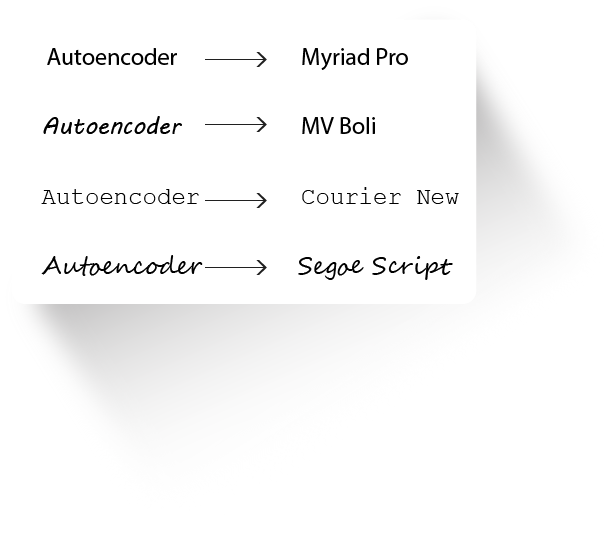
The architecture we’ll need to accomplish this is very similar to what we’ve seen in Part 2.
Here, instead of directly using the latent code z (output of the encoder) to recover the input image (x) at the decoder, we pass in the image labels (y) as well. Now, the input to the decoder has two parts:
- The latent code z from the encoder.
- One hot representation of the image label (let’s call it y).
We train the AAE as usual with a little modification made to the reconstruction phase:
- Reconstruction Phase: We pass in the input image to the encoder to get a latent code z and later, combine the latent code (z, output of the encoder) and the image label (y) to get a bigger column vector, which is then fed to our decoder. We train the AE to minimize the reconstruction loss as usual. Since the image label is being fed to the decoder, the encoder learns the style of an image during training and the decoder uses the content info from the label and the style info from the encoder to reconstruct the input image.
- Regularization Phase: Exactly similar to what we’ve seen in Part 2.
Now, let’s just add the image label to our AAE and check out the results.
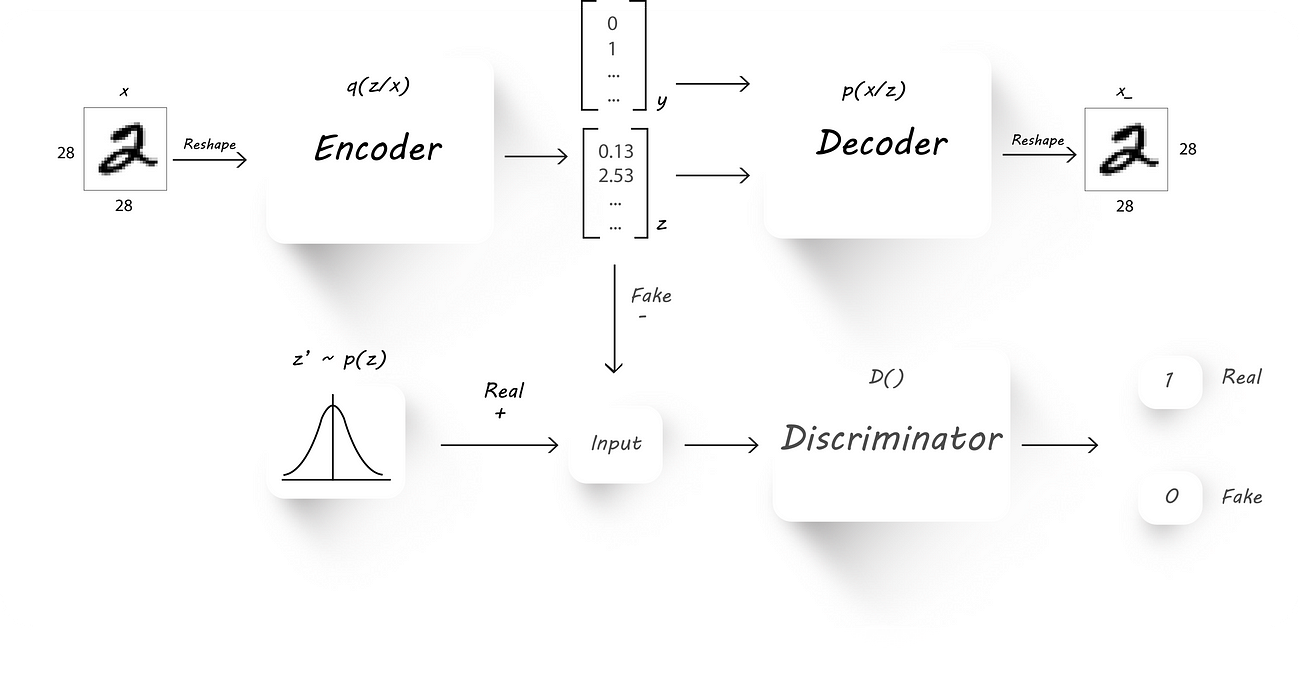
Since we need one hot image labels the decoder architecture will have a larger number of input neurons [10 + z_dim] (10 cause we have ten classes and z_dim is the size of the encoder output, for example, z_dim can be 2).
Now would be the time to stop reading and modify the code from part 2. Come back later to have a look at the code and the results.
Modified Decoder architecture:
We’ll also need to feed in the image labels during training which is super easy:
I’ve just replaced _ with batch_y when calling the mnist_train_next_batch() function and used these labels as inputs to the y_input placeholder.
I’ve trained the AE with the following parameters:
Note that I have used z_dim=15 instead of 2 unlike the previous implementations as the result were visually pleasing.
Similar to Part 2, I’ve maintained the standard deviation of the prior Gaussian distribution to be 5.0 and a mean of 0.
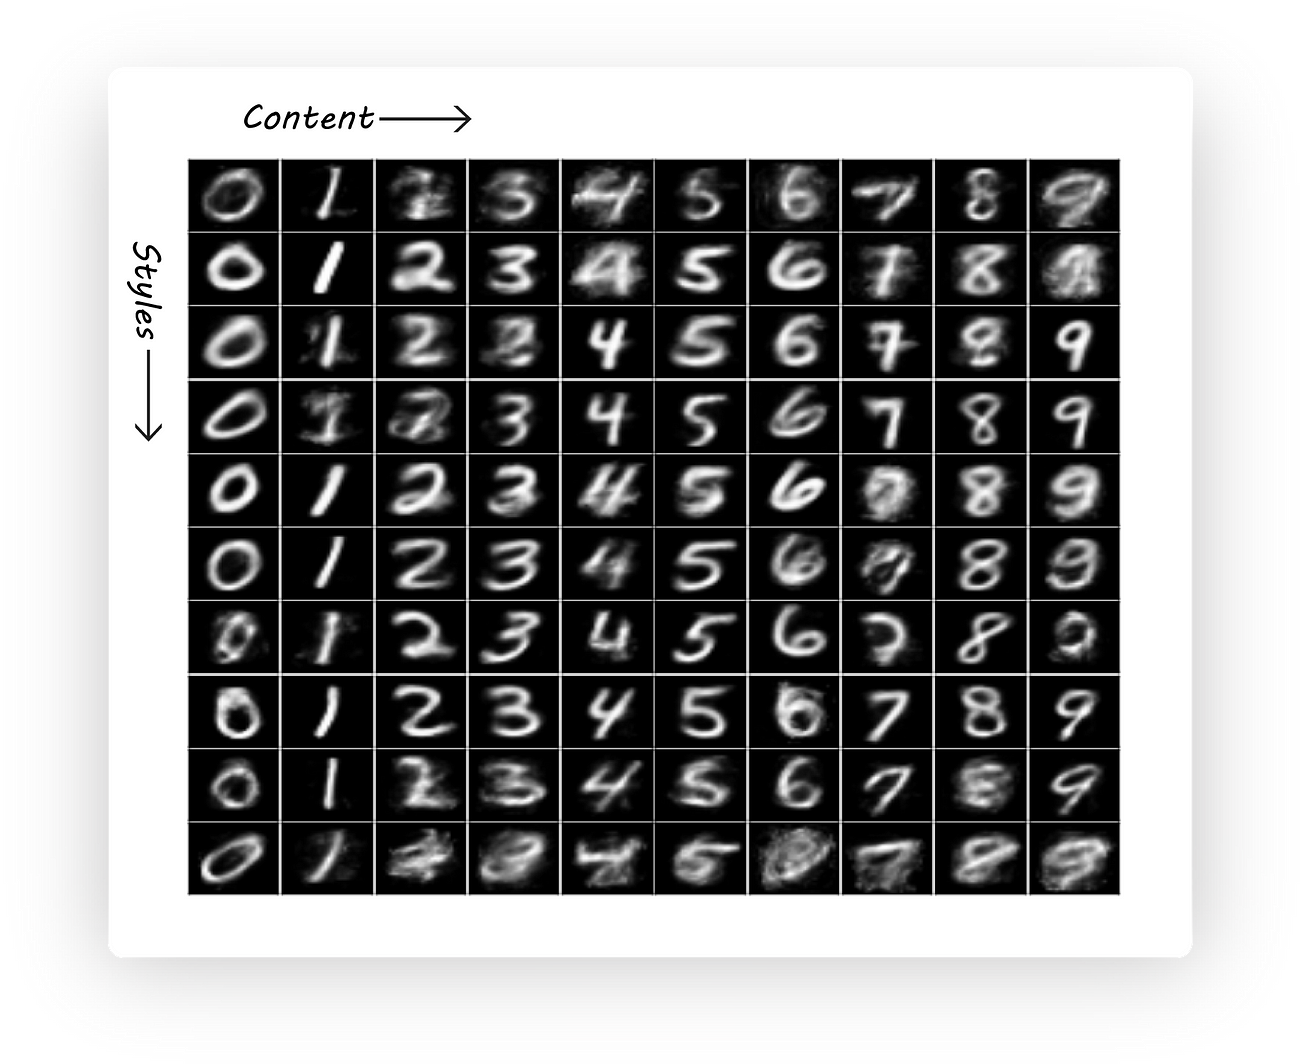
To generate images having the same style but with a different character we’ll pass in a random input as z (z_dim is 15 in this case) and change the one hot vector y to the desired value. Here I’ve passed in 10 random values for z and changed y to represent numbers from 0 to 9:
Have a look at generate_image_grid() for it’s implementation.
As a sanity check let’s have a look at the encoder output distribution to check if it’s still what we want it to be:
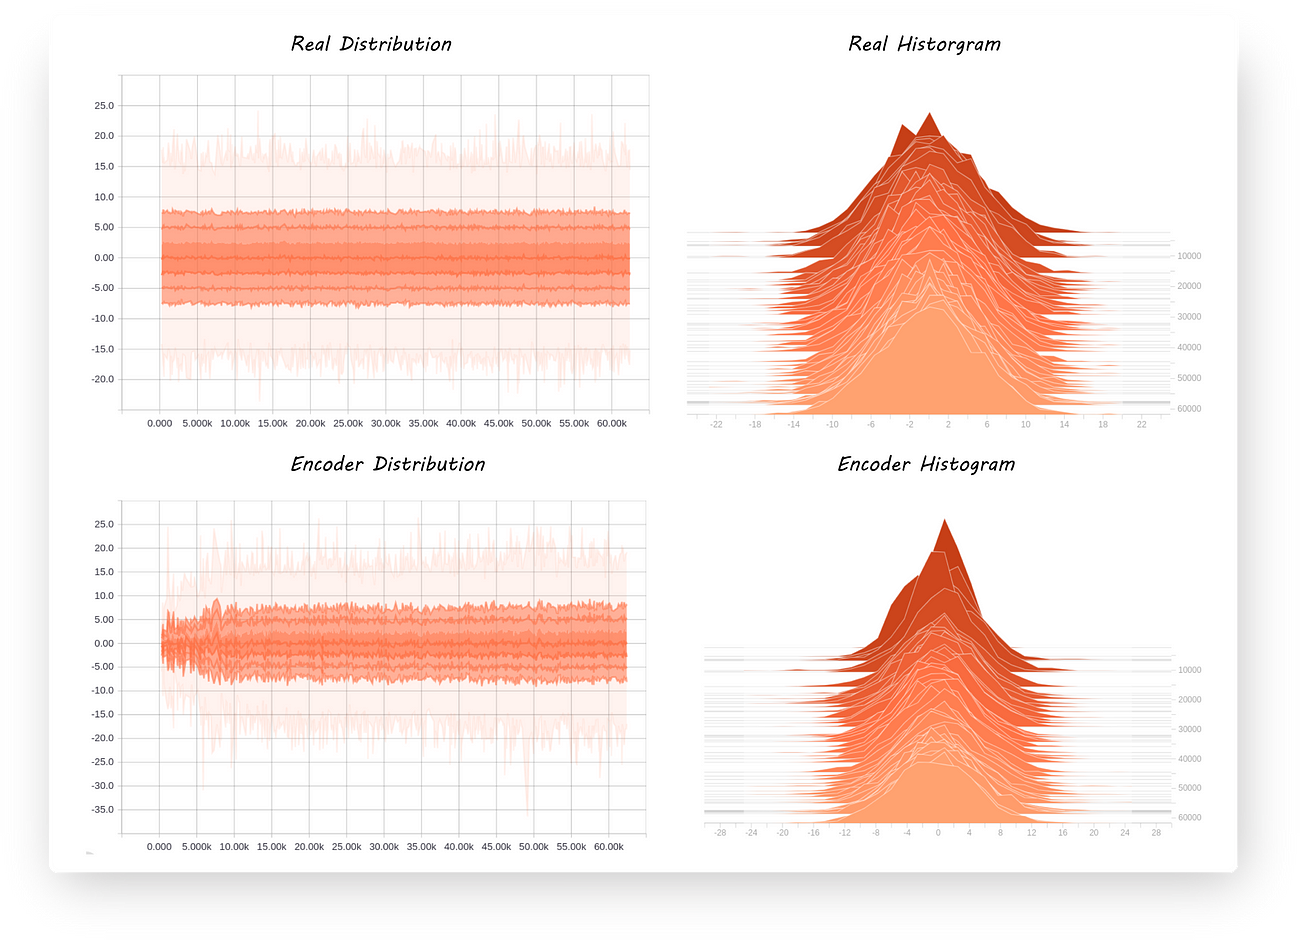
Yup, that completes part 3!
We’ll again build on what we have in this part to classify images using a limited number of labeled ones while still disentangling style and content.
I’ve reduced the reading time for this article just to check if it would affect the read ratio on medium
- A wizard’s guide to Adversarial Autoencoders: Part 3, Disentanglement of style and content.
- A wizard’s guide to Adversarial Autoencoders: Part 1, Autoencoder?
- A wizard’s guide to Adversarial Autoencoders: Part 2, Exploring latent space with Adversarial Autoen
- A Layman's Guide to a Subset of ASN.1, BER, and DER
- A beginner’s guide to collecting Twitter data (and a bit of web scraping)
- Beginner’s Guide to ALE and IDocs – Part II
- Beginner’s Guide to ALE and IDocs – Part III
- A Guide to Blocks & Grand Central Dispatch (and the Cocoa API's making use of them)
- A Designer's Guide to Adobe InDesign and XML: Harness the Power of XML to Automate your Print and We
- A beginner's guide to search engine optimization and promotion
- A Beginner's Guide to Recurrent Networks and LSTMs
- A Beginner’s Guide to Recurrent Networks and LSTMs
- A complete guide to using Keras as part of a TensorFlow workflow: tutorial
- A complete guide to using Keras as part of a TensorFlow workflow: tutorial
- The 1st Part Reading Note of the Android - A Programmer's Guide
- A Contributor's Guide to Launchpad.net - Part 1 - Getting Started
- A Contributor's Guide to Launchpad.net - Part 2 - Code Management
- A Beginner's Guide To Understanding Convolutional Neural Networks Part 2
- oracle海量用户分区设计思路
- opencv 基础操作总结
- [agc004e]Salvage Robots
- ASP実装基礎
- 数值计算扩展--numpy
- A wizard’s guide to Adversarial Autoencoders: Part 3, Disentanglement of style and content.
- 欢迎使用CSDN-markdown编辑器
- okhttp请求
- Android studio 不能新建类的解决
- JDBC中使用preparedStatement相比statement的优势
- 实时可靠的开源分布式实时计算系统——Storm
- 两个关联的GridView,点击其中一个,另一个的状态发生变化,联动操作
- 数据结构--堆栈,列表--1
- C#读取xml文件