申请谷歌云服务器,运行Jupyter
来源:互联网 发布:前端页面优化方案 编辑:程序博客网 时间:2024/06/03 17:03
CS231n Convolutional Neural Networks for Visual Recognition
Google Cloud Tutorial
Google Cloud Tutorial
BEFORE WE BEGIN
BIG REMINDER: Make sure you stop your instances!
(We know you won’t read until the very bottom once your assignment is running, so we are printing this at the top too since it is super important)
Don’t forget to stop your instance when you are done (by clicking on the stop button at the top of the page showing your instances), otherwise you will run out of credits and that will be very sad. :(
If you follow our instructions below correctly, you should be able to restart your instance and the downloaded software will still be available.

Create and Configure Your Account
For the class project and assignments, we offer an option to use Google Compute Engine for developing and testing your implementations. This tutorial lists the necessary steps of working on the assignments using Google Cloud. We expect this tutorial to take about an hour. Don’t get intimidated by the steps, we tried to make the tutorial detailed so that you are less likely to get stuck on a particular step. Please tag all questions related to Google Cloud with google_cloud on Piazza.
This tutorial goes through how to set up your own Google Compute Engine (GCE) instance to work on the assignments. Each student will have $100 in credit throughout the quarter. When you sign up for the first time, you also receive $300 credits from Google by default. Please try to use the resources judiciously. But if $100 ends up not being enough, we will try to adjust this number as the quarter goes on. Note: for assignment 1, we are only supporting python version 2.7 (the default installation from the script) and 3.5.3.
First, if you don’t have a Google Cloud account already, create one by going to the Google Cloud homepage and clicking on Compute. When you get to the next page, click on the blue TRY IT FREEbutton. If you are not logged into gmail, you will see a page that looks like the one below. Sign into your gmail account or create a new one if you do not already have an account.
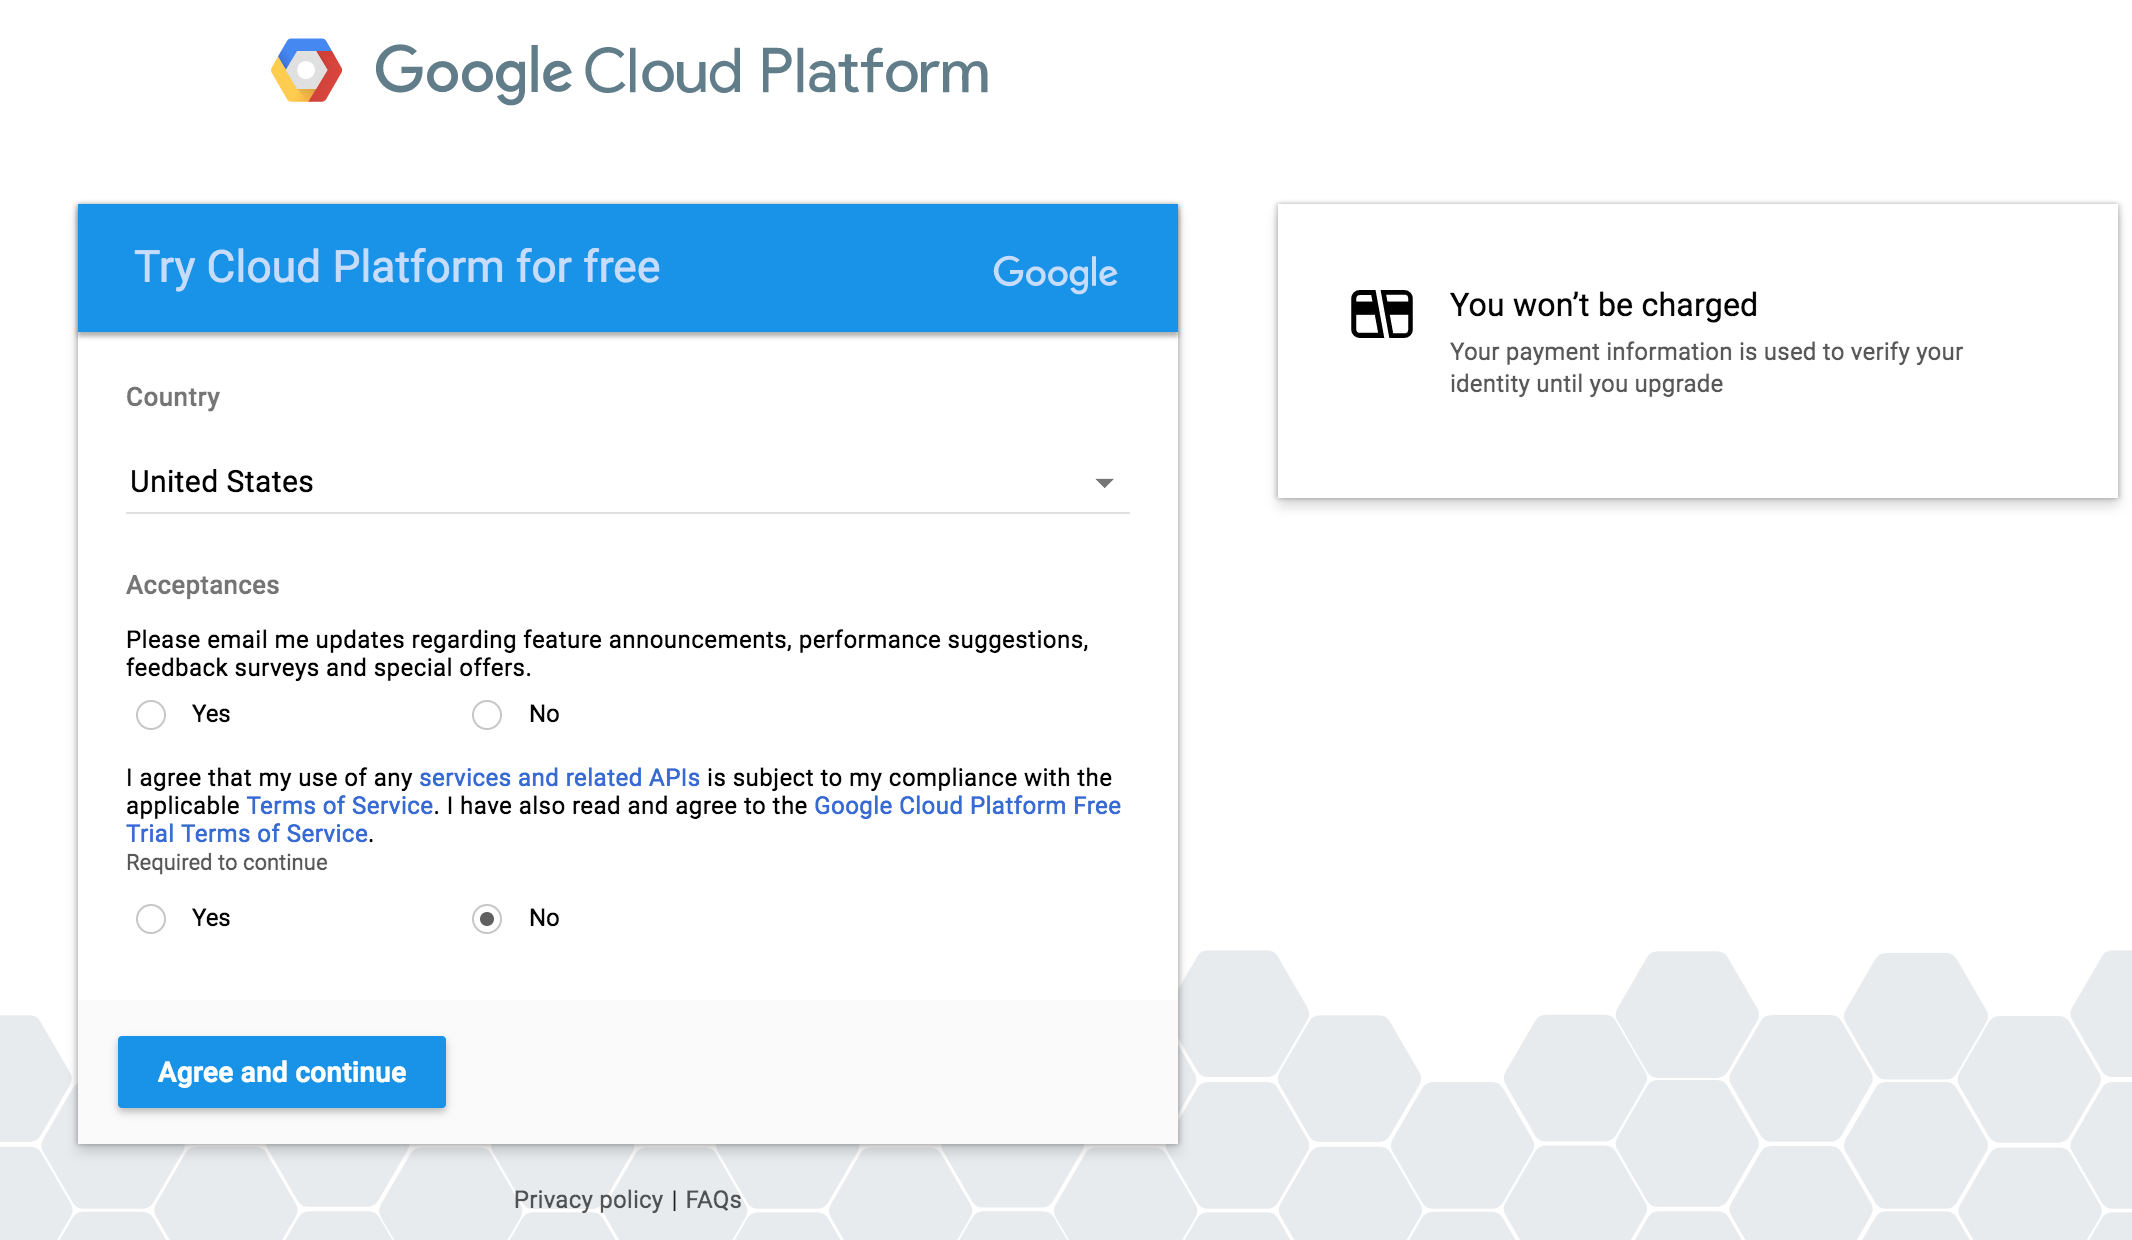
If you already have a gmail account, it will direct you to a signup page which looks like the following.
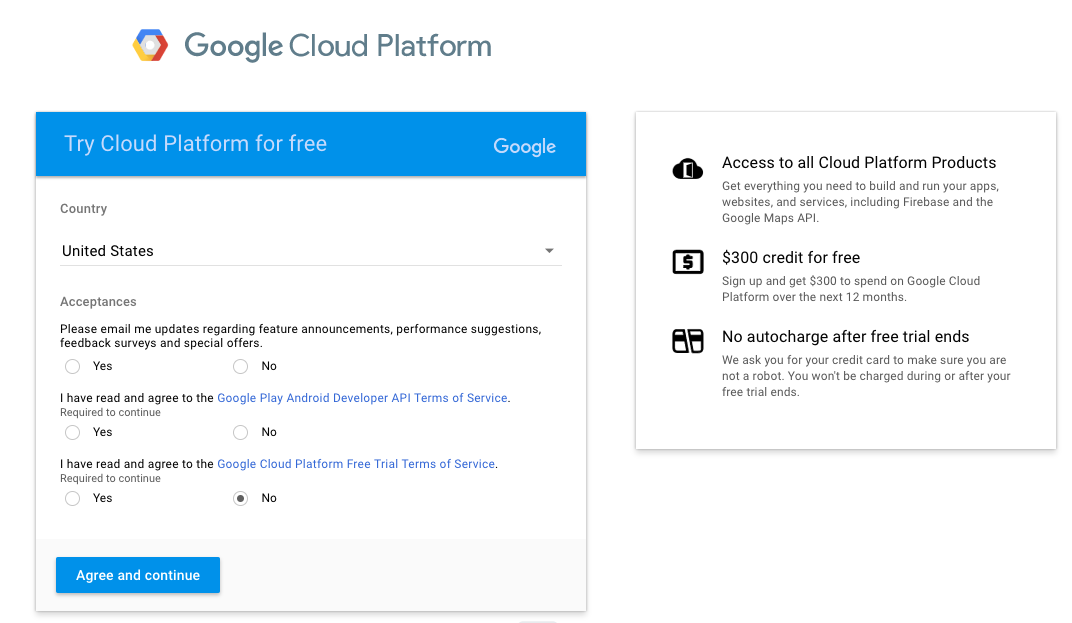
Click the appropriate yes or no button for the first option, and check yes for the latter two options after you have read the required agreements. Press the blue Agree and continue button to continue to the next page to enter the requested information (your name, billing address and credit card information). Once you have entered the required information, press the blue Start my free trial button. You will be greeted by a page like this:
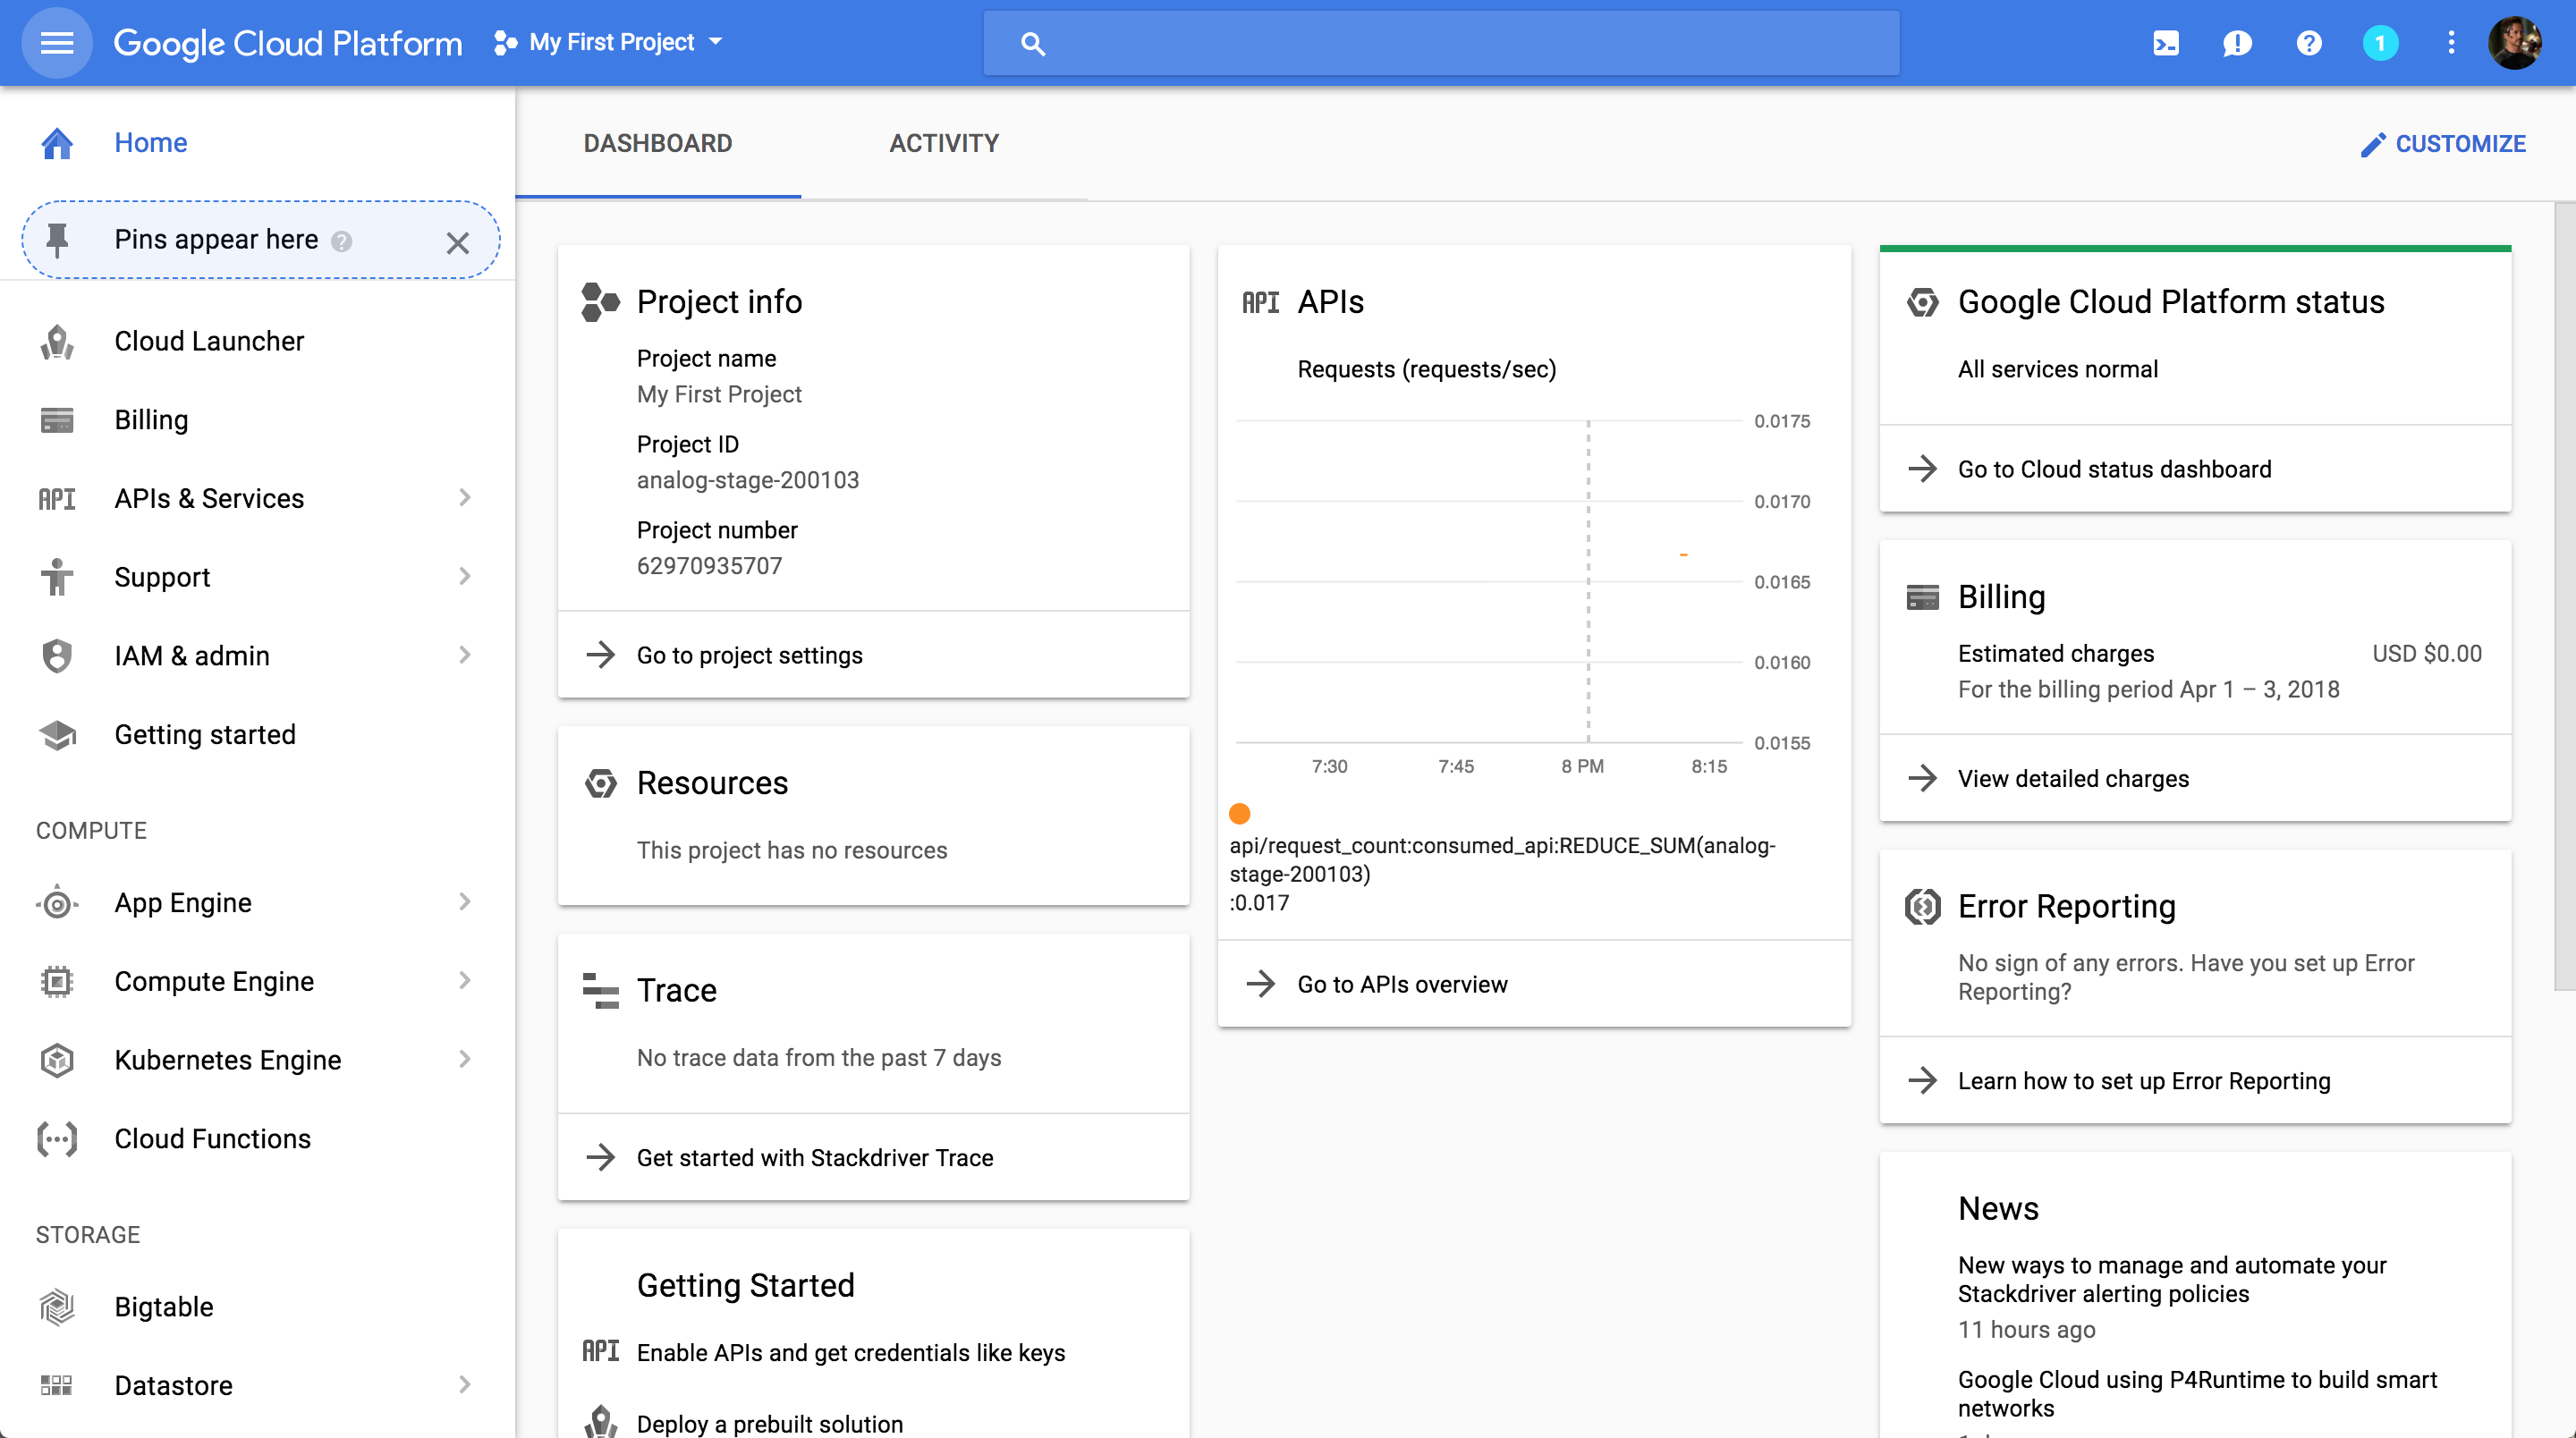
To change the name of your project, click on Manage project settings on the Project info button and save your changes.
Launch a Virtual Instance
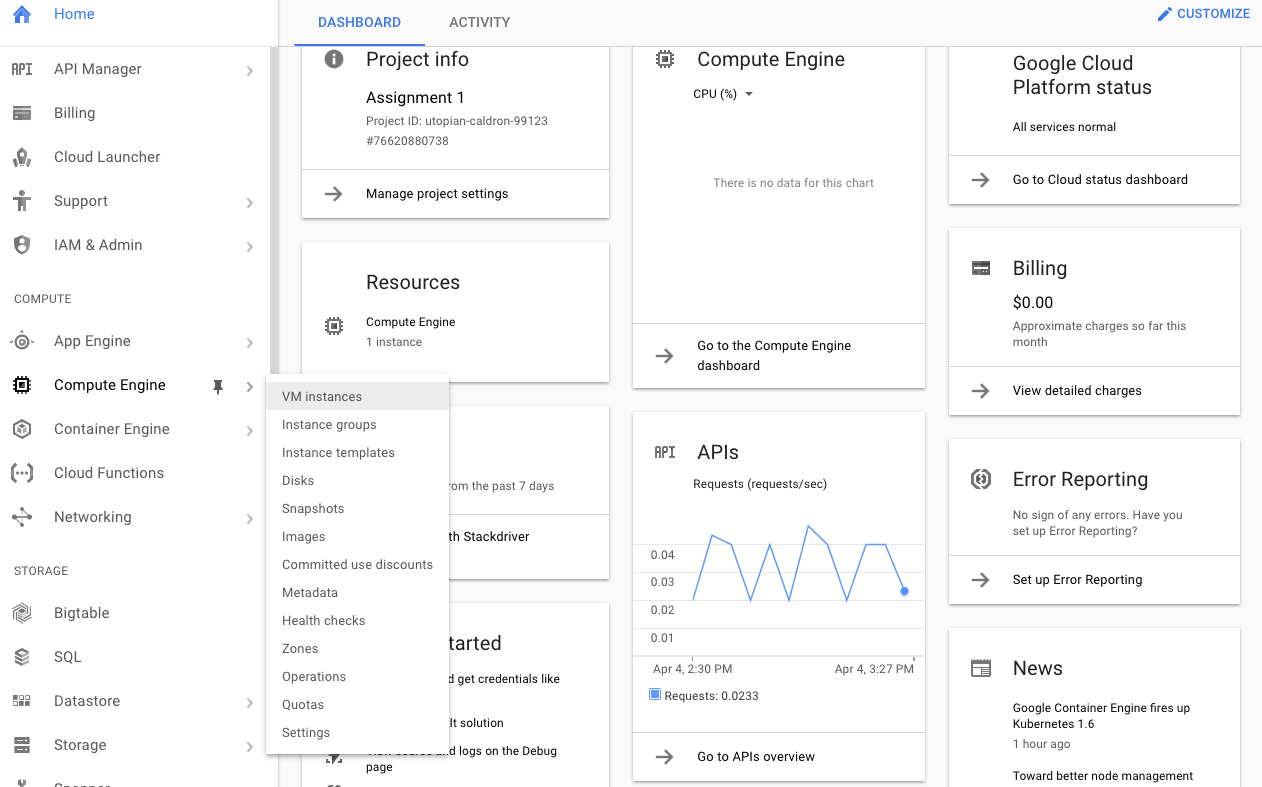
To launch a virtual instance, go to the Compute Engine menu on the left column of your dashboard and click on VM instances. Then click on the blue CREATE button on the next page. This will take you to a page that looks like the screenshot below. (NOTE: Please carefully read the instructions in addition to looking at the screenshots. The instructions tell you exactly what values to fill in).

Make sure that the Zone is set to be us-west1-b (especially for assignments where you need to use GPU instances). Under Machine type pick the 8 vCPUs option. Click on the customize button under Machine type and make sure that the number of cores is set to 8 and the number of GPUs is set to None (we will not be using GPUs in assignment 1 and this tutorial will be updated with instructions for GPU usage). Click on the Change button under Boot disk, choose OS images, check Ubuntu 16.04 LTSand click on the blue select button. Check Allow HTTP traffic and Allow HTTPS traffic. Click on diskand then Disks and uncheck Delete boot disk when instance is deleted (Note that the “Disks” option may be hiding under an expandable URL at the bottom of that webform). Click on the blue Create button at the bottom of the page. You should have now successfully created a Google Compute Instance, it might take a few minutes to start running. Your screen should look something like the one below. When you want to stop running the instance, click on the blue stop button above.
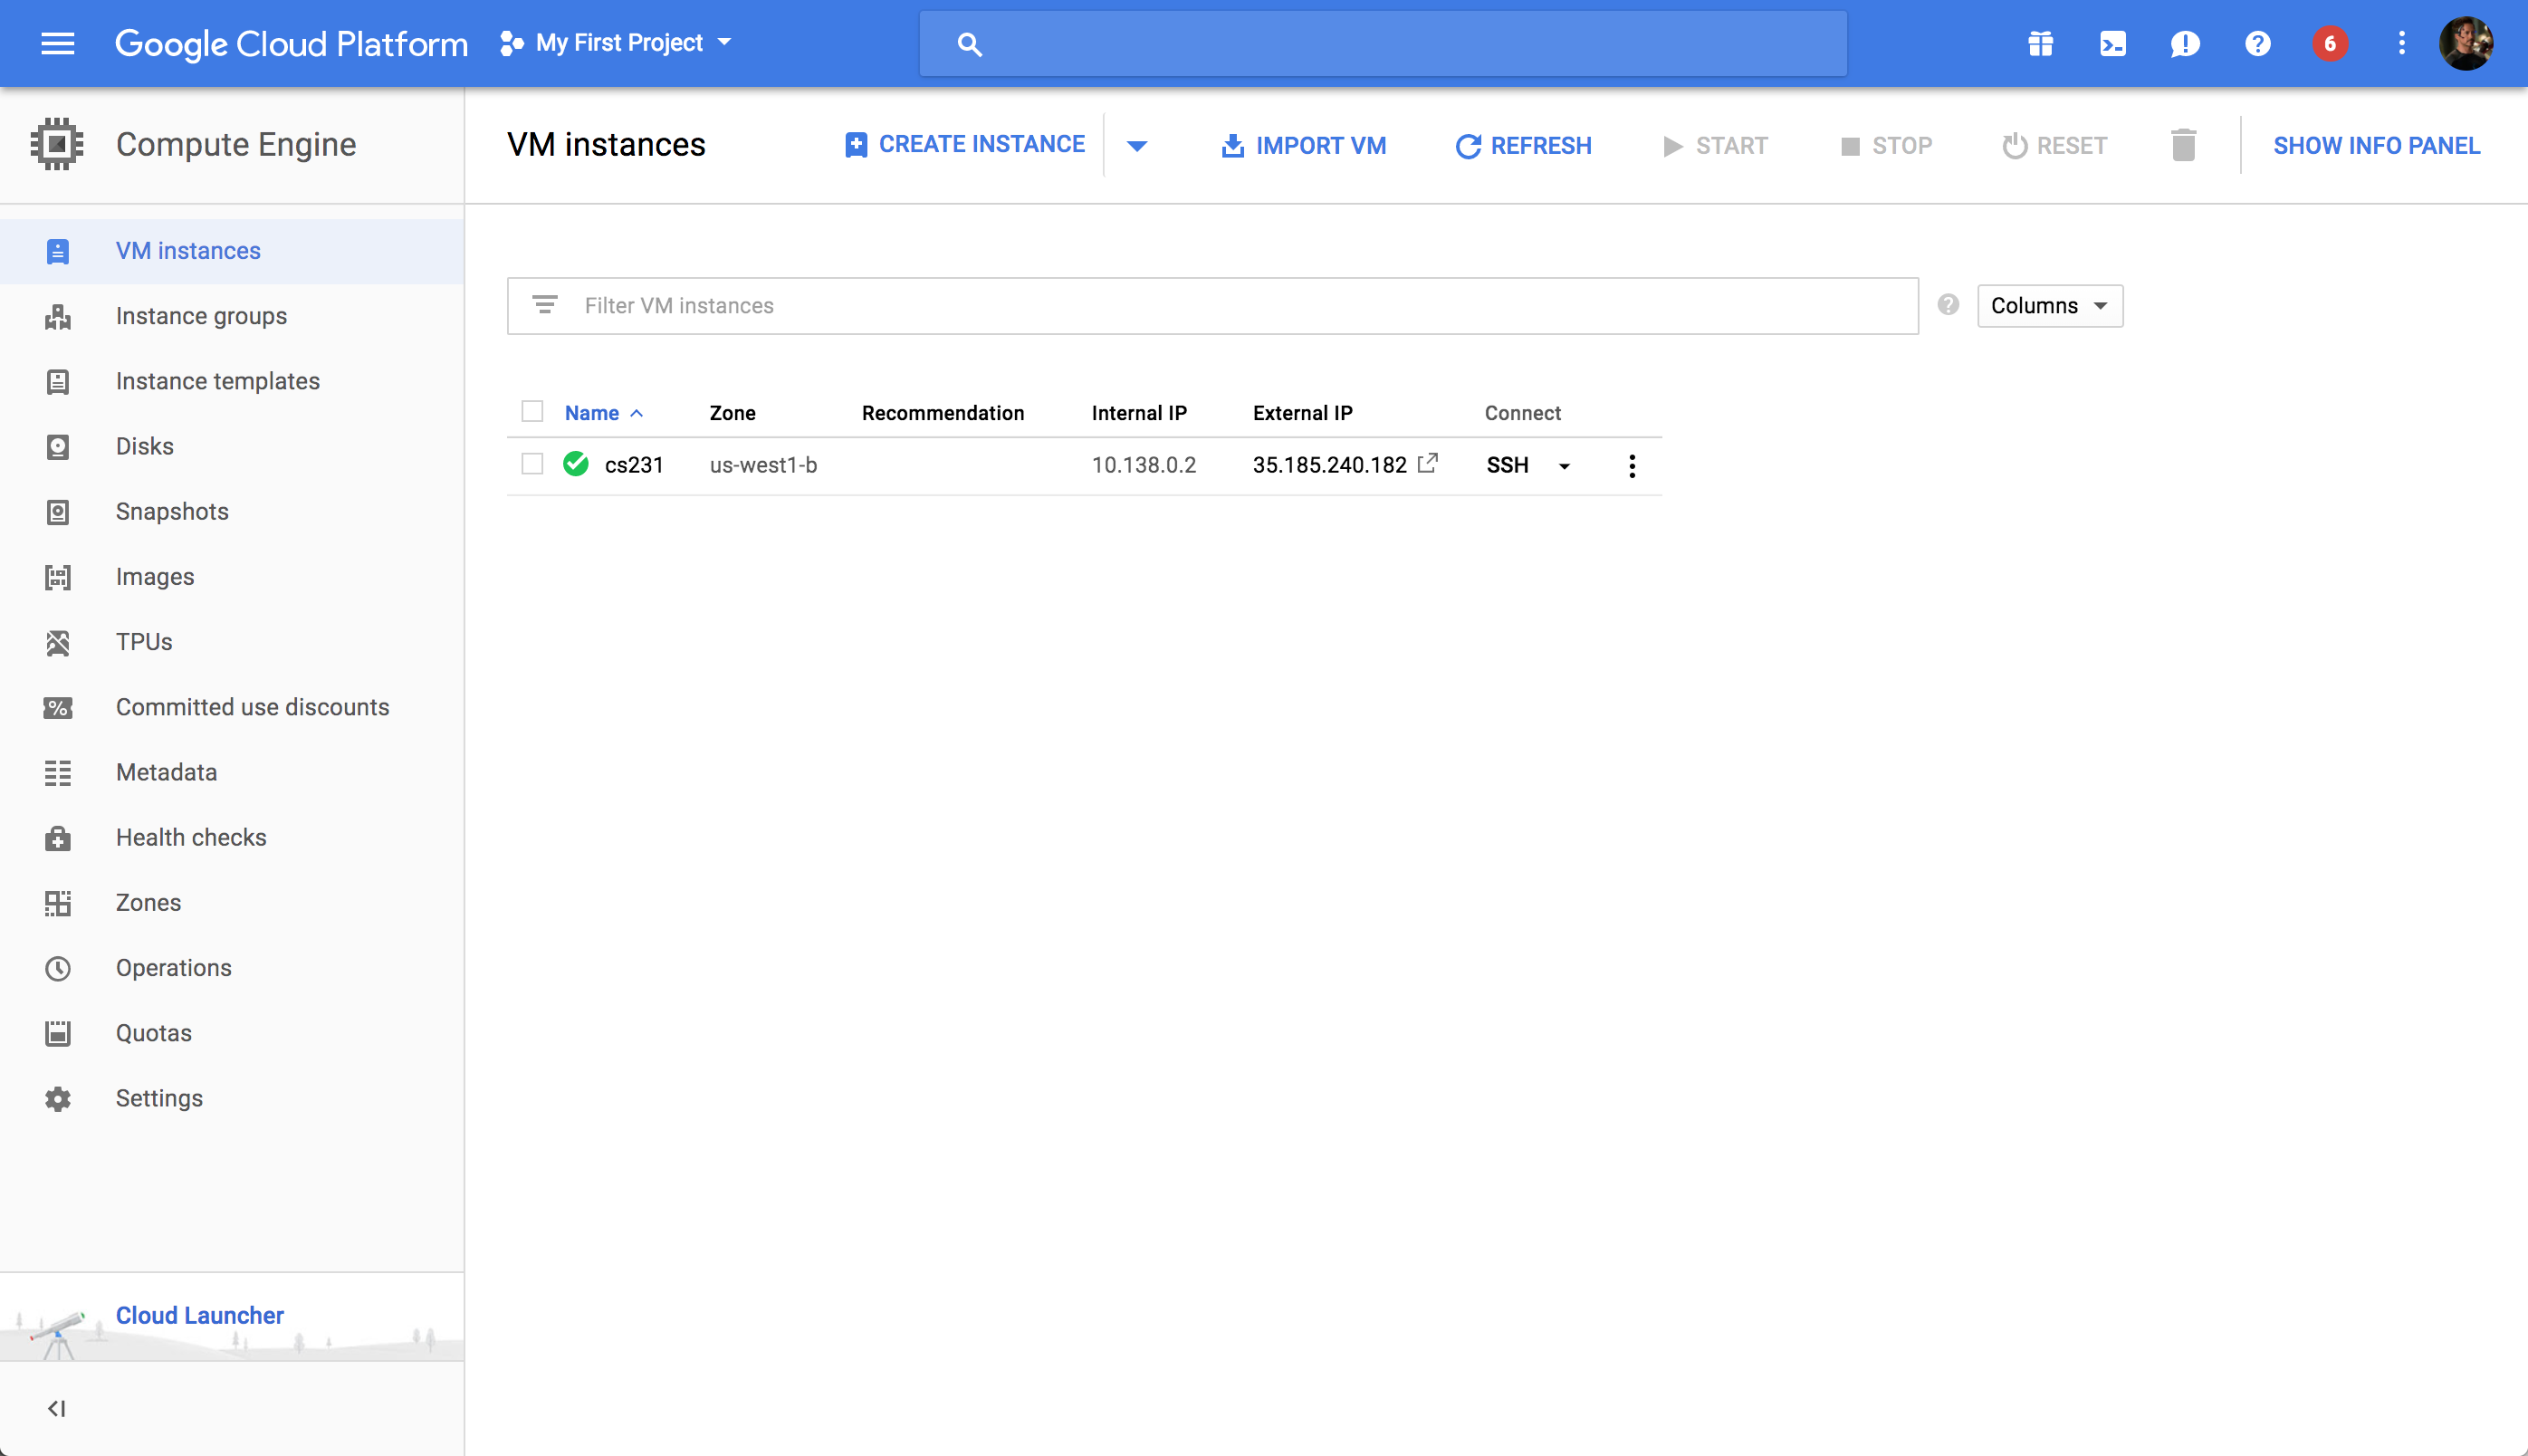
Take note of your <YOUR-INSTANCE-NAME>, in this case, my instance name is instance-2.
Connect to Your Virtual Instance and Download the Assignment
Now that you have created your virtual GCE, you want to be able to connect to it from your computer. The rest of this tutorial goes over how to do that using the command line. First, download the Google Cloud SDK that is appropriate for your platform from here and follow their installation instructions. NOTE: this tutorial assumes that you have performed step #4 on the website which they list as optional. When prompted, make sure you select us-west1-b as the time zone. The easiest way to connect is using the gcloud compute command below. The tool takes care of authentication for you. On OS X, run:
./<DIRECTORY-WHERE-GOOGLE-CLOUD-IS-INSTALLED>/bin/gcloud compute ssh --zone=us-west1-b <YOUR-INSTANCE-NAME>See this page for more detailed instructions. You are now ready to work on the assignments on Google Cloud.
Run the following command to download the current assignment onto your GCE:
wget http://cs231n.stanford.edu/assignments/2017/spring1617_assignment1.zip Then run:
sudo apt-get install unzipand
unzip spring1617_assignment1.zipto get the contents. You should now see a folder titled assignmentX. To install the necessary dependencies for assignment 1 (NOTE: you only need to do this for assignment 1), cd into the assignment directory and run the provided shell script: (Note: you will need to hit the [enter] key at all the “[Y/n]” prompts)
cd assignment1 ./setup_googlecloud.shYou will be prompted to enter Y/N at various times during the download. Press enter for every prompt. You should now have all the software you need for assignmentX. If you had no errors, you can proceed to work with your virtualenv as normal.
I.e. run
source .env/bin/activatein your assignment directory to load the venv, and run
deactivateto exit the venv. See assignment handout for details.
NOTE: The instructions above will run everything needed using Python 2.7. If you would like to use Python 3.5 instead, edit setup_googlecloud.sh to replce the line
virtualenv .env with
virtualenv -p python3 .envbefore running
./setup_googlecloud.shUsing Jupyter Notebook with Google Compute Engine
Many of the assignments will involve using Jupyter Notebook. Below, we discuss how to run Jupyter Notebook from your GCE instance and use it on your local browser.
Getting a Static IP Address
Change the Extenal IP address of your GCE instance to be static (see screenshot below).
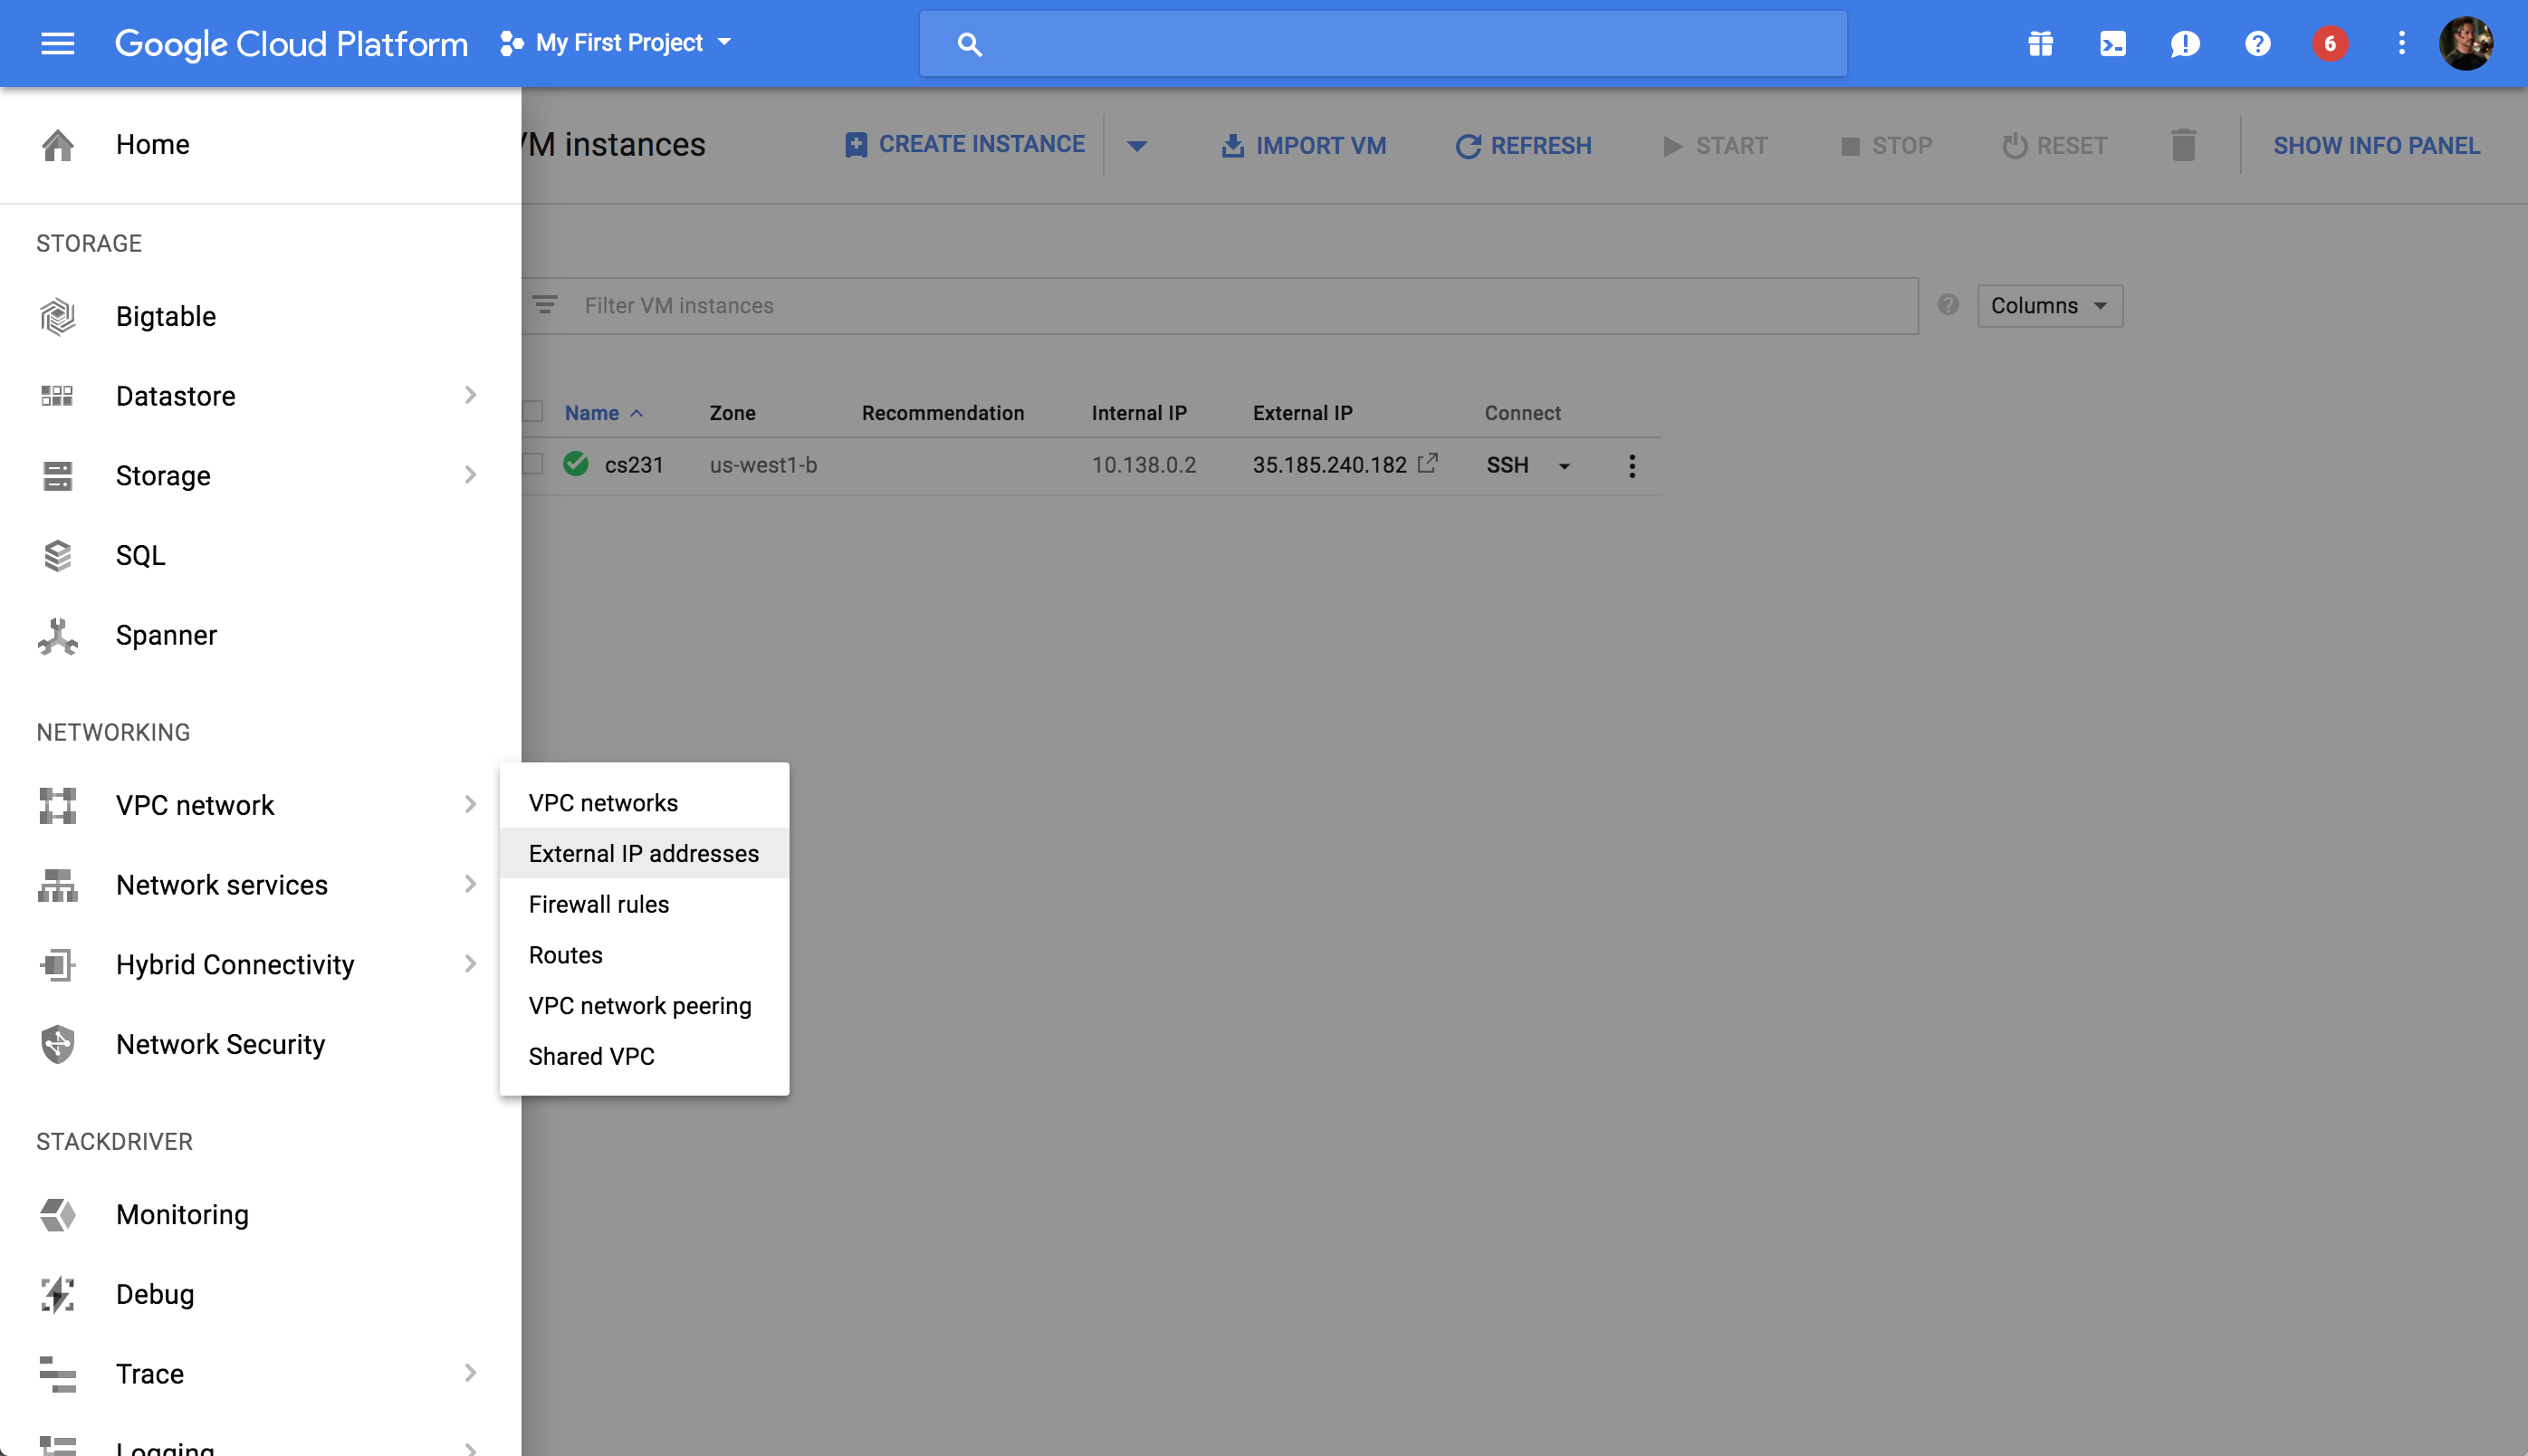
To Do this, click on the 3 line icon next to the Google Cloud Platform button on the top left corner of your screen, go to Networking and External IP addresses (see screenshot below).
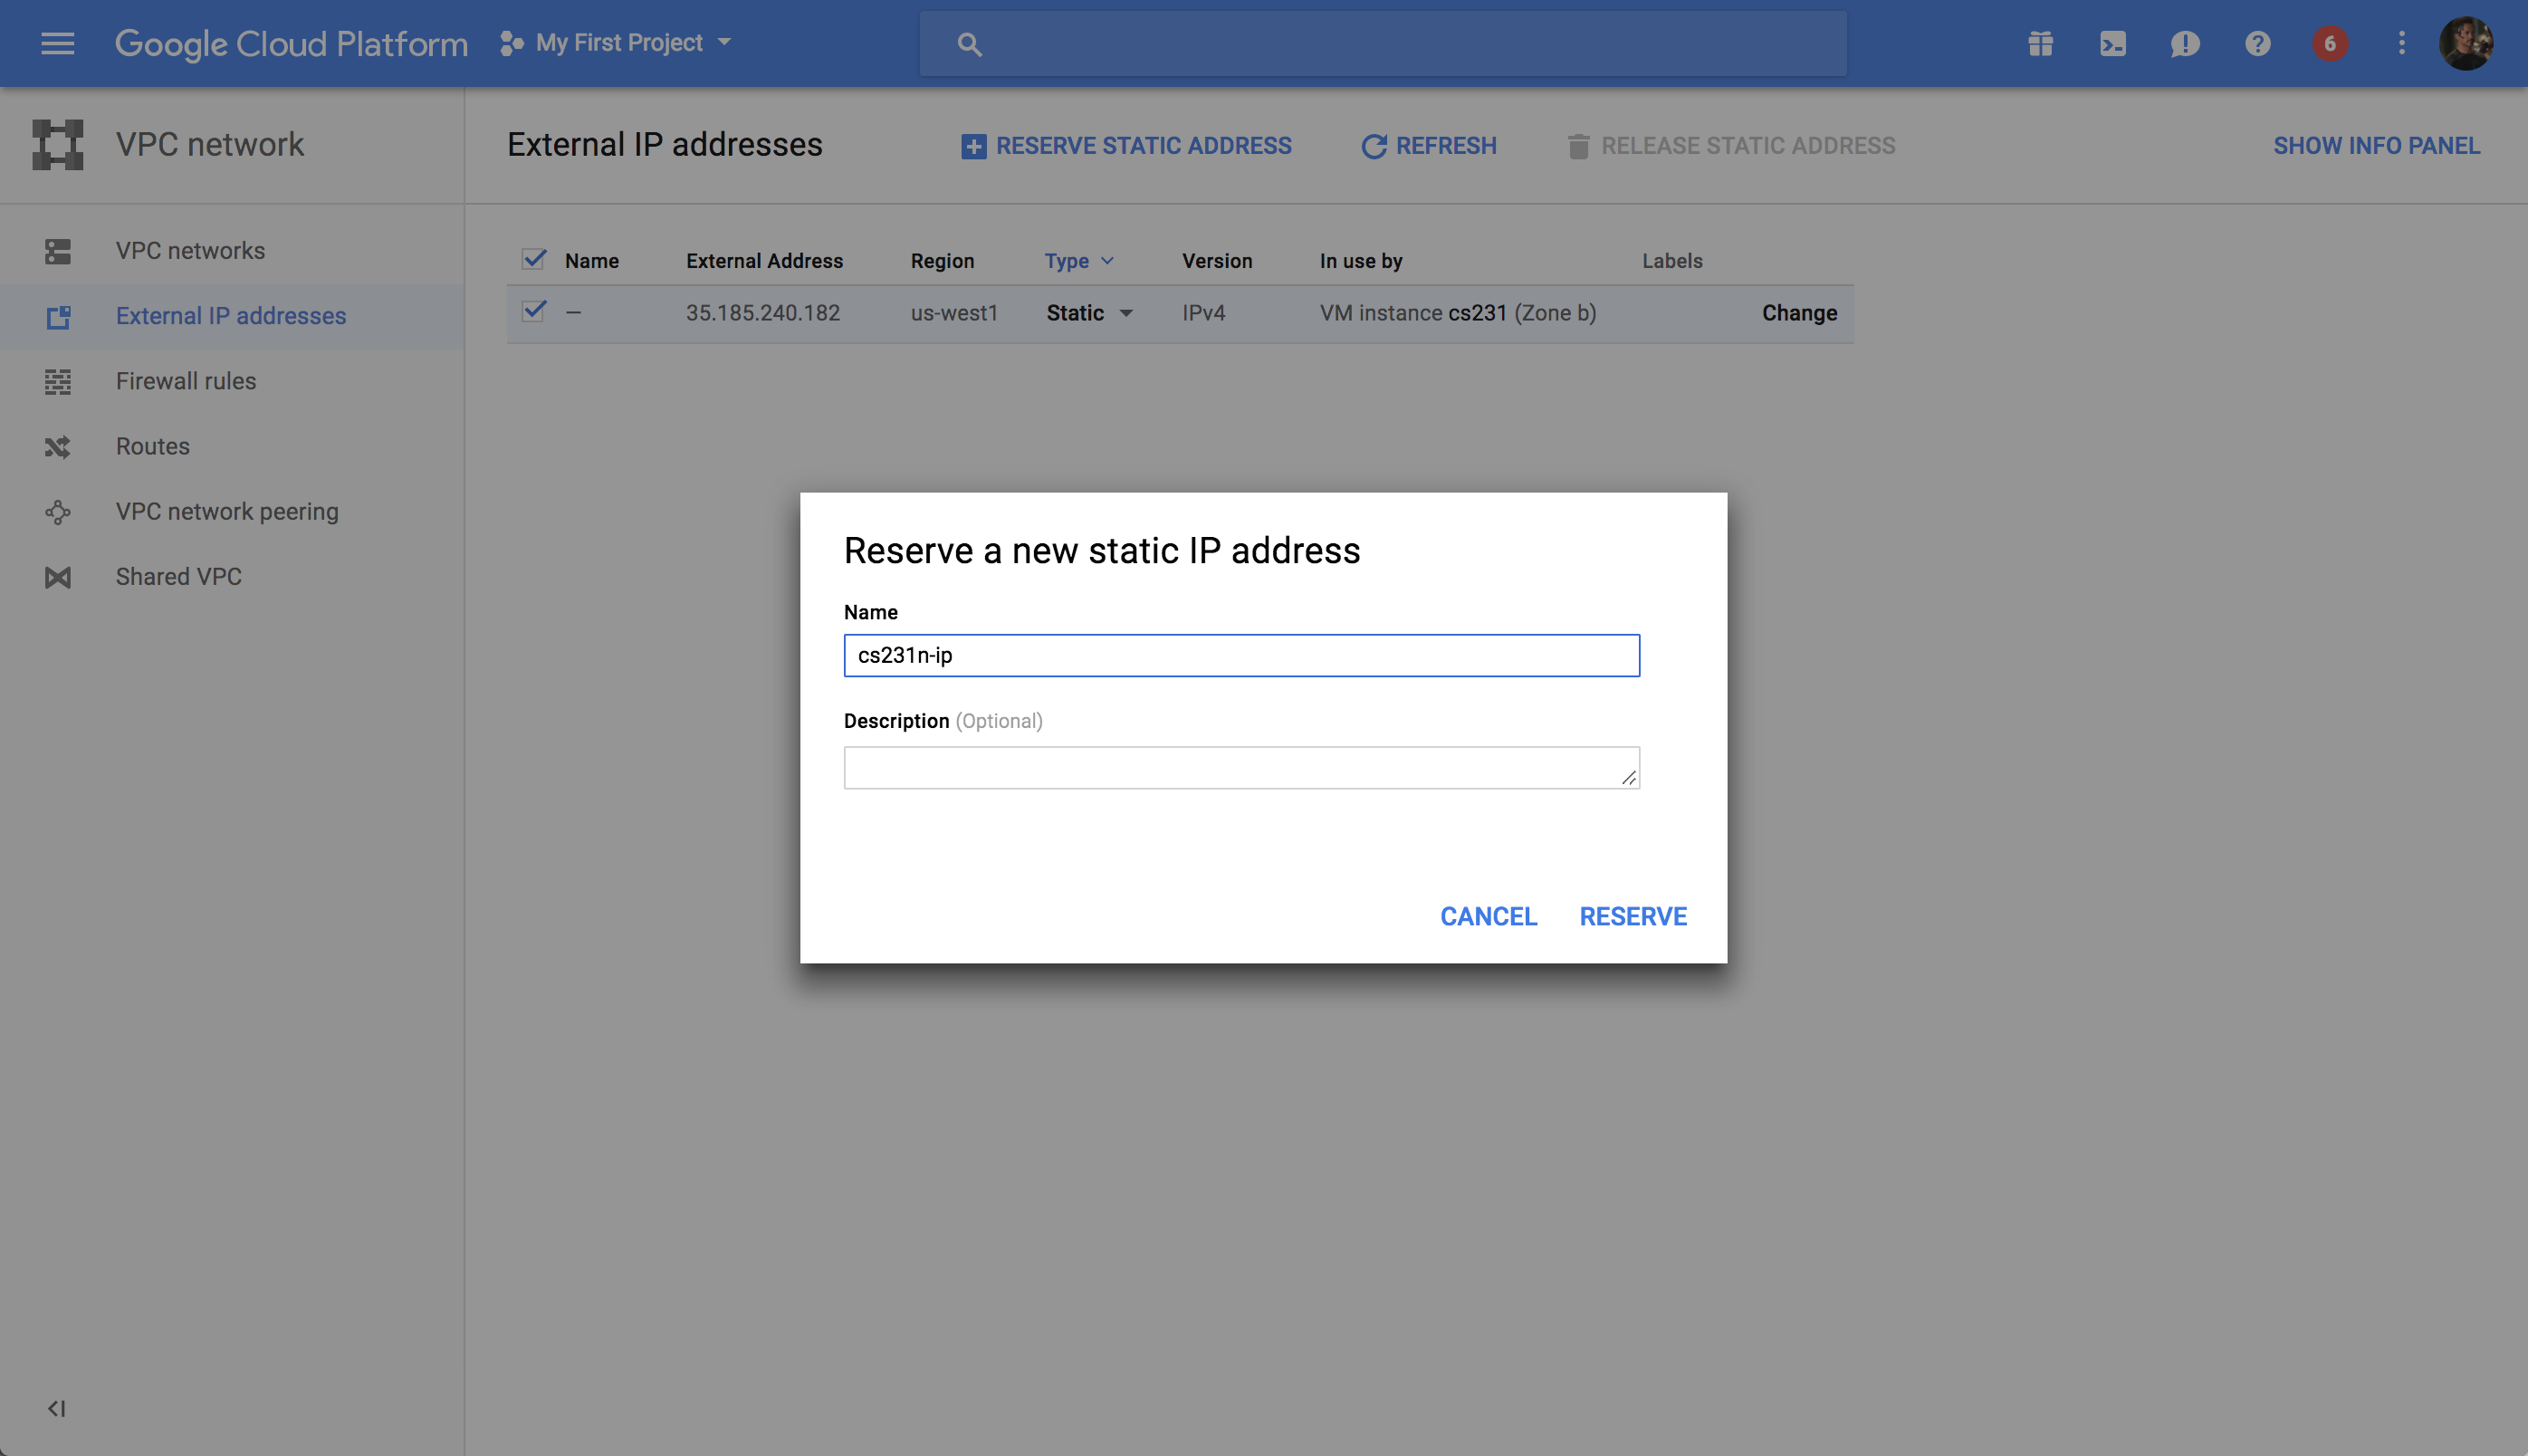
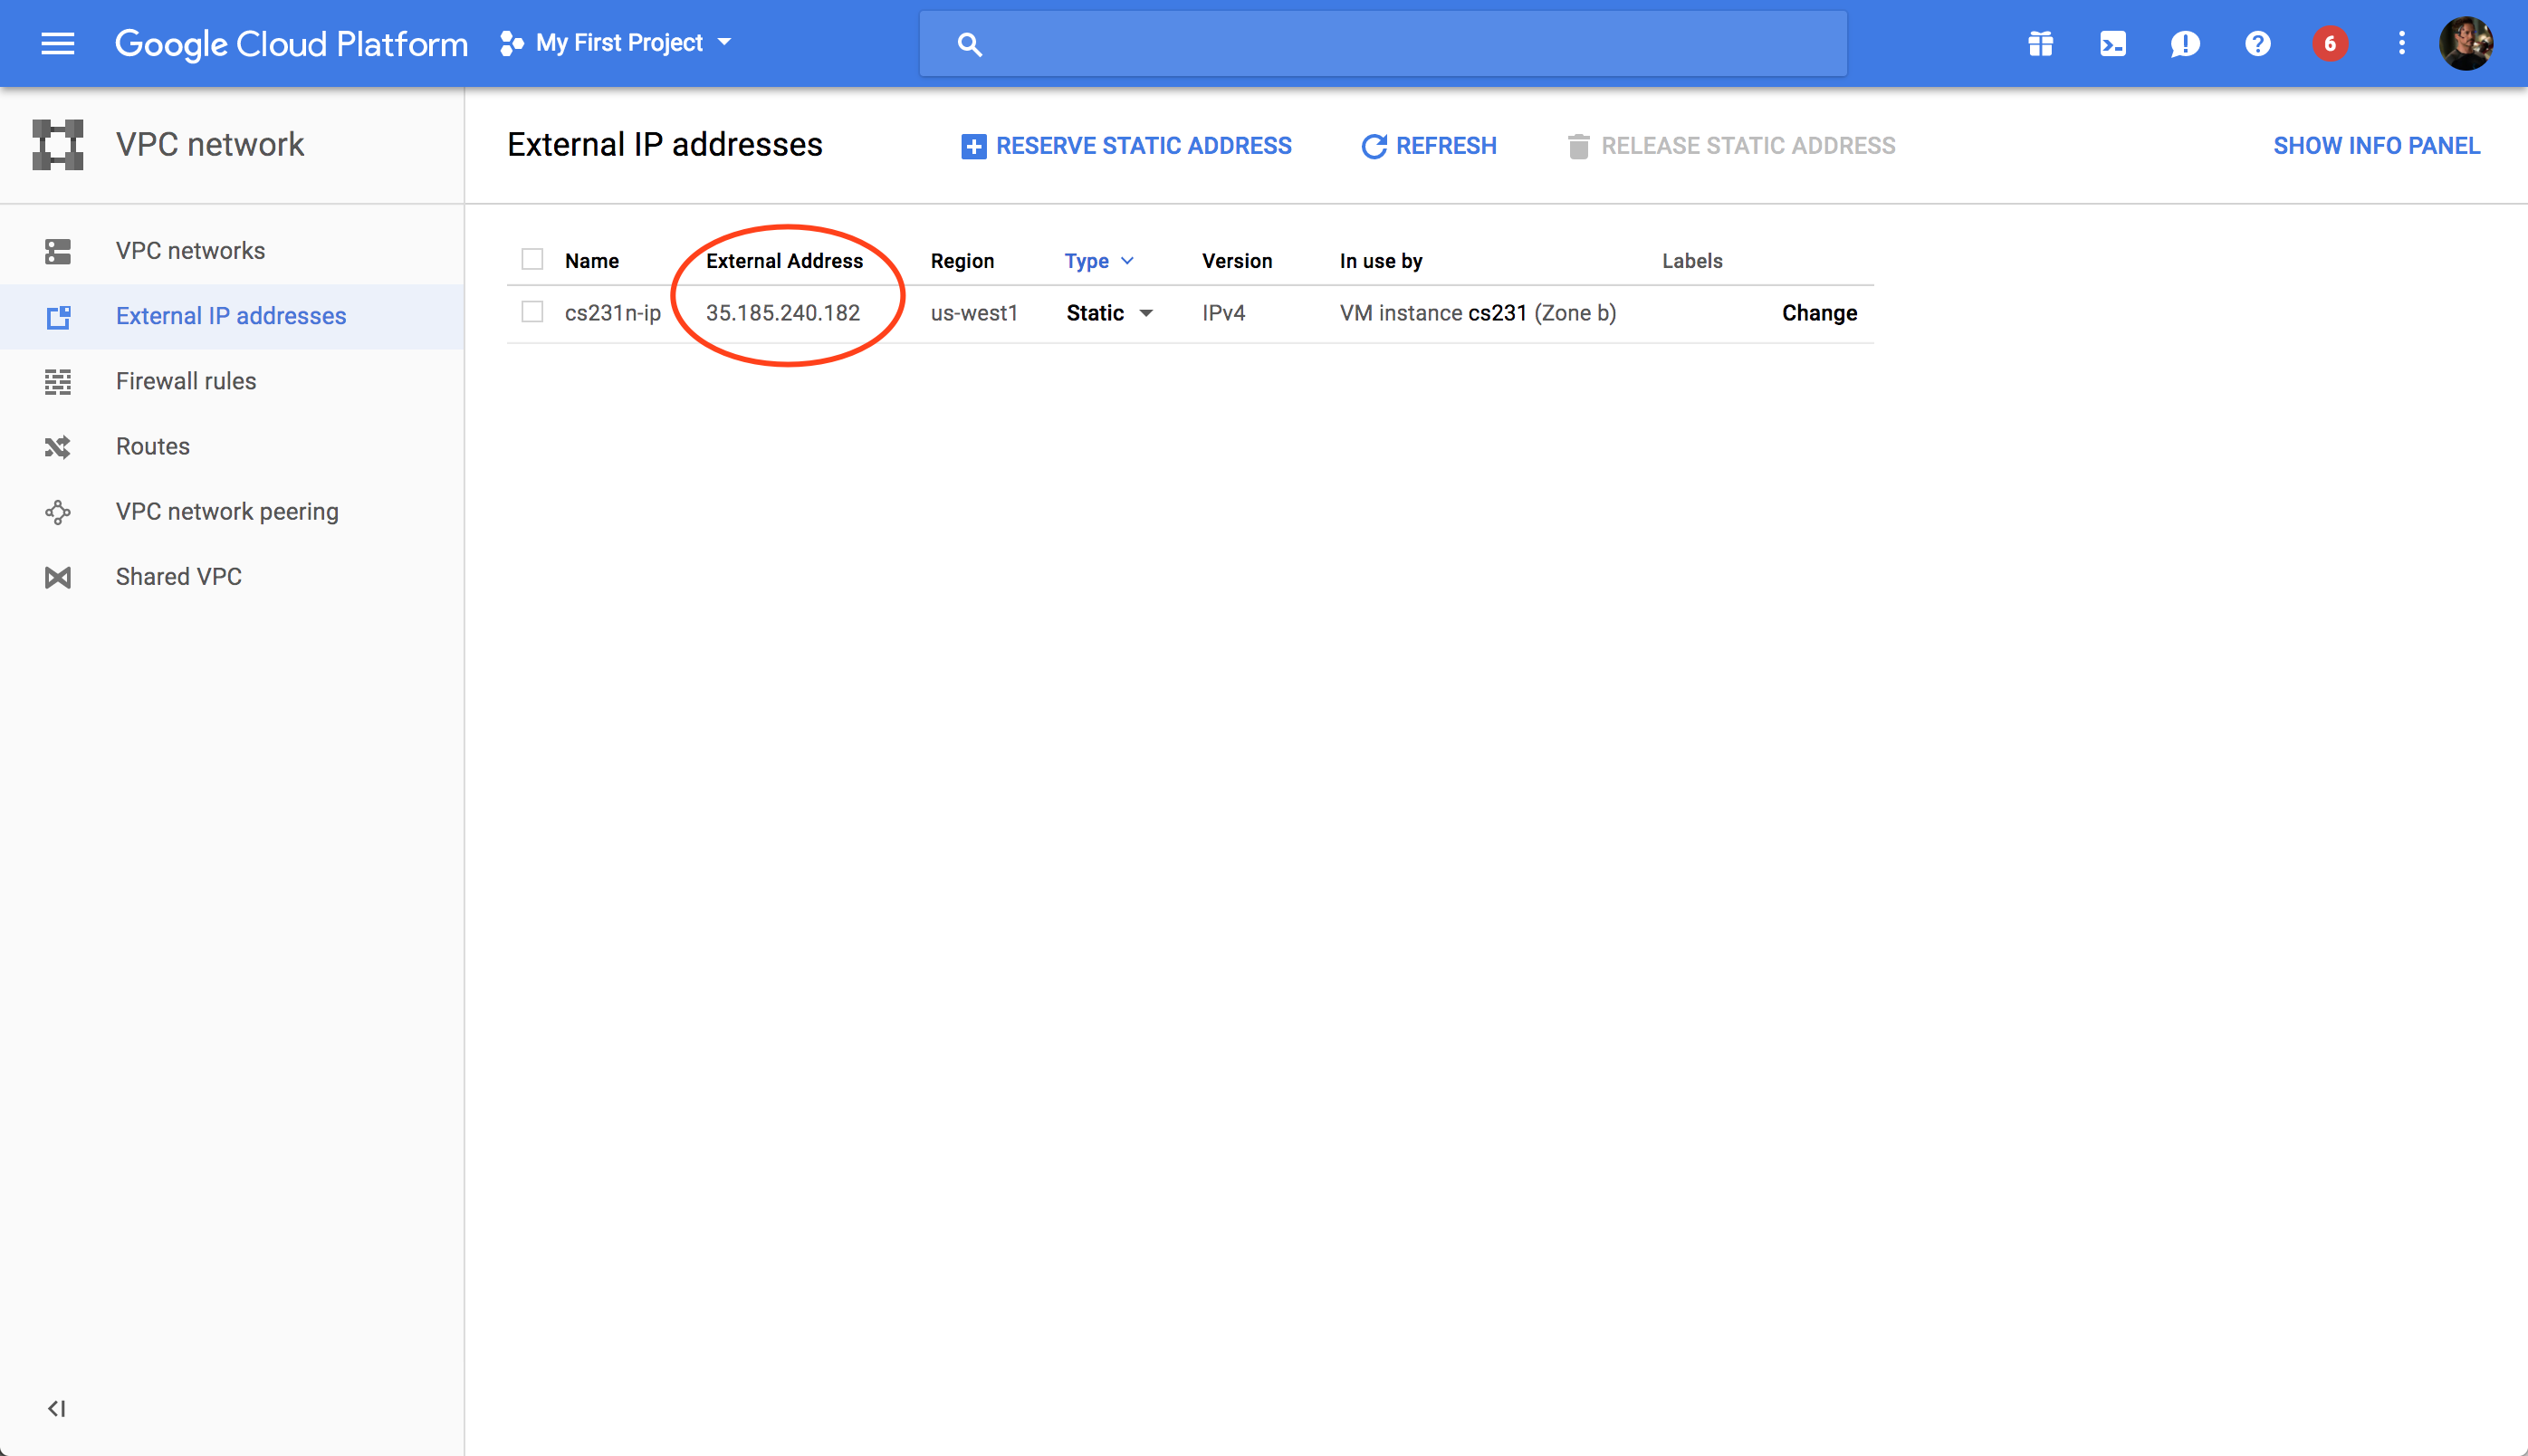
To have a static IP address, change Type from Ephemeral to Static. Enter your preffered name for your static IP, mine is assignment-1 (see screenshot below). And click on Reserve. Remember to release the static IP address when you are done because according to this page Google charges a small fee for unused static IPs. Type should now be set to Static.
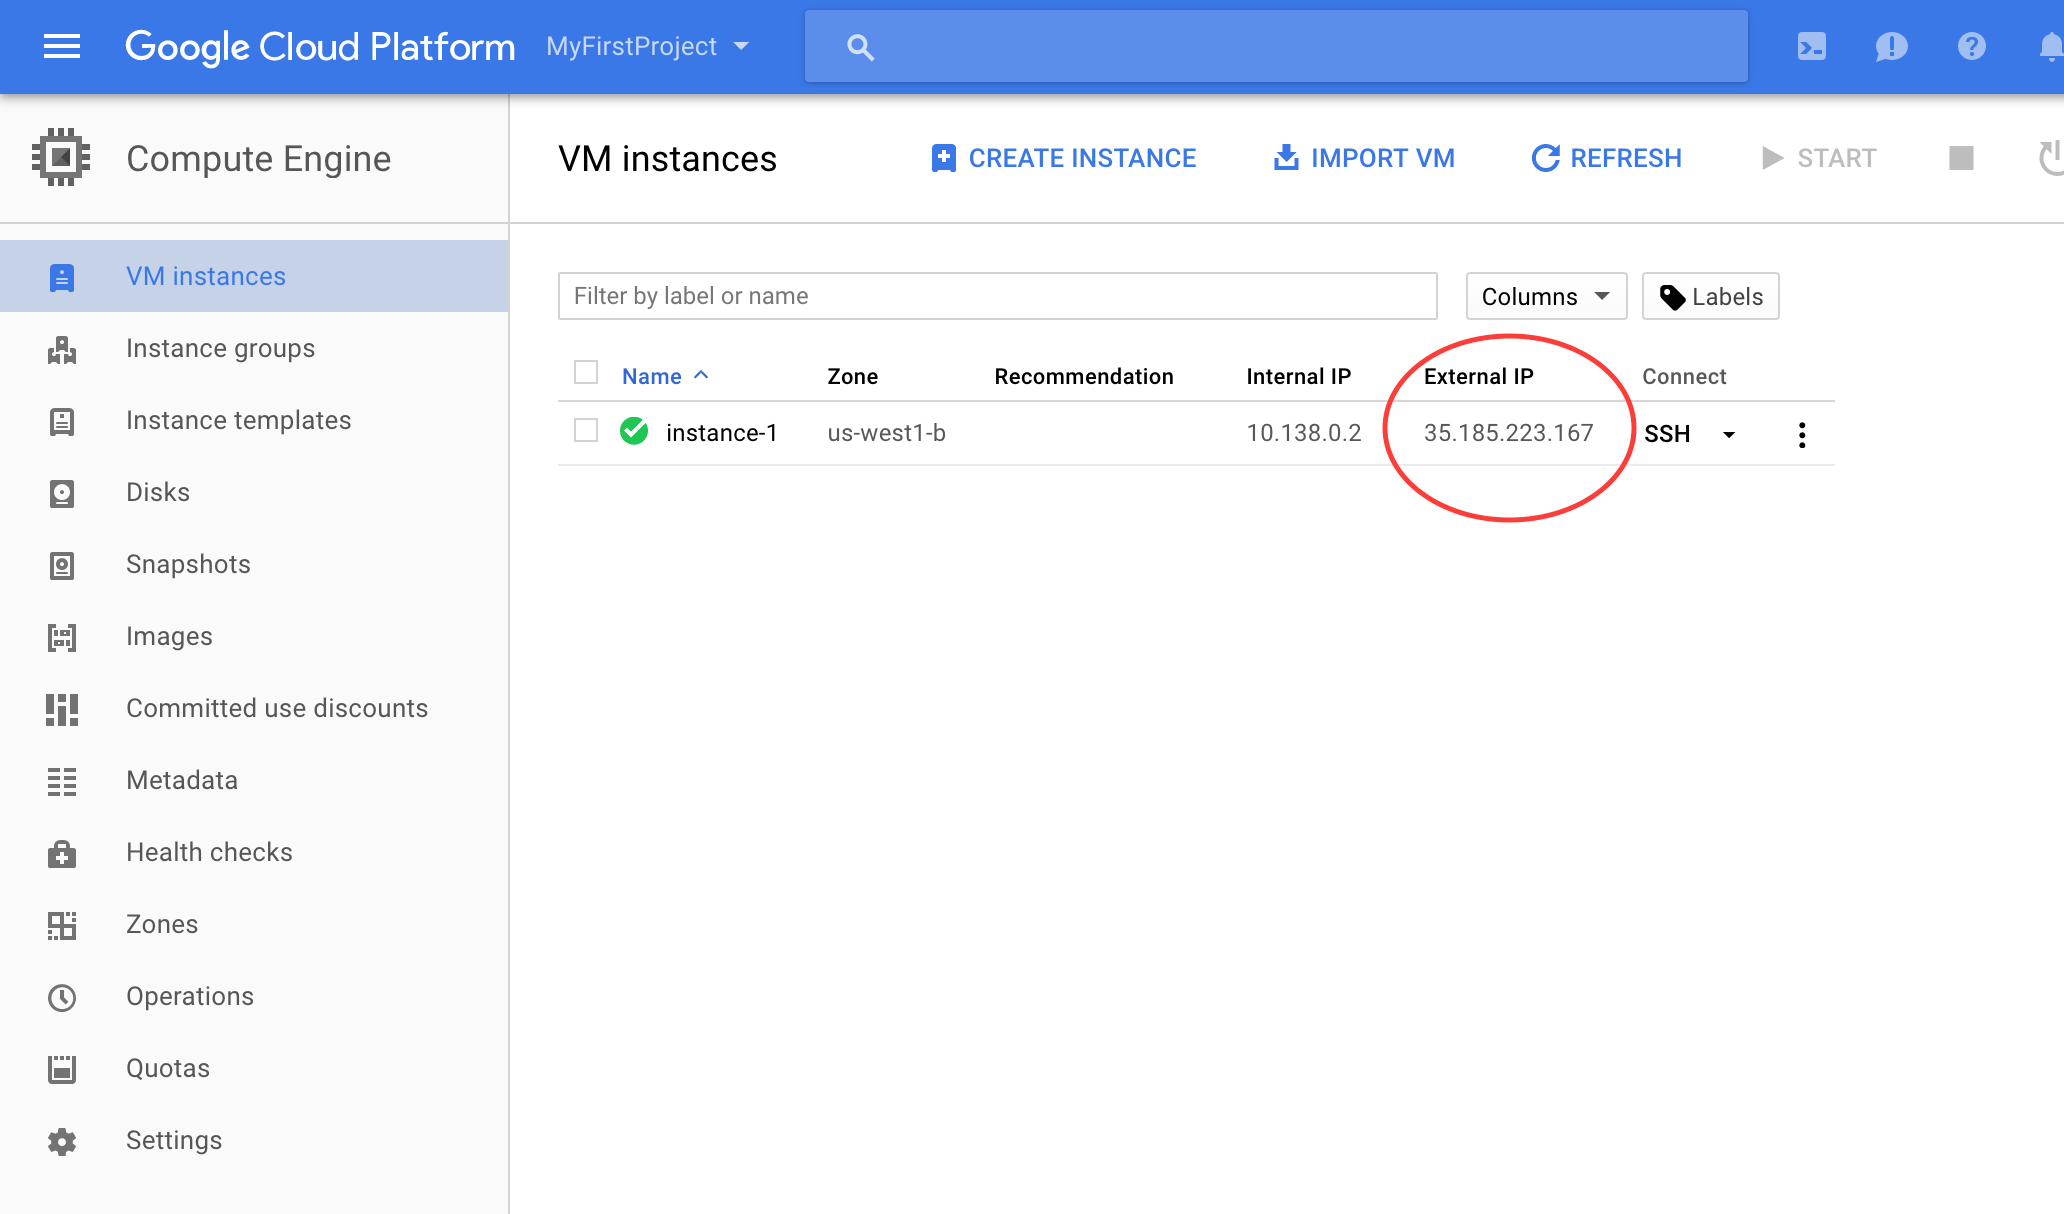
Take note of your Static IP address (circled on the screenshot below). I used 104.196.224.11 for this tutorial.
Adding a Firewall rule
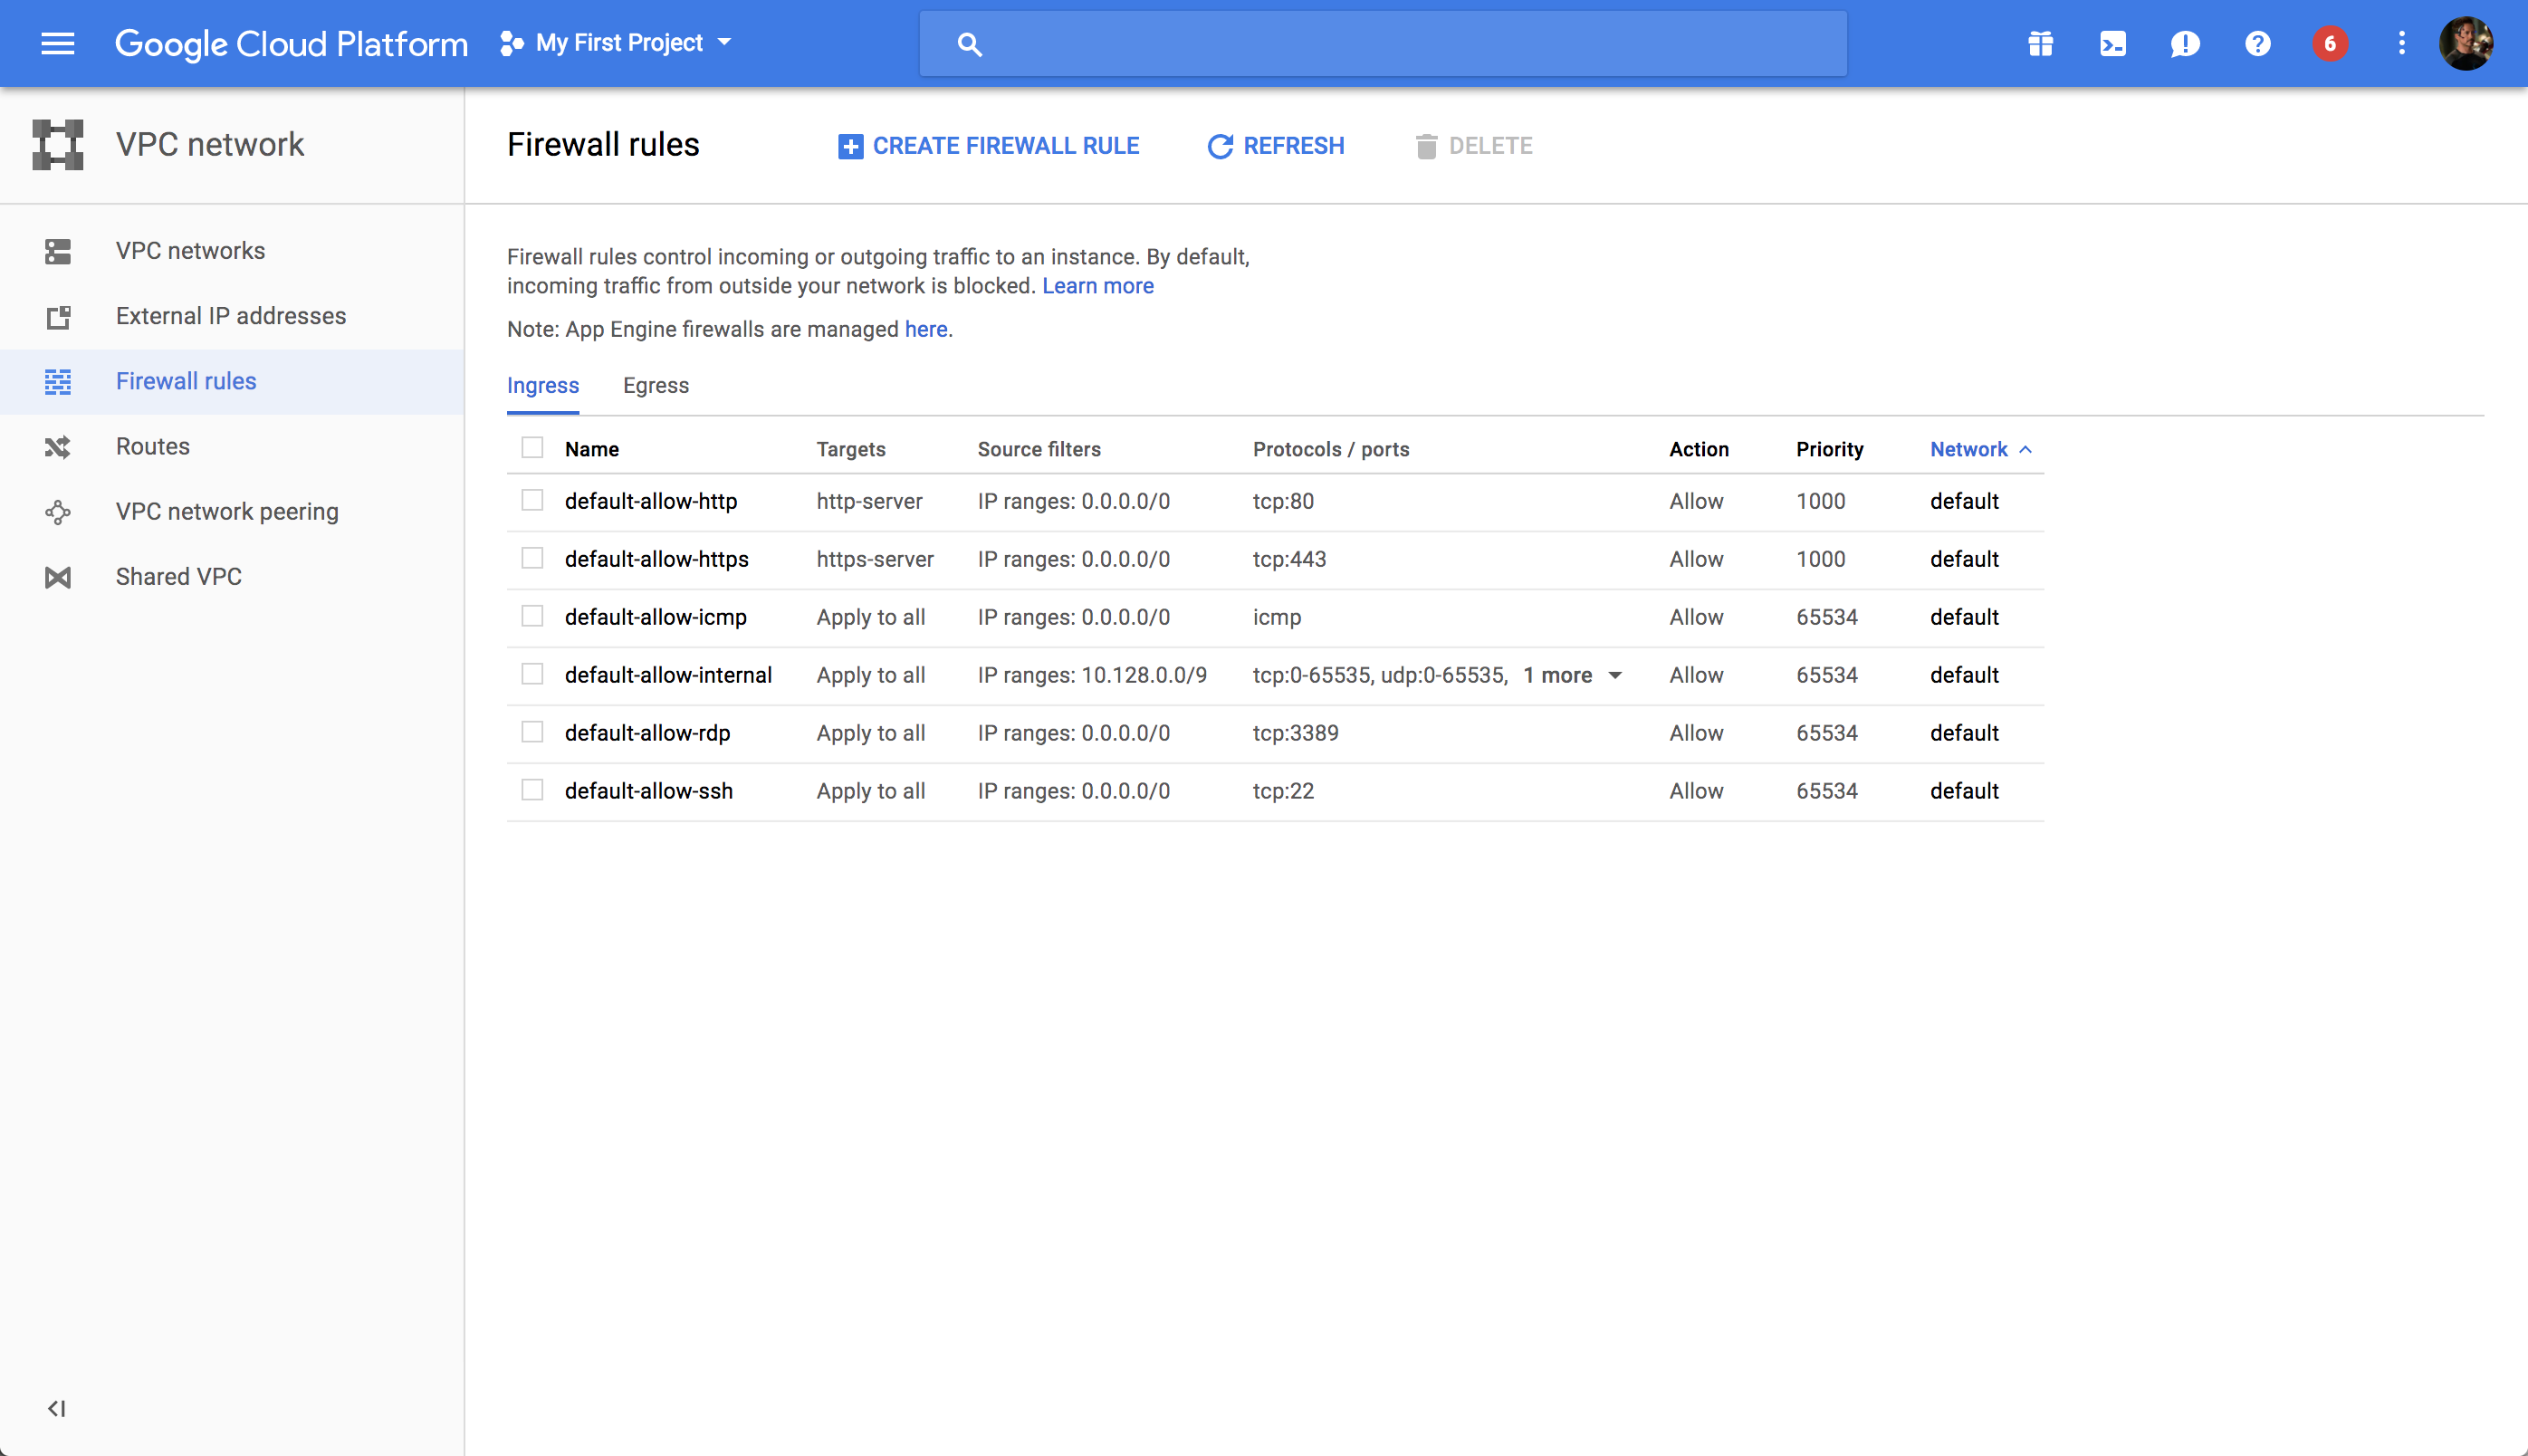
One last thing you have to do is adding a new firewall rule allowing TCP acess to a particular <PORT-NUMBER>. I usually use 7000 or 8000 for <PORT-NUMBER>. Click on the 3 line icon at the top of the page next to Google Cloud Platform. On the menu that pops up on the left column, go to Networkingand Firewall rules (see the screenshot below).
Click on the blue CREATE FIREWALL RULE button. Enter whatever name you want: I used assignment1-rules. Enter 0.0.0.0/0 for Source IP ranges and tcp:<PORT-NUMBER> for Allowed protocols and portswhere <PORT-NUMBER> is the number you used above. Click on the blue Create button. See the screen shot below.
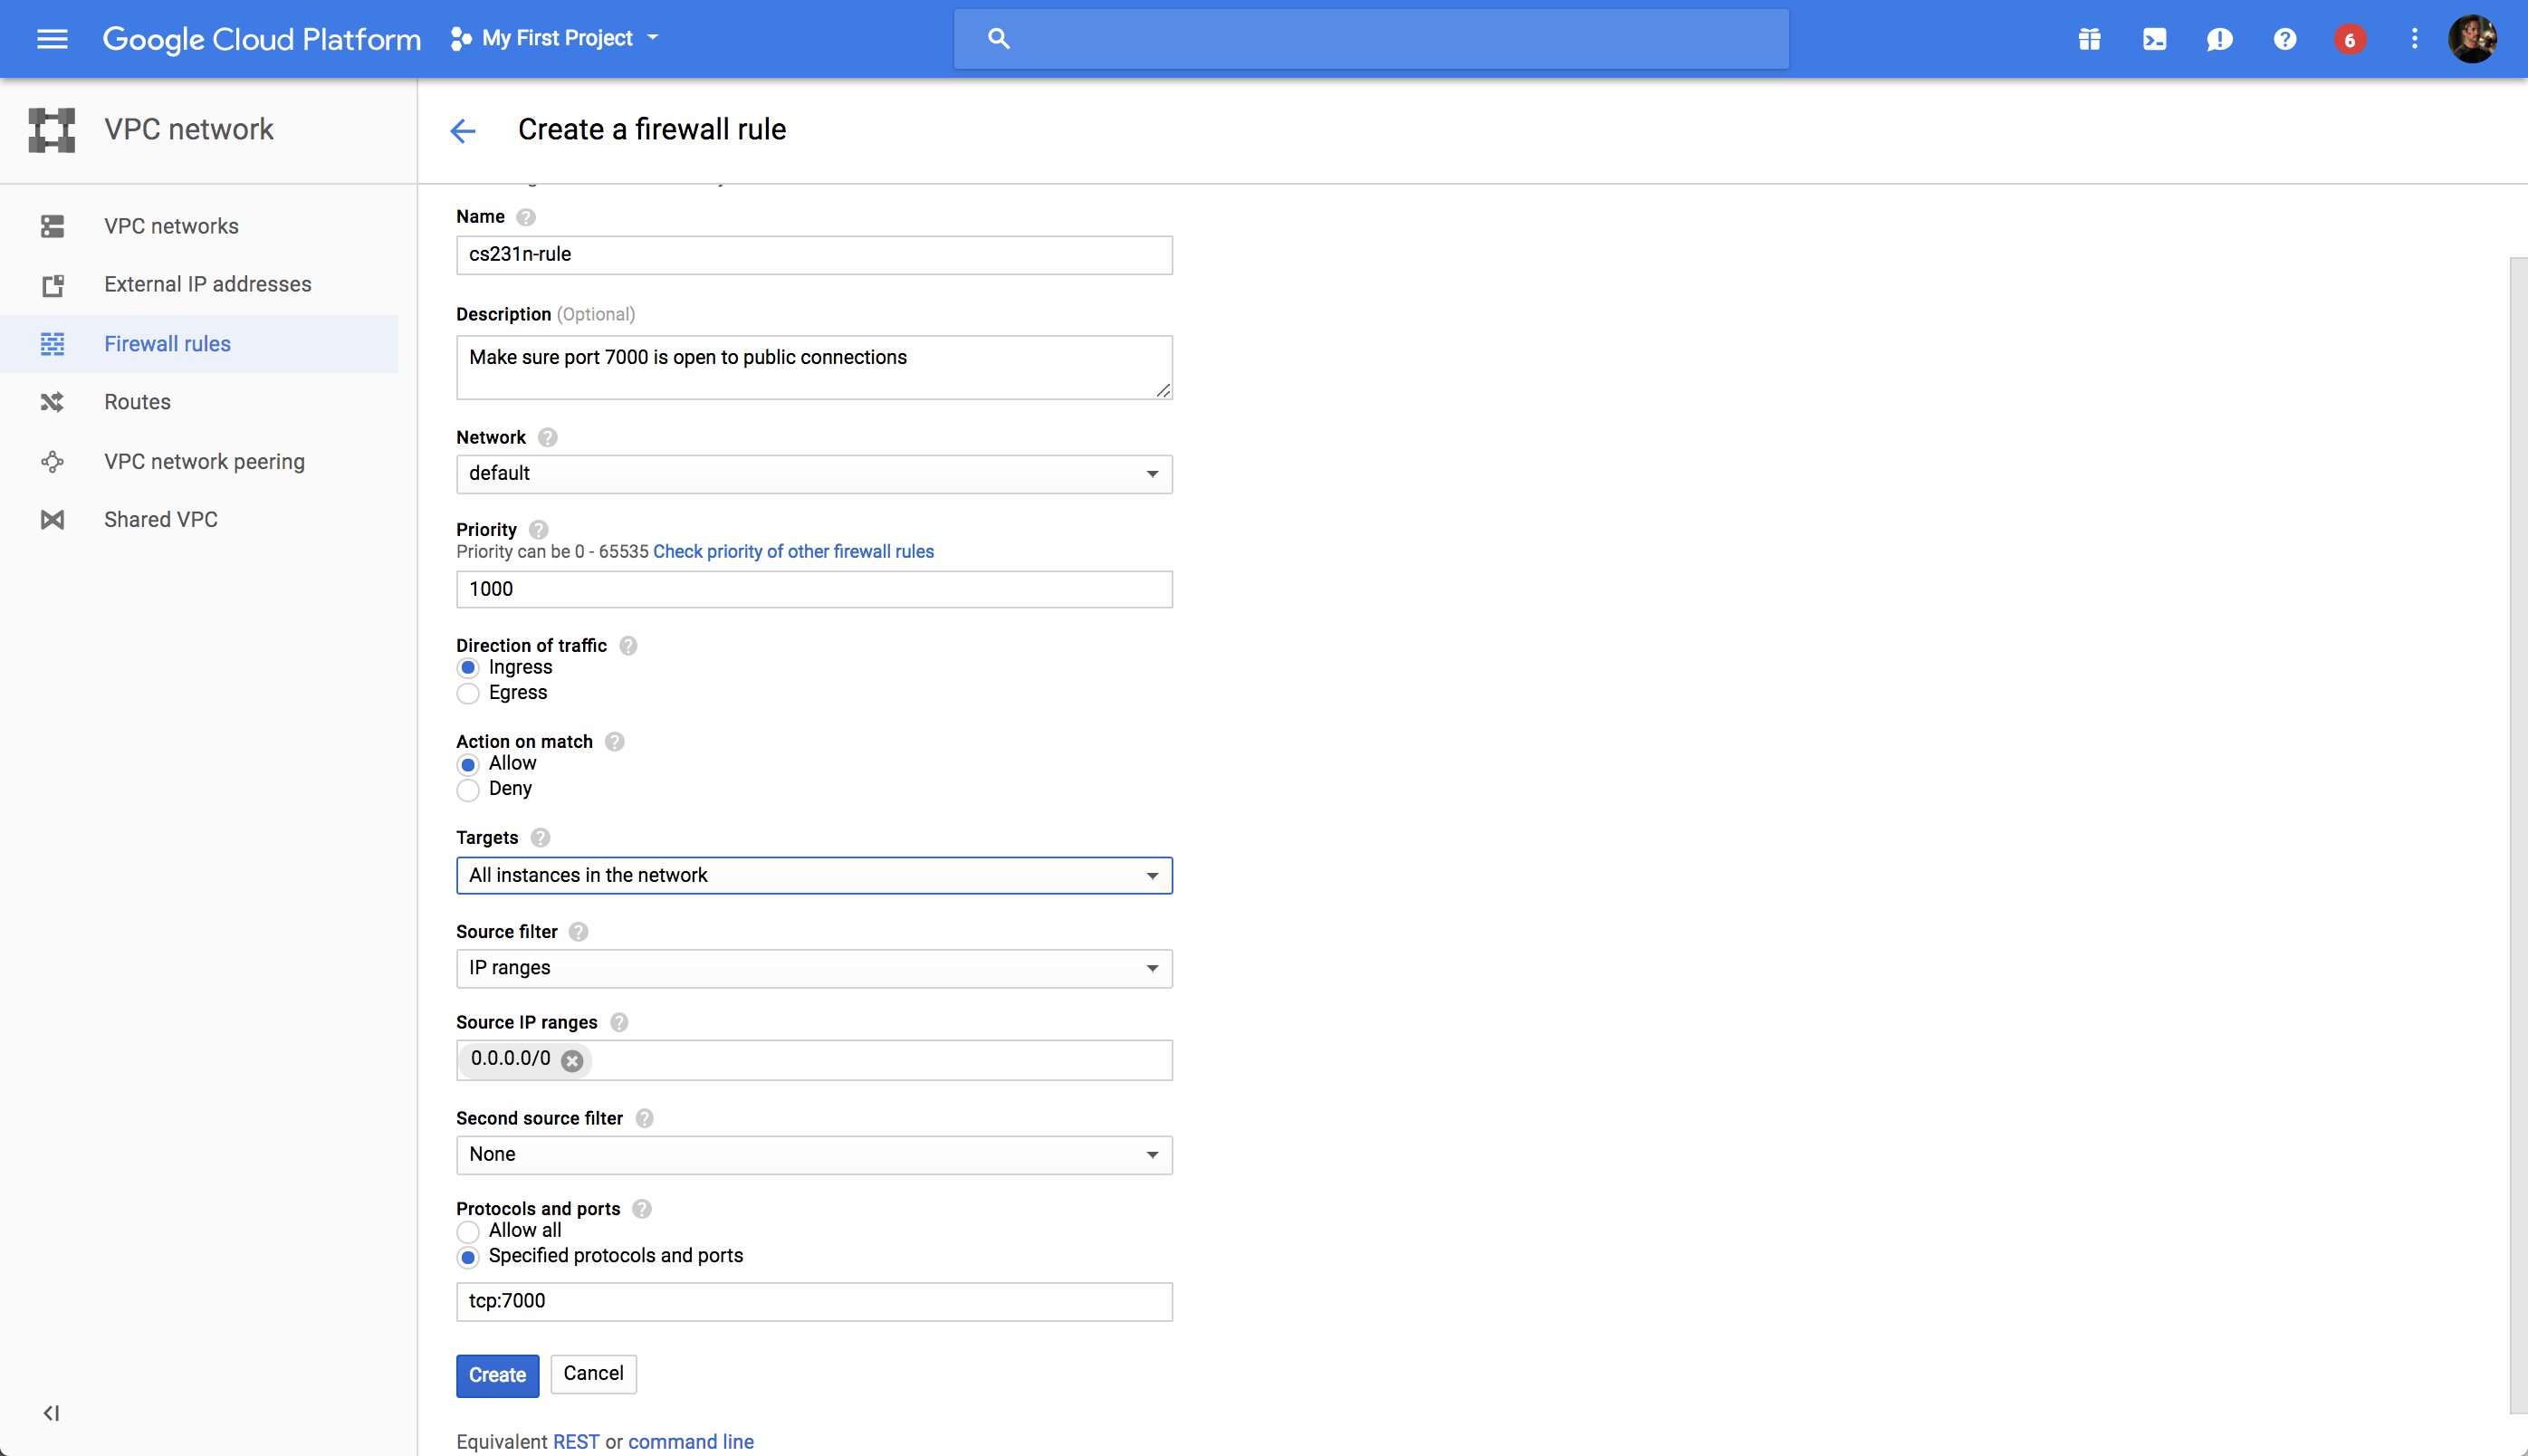
NOTE: Some people are seeing a different screen where instead of Allowed protocols and ports there is a field titled Specified protocols and ports. You should enter tcp:<PORT-NUMBER> for this field if this is the page you see. Also, if you see a field titled Targets select All instances in the network.
Configuring Jupyter Notebook
The following instructions are excerpts from this page that has more detailed instructions.
On your GCE instance check where the Jupyter configuration file is located:
ls ~/.jupyter/jupyter_notebook_config.pyMine was in /home/timnitgebru/.jupyter/jupyter_notebook_config.py
If it doesn’t exist, create one:
# Remember to activate your virtualenv ('source .env/bin/activate') so you can actually run jupyter :)jupyter notebook --generate-configUsing your favorite editor (vim, emacs etc…) add the following lines to the config file, (e.g.: /home/timnitgebru/.jupyter/jupyter_notebook_config.py):
c = get_config()c.NotebookApp.ip = '*'c.NotebookApp.open_browser = Falsec.NotebookApp.port = <PORT-NUMBER>Where <PORT-NUMBER> is the same number you used in the prior section. Save your changes and close the file.
Launching and connecting to Jupyter Notebook
The instructions below assume that you have SSH’d into your GCE instance using the prior instructions, have already downloaded and unzipped the current assignment folder into assignmentX(where X is the assignment number), and have successfully configured Jupyter Notebook.
If you are not already in the assignment directory, cd into it by running the following command:
cd assignment1 If you haven’t already done so, activate your virtualenv by running:
source .env/bin/activateLaunch Jupyter notebook using:
jupyter-notebook --no-browser --port=<PORT-NUMBER> Where <PORT-NUMBER> is what you wrote in the prior section.
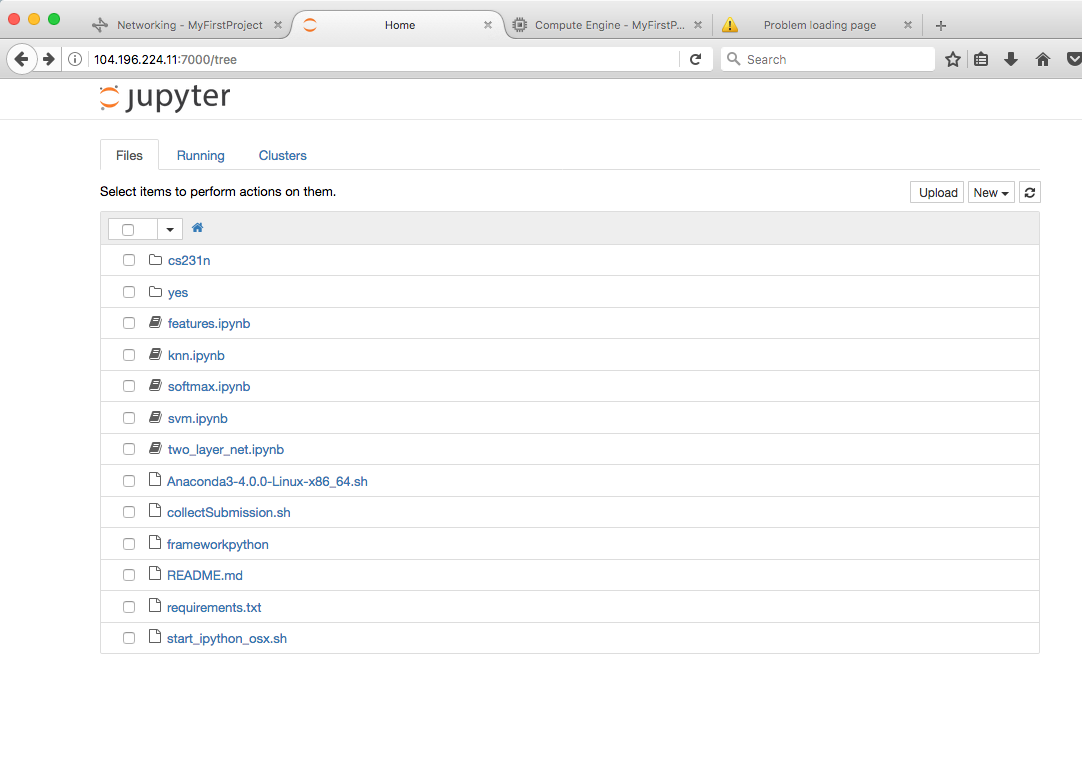
On your local browser, if you go to http://<YOUR-EXTERNAL-IP-ADDRESS>:<PORT-NUMBER>, you should see something like the screen below. My value for <YOUR-EXTERNAL-IP-ADDRESS> was 104.196.224.11 as mentioned above. You should now be able to start working on your assignments.
Submission: Transferring Files From Your Instance To Your Computer
Once you are done with your assignments, run the submission script in your assignment folder. For assignment1, this will create a zip file called assignment1.zip containing the files you need to upload to Canvas. If you’re not in the assignment1 directory already, CD into it by running
cd assignment1install zip by running
sudo apt-get install zipand then run
bash collectSubmission.sh to create the zip file that you need to upload to canvas. Then copy the file to your local computer using the gcloud compute copy-file command as shown below. NOTE: run this command on your local computer:
gcloud compute copy-files [INSTANCE_NAME]:[REMOTE_FILE_PATH] [LOCAL_FILE_PATH]For example, to copy my files to my desktop I ran:
gcloud compute copy-files instance-2:~/assignment1/assignment1.zip ~/DesktopAnother (perhaps easier) option proposed by a student is to directly download the zip file from Jupyter. After running the submission script and creating assignment1.zip, you can download that file directly from Jupyter. To do this, go to Jupyter Notebook and click on the zip file (in this case assignment1.zip). The file will be downloaded to your local computer.
Finally, remember to upload the zip file containing your submission to Canvas. (You can unzip the file locally if you want to double check your ipython notebooks and other code files are correctly inside).
You can refer to this page for more details on transferring files to/from Google Cloud.
BIG REMINDER: Make sure you stop your instances!
Don’t forget to stop your instance when you are done (by clicking on the stop button at the top of the page showing your instances). You can restart your instance and the downloaded software will still be available.
- 申请谷歌云服务器,运行Jupyter
- 远程服务器的jupyter的运行
- 在服务器建立jupyter,浏览器内运行python程序
- mac 下在服务器上运行 Jupyter notebook
- 远程服务器设置jupyter
- 搭建 Jupyter Notebook 服务器
- Jupyter Notebook 服务器配置
- 配置远程服务器jupyter
- 服务器上配置jupyter
- 只需15分钟,使用谷歌云平台运行Jupyter Notebook
- Jupyter Notebook远程服务器配置
- jupyter远程访问linux服务器
- Jupyter安装及服务器配置
- Jupyter notebook远程访问服务器
- CentOS7服务器安装Jupyter Notebook
- 如何在AWS运行Jupyter Notebook
- Jupyter
- jupyter
- Java核心技术 第9版 学习笔记二
- 小米笔记本13.3(Intel+mx150独显双显卡)+deepin15.5+cuda9.0安装教程
- 17.12.09,web学习第二十一天,还有一年,努力吧青年商品条件查询和分页查询
- WEB缓存_缓存过期策略
- Java7特性中,abstract class和interface有什么区别
- 申请谷歌云服务器,运行Jupyter
- IDEA spring-boot jpa jsp 框架搭建(一)
- storm ack机制
- Android-数据库
- BZOJ[4756][Usaco2017 Jan]Promotion Counting 线段树合并
- SSM SpringMVC 批量删除
- 【转载】TensorFlow学习---tf.nn.dropout防止过拟合
- ubuntu proxychains and shadowsocks
- Ubuntu搭建LAMP环境