使用ASP.NET Atlas ListView控件显示列表数据
来源:互联网 发布:java中null什么意思 编辑:程序博客网 时间:2024/04/28 06:17
使用ASP.NET Atlas ListView控件显示列表数据
English Version: http://dflying.dflying.net/1/archive/113_display_listible_data_using_aspnet_atlas_listview_control.html
在这个系列中,我将介绍一些Atlas Sys.UI.Data中较高级的控件,包括:
这篇是其中的第一篇:使用ASP.NET Atlas ListView控件显示列表数据
在目前的大部分Web程序中,我们都需要显示给用户一些列表数据。ASP.NET中的GridView服务器控件提供了这种功能,Atlas中的客户端控件ListView也可以在客户端提供类似功能,并以AJAX方式运行。虽然您可以使用传统的GridView控件加上Atlas的UpdatePanel提供同样的AJAX运行方式,但是这种实现方式较低效,也不是“纯粹”的Atlas方法。推荐的方法是采用Atlas的客户端控件ListView来代替。不要担心,Atlas的ListView控件和GridView一样简单,而其二者在很多概念方面是相似的,例如ItemTemplate。但是需要注意的是目前IDE中并没有提供对Atlas脚本的智能感知功能,加之Atlas脚本也没有编译时期检查,所以在书写代码的时候应该格外小心。
使用ListView的时候应该提供给其一些必要的模版(Template),以告诉Atlas应该如何渲染您的内容。ListView中有如下模版:
- layoutTemplate:这个模版用来渲染包含列表项目的容器(例如使用<table>标记),列表的头部(例如使用<thead>标记),尾部等。您必须为ListView指定一个layoutTemplate。而且这个模版必须包含一个itemTemplate模版,也可选包含一个separatorTemplate模版。
- itemTemplate:这个模版用来渲染列表中的一个项目(例如使用<tr>标记)。这个模版必须被置于layoutTemplate中。
- separatorTemplate:这个模版用来渲染列表中的项目之间的分隔元素(例如使用<hr>标记)。这个模版必须被置于layoutTemplate中。
- emptyTemplate.:这个模版用来渲染没有项目存在时的ListView。此时可能与该ListView相关的DataSource对象中没有项目,或是正在从服务器中取得的过程中。
ListView中还有一些属性:
- itemCssClass:指定项目条目的css class。
- alternatingItemCssClass:指定间隔的项目条目的css class。
- selectedItemCssClass:指定被选中的项目条目的css class。
- separatorCssClass:指定分隔元素的css class。
- itemTemplateParentElementId:这个属性指定了itemTemplate和separatorTemplate的父元素。这样itemTemplate和separatorTemplate元素就可以在其中被重复渲染。
ListView还有一些继承于Sys.UI.Data.DataControl基类的方法/属性,因为在下面的代码中我们不需要使用,这里暂且略过。如果您感兴趣,可以参考这篇文章:使用ASP.NET Atlas ItemView控件显示集合中的单个数据。OK,让我们通过一个实例来说明如何使用ListView控件:
首先,我们编写一个返回.NET中DataTable的Web Service。注意到在这里将继承于Microsoft.Web.Services.DataService基类,并且为service方法加上定义在名称空间System.ComponentModel中的属性DataObjectMethod。在service方法的开头,我们使用System.Threading.Thread.Sleep(2000)来模拟2秒钟的网络延迟,以便可以看到emptyTemplate中的内容。
 [WebService(Namespace = "http://tempuri.org/")][WebServiceBinding(ConformsTo = WsiProfiles.BasicProfile1_1)]
 public class MyService : Microsoft.Web.Services.DataService {

 [DataObjectMethod(DataObjectMethodType.Select)] public DataTable GetListData()
 {
{ System.Threading.Thread.Sleep(2000); DataTable dt = new DataTable("MyListData"); dt.Columns.Add("Name", typeof(string)); dt.Columns.Add("Email", typeof(string)); DataRow newRow; for (int i = 0; i < 5; ++i) { newRow = dt.NewRow(); newRow["Name"] = string.Format("Dflying {0}", i); newRow["Email"] = string.Format("Dflying{0}@dflying.net", i); dt.Rows.Add(newRow);
 } return dt; }
 }
}
然后,添加一些ASP.NET页面中必须的控件/标记:
<atlas:ScriptManager ID="ScriptManager1" runat="server" /><!-- Element for myList (container) --><div id="myList"></div><!-- Layout Elements --><div style="display: none;"></div>在上面的标记中,我们加入了三个标记:一个必须的ScriptManager控件。一个id为myList的div,用来让Atlas把渲染后的ListView放置于这里。一个隐藏的div,用于定义我们的模版。这个隐藏div中的元素在页面上是不可见的,只是用来提供给Atlas必要的模版。
我们在这个隐藏的div中加入如下ListView的模版:
<!-- Layout Template --><table id="myList_layoutTemplate" border="1" cellpadding="3"> <thead> <tr> <td><span>No.</span></td> <td><span>Name</span></td> <td><span>Email</span></td> </tr> </thead> <!-- Repeat Template --> <tbody id="myList_itemTemplateParent"> <!-- Repeat Item Template --> <tr id="myList_itemTemplate"> <td><span id="lblIndex" /></td> <td><span id="lblName" /></td> <td><span id="lblEmail" /></td> </tr> <!-- Separator Item Template --> <tr id="myList_separatorTemplate"> <td colspan="3">Separator</td> </tr> </tbody></table><!-- Empty Template --><div id="myList_emptyTemplate"> No Data</div>上面的代码中您可以看到我提到的所有四种模版。另外还要指定每一个模版一个id,将用于下面的Atlas脚本声明中。在这个例子中我将以HTML Table的形式渲染这个ListView,很抱歉分隔元素将会很丑陋(一个空行)。
最后在页面中添加Atlas脚本声明:
<dataSource id="listDataSource" autoLoad="true" serviceURL="MyService.asmx" /><listView id="myList" itemTemplateParentElementId="myList_itemTemplateParent"> <bindings> <binding dataContext="listDataSource" dataPath="data" property="data" /> </bindings> <layoutTemplate> <template layoutElement="myList_layoutTemplate" /> </layoutTemplate> <itemTemplate> <template layoutElement="myList_itemTemplate"> <label id="lblIndex"> <bindings> <binding dataPath="$index" transform="Add" property="text"/> </bindings> </label> <label id="lblName"> <bindings> <binding dataPath="Name" property="text" /> </bindings> </label> <label id="lblEmail"> <bindings> <binding dataPath="Email" property="text" /> </bindings> </label> </template> </itemTemplate> <separatorTemplate> <template layoutElement="myList_separatorTemplate" /> </separatorTemplate> <emptyTemplate> <template layoutElement="myList_emptyTemplate"/> </emptyTemplate></listView>这里我添加了一个Atlas客户端DataSource对象以从Web Service中取得数据。这里我们暂且不多谈DataSource(可能在后续文章中有所介绍)。让我们来看一下ListView相关的定义:在ListView的定义中,我们指定了itemTemplateParentElementId属性。然后在ListView的内部定义了一个binding段,用来把DataSource中取得的数据与这个ListView绑定起来。我们还定义了四个模版段,每个模版段都用layoutElement与上面定义过的四种模版关联。注意到在layoutTemplate模版中的第一个label控件,我们在其绑定中指定了一个Add transformer以将从0开始的顺序变为从1开始(关于Atlas Transformer,请参考我的这篇文章:http://dflying.cnblogs.com/archive/2006/04/05/367908.html)。
大功告成,运行一下吧。
装载中: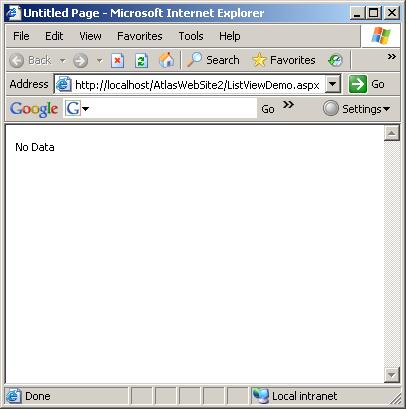
装载完成:
- 使用ASP.NET Atlas ListView控件显示列表数据
- 使用ASP.NET Atlas ItemView控件显示集合中的单个数据
- 使用ASP.NET Atlas XSLTView控件用XSLT修饰并显示XML数据
- 使用ASP.NET Atlas XSLTView控件用XSLT修饰并显示XML数据
- 使用ASP.NET Atlas编写显示进度条控件
- 使用ASP.NETAtlasListView控件显示列表数据
- asp.net使用listview分页显示数据
- asp.net使用listview分页显示数据
- 使用ASP.NET Atlas编写显示真实进度的ProgressBar(进度条)控件
- 使用ASP.NET Atlas编写显示真实进度的ProgressBar(进度条)控件
- 使用ASP.NET Atlas编写显示真实进度的ProgressBar(进度条)控件
- 使用ASP.NET Atlas编写显示真实进度的ProgressBar(进度条)控件
- 使用ASP.NET Atlas编写显示真实进度的ProgressBar(进度条)控件
- ASP.NET的最强大数据显示控件ListView
- 使用ListView控件以列表形式显示一系列数据
- 使用 ASP.NET Atlas PageNavigator控件实现客户端分页导航
- 使用 ASP.NET Atlas PageNavigator控件实现客户端分页导航
- 使用 ASP.NET Atlas PageNavigator控件实现客户端分页导航
- Web 服务版本控制
- 让Windows自动连接到其它计算机
- ANT十五大最佳实践
- 获取磁盘剩余空间
- WEB交互界面易用性设计和验收的指导性原则
- 使用ASP.NET Atlas ListView控件显示列表数据
- 利用Treeview做权限树的一种方法
- 把数据从SQL2000导到SQl2005时打开关系图 提示错误 修正方法
- 在代理中利用VBA对word直接编辑后保存
- Foundation of AJAX 阅读笔记(三)
- 使用ASP.NET Atlas ItemView控件显示集合中的单个数据
- DirectShow中例子pull模式的源filter播放大文件慢的问题
- 使用 ASP.NET Atlas PageNavigator控件实现客户端分页导航
- 全面接触Java集合框架