android 传感器实例 以及 自定义可复用控件的使用
来源:互联网 发布:linux 清除arp缓存 编辑:程序博客网 时间:2024/04/30 21:15
Android中传感器的种类
Google Android操作系统中内置了很多传感器,在部分游戏或软件中可以自动识别屏幕的横屏、竖屏方向来改变屏幕显示布局。下面是Android中支持的几种传感器:
Sensor.TYPE_ACCELEROMETER:加速度传感器。
Sensor.TYPE_GYROSCOPE:陀螺仪传感器。
Sensor.TYPE_LIGHT:亮度传感器。
Sensor.TYPE_MAGNETIC_FIELD:地磁传感器。
Sensor.TYPE_ORIENTATION:方向传感器。
Sensor.TYPE_PRESSURE:压力传感器。
Sensor.TYPE_PROXIMITY:近程传感器。
Sensor.TYPE_TEMPERATURE:温度传感器。
Android中传感器的编程
对与没有真机的开发者来说,想做传感器编程也并不难只要会使用google-code开源项目里的SensorSimulator就能达到和真机一样的效果,这里是它的链接http://code.google.com/p/openintents/wiki/SensorSimulator,这是第二个版本较以前有了很多变化,不仅有了更干净,简便的界面,而且还增加了更多的功能比如你可以从真机上记录一系列的数据下来方便研究。关于如何连接,调试,测试,编程上面都有完整的介绍,只要英语还过关就能应付。
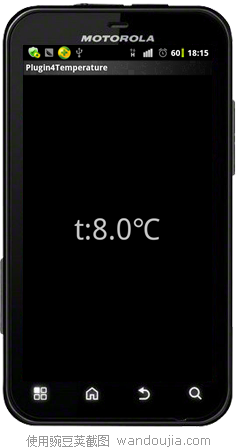
好了该进入正题了,首先来个简单点的:温度传感器
首先新建一个项目,然后在它的Activity实现SensorEventListener,在重写两个必须得方法onSensorChanged,onAccuracyChanged,然后在onResume(),onPause()方法中注册,解除监听器.当onSensorChanged()方法中触发事件时首先会得到温度值然后会new一个message发送给handler更新UI
代码如下:
- package sina.CreAmazing.plugin_temperature;
- import android.app.Activity;
- import android.hardware.Sensor;
- import android.hardware.SensorEvent;
- import android.hardware.SensorEventListener;
- import android.hardware.SensorManager;
- import android.os.Bundle;
- import android.os.Handler;
- import android.os.Message;
- import android.widget.TextView;
- public class Plugin4TemperatureActivityextends Activity implements
- SensorEventListener {
- /** Called when the activity is first created. */
- public staticfinal int TEMPERATRUE =1;
- //声明一个SensorManager,在oncreate方法中获得实例;
- private SensorManager mSensorManager;
- private Sensor mTemperature;
- private TextView tv;
- //在此handler是为了更新UI用的,
- Handler myHandler = new Handler() {
- public void handleMessage(android.os.Message msg) {
- switch (msg.what) {
- case TEMPERATRUE:
- float x = (Float) msg.obj;
- System.out.println("receive:" + x);
- tv.setText("t:"+x+"℃");
- break;
- default:
- break;
- }
- };
- };
- @Override
- public void onCreate(Bundle savedInstanceState) {
- super.onCreate(savedInstanceState);
- setContentView(R.layout.main);
- tv = (TextView) this.findViewById(R.id.tv);
- // 获取服务并得到SensorManager实例
- mSensorManager = (SensorManager) getSystemService(SENSOR_SERVICE);
- //获取注册传感器
- mTemperature = mSensorManager.getDefaultSensor(Sensor.TYPE_TEMPERATURE);
- }
- /*
- * 在android api中特别叮嘱Always make sure to disable sensors you don't need,
- * especially when your activity is paused.
- * 所以我们分别要在activity的onResume(),onPause()方法中注册,解除监听器否则会耗掉大量的电能。
- *
- */
- @Override
- protected void onResume() {
- super.onResume();
- //注册你所需要的传感器
- mSensorManager.registerListener(this, mTemperature,
- SensorManager.SENSOR_DELAY_NORMAL);
- }
- @Override
- protected void onPause() {
- super.onPause();
- //解除注册监听器
- mSensorManager.unregisterListener(this);
- }
- //在这个方法中可以获取你注册传感器的值
- @Override
- public void onSensorChanged(SensorEvent event) {
- // 对于温度传感器event的第一个值就是摄氏温度值
- float x = event.values[0];
- if (event.sensor.getType() == Sensor.TYPE_TEMPERATURE) {
- System.out.println(x);
- //发送消息给handler,更新UI
- Message msg = myHandler.obtainMessage();
- msg.what = TEMPERATRUE;
- msg.obj = x;
- myHandler.sendMessage(msg);
- }
- }
- @Override
- public void onAccuracyChanged(Sensor sensor,int accuracy) {
- // TODO Auto-generated method stub
- }
- }
package sina.CreAmazing.plugin_temperature;import android.app.Activity;import android.hardware.Sensor;import android.hardware.SensorEvent;import android.hardware.SensorEventListener;import android.hardware.SensorManager;import android.os.Bundle;import android.os.Handler;import android.os.Message;import android.widget.TextView;public class Plugin4TemperatureActivity extends Activity implementsSensorEventListener {/** Called when the activity is first created. */public static final int TEMPERATRUE = 1;//声明一个SensorManager,在oncreate方法中获得实例;private SensorManager mSensorManager;private Sensor mTemperature;private TextView tv;//在此handler是为了更新UI用的,Handler myHandler = new Handler() {public void handleMessage(android.os.Message msg) {switch (msg.what) {case TEMPERATRUE:float x = (Float) msg.obj;System.out.println("receive:" + x);tv.setText("t:"+x+"℃");break;default:break;}};};@Overridepublic void onCreate(Bundle savedInstanceState) {super.onCreate(savedInstanceState);setContentView(R.layout.main);tv = (TextView) this.findViewById(R.id.tv);// 获取服务并得到SensorManager实例mSensorManager = (SensorManager) getSystemService(SENSOR_SERVICE);//获取注册传感器mTemperature = mSensorManager.getDefaultSensor(Sensor.TYPE_TEMPERATURE);}/* * 在android api中特别叮嘱Always make sure to disable sensors you don't need, * especially when your activity is paused. * 所以我们分别要在activity的onResume(),onPause()方法中注册,解除监听器否则会耗掉大量的电能。 * */@Overrideprotected void onResume() {super.onResume();//注册你所需要的传感器mSensorManager.registerListener(this, mTemperature,SensorManager.SENSOR_DELAY_NORMAL);}@Overrideprotected void onPause() {super.onPause();//解除注册监听器mSensorManager.unregisterListener(this);}//在这个方法中可以获取你注册传感器的值@Overridepublic void onSensorChanged(SensorEvent event) {// 对于温度传感器event的第一个值就是摄氏温度值float x = event.values[0];if (event.sensor.getType() == Sensor.TYPE_TEMPERATURE) {System.out.println(x);//发送消息给handler,更新UIMessage msg = myHandler.obtainMessage();msg.what = TEMPERATRUE;msg.obj = x;myHandler.sendMessage(msg);}}@Overridepublic void onAccuracyChanged(Sensor sensor, int accuracy) {// TODO Auto-generated method stub}}它的布局文件就是一个简单的TextView:
- <?xml version="1.0" encoding="utf-8"?>
- <LinearLayout xmlns:android="http://schemas.android.com/apk/res/android"
- android:layout_width="fill_parent"
- android:layout_height="fill_parent"
- android:gravity="center"
- android:orientation="vertical" >
- <TextView
- android:gravity="center"
- android:id="@+id/tv"
- android:layout_width="fill_parent"
- android:layout_height="wrap_content"
- android:text="@string/hello" />
- </LinearLayout>
<?xml version="1.0" encoding="utf-8"?><LinearLayout xmlns:android="http://schemas.android.com/apk/res/android" android:layout_width="fill_parent" android:layout_height="fill_parent" android:gravity="center" android:orientation="vertical" > <TextView android:gravity="center" android:id="@+id/tv" android:layout_width="fill_parent" android:layout_height="wrap_content" android:text="@string/hello" /></LinearLayout>
在AndroidManifast.xml中不需要什么权限。运行效果如图1
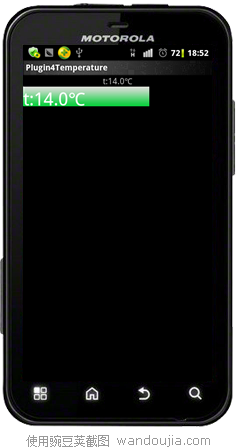
如何自定义一个控件,来更好的显示我们得到的这些数据呢?如何又让自己定义的这个控件在多个Activity中都能很方便的显示呢?好这就来为你们揭秘
首先在layout文件夹里新建一个布局文件plug_in.xml,这是你所要定义的布局,可以很简单,可以很复杂,它将作为一个独立的布局文件供你在任何其他布局文件中引用。在这里只是一个重叠在一起的ImageView和TextView。
- <?xml version="1.0" encoding="utf-8"?>
- <FrameLayout xmlns:android="http://schemas.android.com/apk/res/android"
- android:layout_width="match_parent"
- android:layout_height="match_parent"
- android:orientation="vertical" >
- <ImageView
- android:layout_width="wrap_content"
- android:layout_height="wrap_content"
- android:src="@drawable/bar" />
- <TextView
- android:id="@+id/plugin_tv"
- android:layout_width="wrap_content"
- android:layout_height="wrap_content"
- android:text="@string/hello"
- android:textColor="@android:color/white"
- android:textSize="30dip" />
- </FrameLayout>
<?xml version="1.0" encoding="utf-8"?><FrameLayout xmlns:android="http://schemas.android.com/apk/res/android" android:layout_width="match_parent" android:layout_height="match_parent" android:orientation="vertical" > <ImageView android:layout_width="wrap_content" android:layout_height="wrap_content" android:src="@drawable/bar" /> <TextView android:id="@+id/plugin_tv" android:layout_width="wrap_content" android:layout_height="wrap_content" android:text="@string/hello" android:textColor="@android:color/white" android:textSize="30dip" /></FrameLayout>
如何引用自己的控件呢?
关键是在main.xml也就是在要显示Activity的布局中加入:
- <include
- android:id="@+id/main_temperature"
- layout="@layout/plug_in" />
<include android:id="@+id/main_temperature" layout="@layout/plug_in" />
一个是为这个控件添加一个id,一个是指定所要引用的布局。
这样就能在任何需要的布局你添加你自己的布局,但是如何使用它呢?
首先要定义一个View,和要使用的TextView:
- private TextView tv2;
- private View temperatureView;
private TextView tv2;private View temperatureView;
在onCreate()中找到他们:
- temperatureView = this.findViewById(R.id.main_temperature);
- tv2 = (TextView) temperatureView.findViewById(R.id.plugin_tv);
temperatureView = this.findViewById(R.id.main_temperature);tv2 = (TextView) temperatureView.findViewById(R.id.plugin_tv);
注意tv2是在temperatureView中所以是tv2 = (TextView) temperatureView.findViewById(R.id.plugin_tv);
然后就可以使用tv2了:
- switch (msg.what) {
- case TEMPERATRUE:
- float x = (Float) msg.obj;
- System.out.println("receive:" + x);
- tv.setText("t:"+x+"℃");
- tv2.setText("t:"+x+"℃");
- break;
- default:
- break;
- }
switch (msg.what) {case TEMPERATRUE:float x = (Float) msg.obj;System.out.println("receive:" + x);tv.setText("t:"+x+"℃");tv2.setText("t:"+x+"℃");break;default:break;}运行效果如图2
这里是两个项目的源码:
http://115.com/file/c249ln2g#Plugin4Temperature.rar
http://115.com/file/belphf21#Plugin4Temperature2.rar
- android 传感器实例 以及 自定义可复用控件的使用
- android 传感器实例 以及 自定义可复用控件的使用
- ButterKnife的使用以及自定义注解实例化控件
- Android传感器使用实例
- android 自定义控件方法以及实例
- Android传感器使用实例1
- android自定义控件实例
- android自定义控件实例
- android自定义控件实例
- android自定义控件实例
- android自定义控件实例
- android自定义控件实例
- android自定义控件实例
- android自定义控件实例
- android 自定义控件实例
- android自定义控件实例
- android自定义控件实例
- Android自定义控件以及控件属性的自定义
- MSVC vs. MinGW 之 (lib,dll,def,obj,exe) vs (a,dll,def,o,exe) 玩转攻略手记_Kaien Space
- QMessageBox按钮汉化
- HTTP 数据传输 -- Wizfi210应用笔记
- ExtJS4组件_Grid配置-属性-方法详解-案例
- Objective-C与JavaScript的交互
- android 传感器实例 以及 自定义可复用控件的使用
- cheackbox的checked的属性
- 相机标定
- 关于typedef的用法
- PropertyBag对象实现数据连续操作
- Animation的巧妙使用
- Android联系人姓氏提示
- 断电后不能上网的解决方案
- 听从内心的呼唤,做好自己的事