减少HTTP请求之合并图片详解(大型网站优化技术)
来源:互联网 发布:护卫神php套件好用吗 编辑:程序博客网 时间:2024/05/21 15:00
减少HTTP请求之合并图片详解(大型网站优化技术)
一、相关知识讲解
看过雅虎的前端优化35条建议,都知道优化前端是有多么重要。页面的加载速度直接影响到用户的体验。80%的终端用户响应时间都花在了前端上,其中大部分时间都在下载页面上的各种组件:图片,样式表,脚本,Flash等等。
减少组件数必然能够减少页面提交的HTTP请求数。这是让页面更快的关键。减少页面组件数的一种方式是简化页面设计。但有没有一种方法可以在构建复杂的页面同时加快响应时间呢?嗯,确实有鱼和熊掌兼得的办法。
这里我们就拿雅虎的第一条建议:尽量减少HTTP请求数里的减少图片请求数量 进行讲解。
我们都知道,一个网站的一个页面可能有很多小图标,例如一些按钮、箭头等等。当加载html文档时,只要遇到有图片的,都会自动建立起HTTP请求下载,然后将图片下载到页面上,这些小图片可能也就是十几K大甚至1K都不到,假如我们的一个页面有一百个小图标,我们在加载页面时,就要发送100个HTTP请求,如果你的网站访问量很大并发量也很高,假如上百万访问量,那发起的请求就是千万级别了,服务器是有一定的压力的,并且一个用户的一个页面要发起那么多请求,是很耗时的。
所以,我们优化的方案就是:将这些十几K、几K的小图标合并在一张图片里,然后用CSS的background-image和background-position属性来定位要显示的部分。
二、代码实现
1、思路:
将一个文件夹里的图标,自动生成在一张图片里面,同时自动生成对应的css文件,我们只要在HTML里的标签中添加相应的属性值就能显示图片了。
2、实现过程:

1 <?php 2 //自己定义一个根目录 3 define('ROOT', $_SERVER['DOCUMENT_ROOT'].'iconwww'); 4 //这个是图片的目录 5 define('RES_BASE_URL', 'http://localhost:8080/iconwww/img'); 6 7 /** 8 * 生成背景图的函数 9 */ 10 function generateIcon() { 11 //网站根目录 12 $webRoot = rtrim(ROOT, '/'); 13 //背景图目录 14 $root = "$webRoot/img/bg"; 15 //Php-SPL库中 的 目录文件遍历器 16 $iterator = new DirectoryIterator($root); 17 //开始遍历该背景图目录下的目录,我们是把想生成背景图的目录,放在bg目录中以各个模块的目录分类存放 18 foreach ($iterator as $file) { 19 //遇到目录遍历 20 if (!$file->isDot() && $file->isDir()) { 21 //取得文件名 22 $fileName = $file->getFilename(); 23 generateIconCallback("$root/$fileName", "$webRoot/img/$fileName", "$webRoot/css/$fileName.css"); 24 } 25 } 26 } 27 28 /** 29 * 用户生成合并的背景图和css文件的函数 30 * @param string $dir 生成背景图的图标所在的目录路径 31 * @param string $bgSavePath 背景图所保存的路径 32 * @param string $cssSavePath css保存的路径 33 */ 34 function generateIconCallback($dir, $bgSavePath, $cssSavePath) { 35 $shortDir = str_replace('\\', '/', substr($dir, strlen(ROOT-1))); 36 //返回文件路径信息 37 $pathInfo = pathinfo($bgSavePath.'.png'); 38 39 $bgSaveDir = $pathInfo['dirname']; 40 //确保目录可写 41 ensure_writable_dir($bgSaveDir); 42 //背景图名字 43 $bgName = $pathInfo['filename']; 44 //调用generateIconCallback_GetFileMap()函数生成每一个图标所需要的数据结构 45 $fileMap = array('a' => generateIconCallback_GetFileMap($dir)); 46 47 $iterator = new DirectoryIterator($dir); 48 foreach ($iterator as $file) { 49 if ($file->isDot()) continue; 50 if ($file->isDir()) { 51 //二级目录也要处理 52 $fileMap['b-'.$file->getFilename()] = generateIconCallback_GetFileMap($file->getRealPath()); 53 } 54 } 55 ksort($fileMap); 56 57 //分析一边fileMap,计算整个背景图的大小和每一个图标的offset 58 //初始化偏移量和背景图 59 $offsetX = $offsetY = $bgWidth = 0; 60 //设定每个小图标之间的距离 61 $spaceX =$spaceY = 5; 62 //图片最大宽度 63 $maxWidth = 800; 64 $fileMd5List =array(); 65 //这里需要打印下$fileMap就知道它的数据结构了 66 foreach ($fileMap as $k1 => $innerMap) { 67 foreach ($innerMap as $k2 => $itemList) { 68 //行高姐X轴偏移量初始化 69 $offsetX = $lineHeight = 0; 70 foreach ($itemList as $k3 => $item) { 71 //变量分别是:图标的宽度,高度,类型,文件名,路径,MD5加密字符串 72 list($imageWidth, $imageHeight, $imageType, $fileName, $filePathname, $fileMd5) = $item; 73 $fileMd5List []= $fileMd5; 74 //如果图片的宽度+偏移量 > 最大宽度(800) 那就换行 75 if ($offsetX !== 0 && $imageWidth + $offsetX > $maxWidth) { 76 $offsetY += $spaceY + $lineHeight; 77 $offsetX = $lineHeight = 0; 78 } 79 //如果图片高度 > 当前行高 那就讲图片高度付给行高我们这的 80 if ($imageHeight > $lineHeight) $lineHeight = $imageHeight; 81 $fileMap[$k1][$k2][$k3] = array($imageWidth, $imageHeight, $offsetX, $offsetY, $imageType, $fileName, $filePathname); 82 //X轴偏移量的计算 83 $offsetX += $imageWidth + $spaceX; 84 if ($offsetX > $bgWidth) $bgWidth = $offsetX; 85 } 86 //Y轴偏移量的计算 87 $offsetY += $lineHeight + $spaceY; 88 } 89 } 90 //把右下两边多加了的空白距离给干掉 91 $bgWidth -= $spaceX; 92 $bgHeight = $offsetY - $spaceY; 93 $fileMd5List = implode("\n", $fileMd5List); 94 95 //生成背景图和 css文件 96 97 //资源路径 98 $resBaseUrl = RES_BASE_URL; 99 $suffix = base_convert(abs(crc32($fileMd5List)), 10, 36);100 $writeHandle = fopen($cssSavePath, 'w');101 fwrite($writeHandle, "/** bg in dir: $shortDir/ */\n[icon-$bgName]{background:url({$resBaseUrl}/$bgName.png?$suffix) no-repeat;display:inline-block;}");102 103 //做图片,这些函数具体可以查看PHP手册104 $destResource = imagecreatetruecolor($bgWidth, $bgHeight);105 imagealphablending($destResource, false);106 imagesavealpha($destResource, false);107 $color = imagecolorallocatealpha($destResource, 255, 255, 255, 127);108 109 imagefill($destResource, 0, 0, $color);110 111 //对每一张小图片进行处理,生成在大背景图里,并生成css文件112 foreach ($fileMap as $innerMap) {113 foreach ($innerMap as $itemList) {114 foreach ($itemList as $item) {115 list($imageWidth, $imageHeight, $offsetX, $offsetY, $imageType, $fileName, $filePathname) = $item;116 if ($imageType === IMAGETYPE_PNG) {117 $srcResource = imagecreatefrompng($filePathname);118 } else if ($imageType === IMAGETYPE_JPEG) {119 $srcResource = imagecreatefromjpeg($filePathname);120 }121 imagecopy($destResource, $srcResource, $offsetX, $offsetY, 0, 0, $imageWidth, $imageHeight);122 imagedestroy($srcResource);123 124 //写入css125 $posX = $offsetX === 0 ? 0 : "-{$offsetX}px";126 $posY = $offsetY === 0 ? 0 : "-{$offsetY}px";127 fwrite($writeHandle, "\n[icon-$bgName=\"$fileName\"]{width:{$imageWidth}px;height:{$imageHeight}px;background-position:$posX $posY;}");128 } 129 }130 }131 132 //压缩级别 7133 imagepng($destResource, "$bgSavePath.png", 7);134 imagedestroy($destResource);135 fclose($writeHandle);136 137 $shortCssSavePath = substr($cssSavePath, strlen(ROOT));138 }139 140 /**141 * 将图片的信息处理成我们想要的数据结构142 * @param [type] $dir [description]143 * @return [type] [description]144 */145 function generateIconCallback_GetFileMap($dir) {146 $map = $sort = array();147 $iterator = new DirectoryIterator($dir);148 foreach($iterator as $file) {149 if(!$file->isFile()) continue;150 $filePathname = str_replace("\\", '/', $file->getRealPath());151 //这些函数可以查看PHP手册152 $imageInfo = getimagesize($filePathname);153 $imageWidth = $imageInfo[0];154 $imageHeight = $imageInfo[1];155 $imageType = $imageInfo[2];156 157 if(!in_array($imageType, array(IMAGETYPE_JPEG, IMAGETYPE_PNG))) {158 $fileShortName = substr($filePathname, strlen(ROOT) - 1);159 echo "<p> $fileShortName 图片被忽略: 因为图片类型不是png|jpg.</p>";160 continue;161 }162 163 //这是我们的图片规格,行高分别有 16 32 64 128 256 99999 164 foreach(array(16, 32, 64, 128, 256, 99999) as $height) {165 if($imageHeight <= $height) {166 $mapKey = $height;167 break;168 }169 }170 if(!isset($map[$mapKey])) $map[$mapKey] = array();171 $filePathInfo = pathinfo($filePathname);172 $map[$mapKey] []= array($imageWidth, $imageHeight, $imageType, $filePathInfo['filename'], $filePathname, md5_file($filePathname));173 $sort[$mapKey] []= str_pad($imageHeight, 4, '0', STR_PAD_LEFT) . $filePathInfo['filename'];174 }175 foreach($map as $k => $v) array_multisort($map[$k], SORT_ASC, SORT_NUMERIC, $sort[$k]);176 ksort($map, SORT_NUMERIC);177 return $map;178 }179 180 /**181 * 判断目录是否可写182 * @param string $dir 目录路径183 */184 function ensure_writable_dir($dir) {185 if(!file_exists($dir)) {186 mkdir($dir, 0766, true);187 @chmod($dir, 0766);188 @chmod($dir, 0777);189 }190 else if(!is_writable($dir)) {191 @chmod($dir, 0766);192 @chmod($dir, 0777);193 if(!@is_writable($dir)) {194 throw new BusinessLogicException("目录不可写", $dir);195 }196 }197 }198 199 generateIcon();200 ?>201 <!DOCTYPE html>202 <html>203 <head>204 <link rel="stylesheet" type="text/css" href="css/Pink.css">205 <title></title>206 207 208 </head>209 <body>210 <div>我们直接引入所生成的css文件,并测试一下是否成功</div>211 <br>212 <div>这里在span标签 添加属性 icon-Pink ,值为About-40,正常显示图片</div>213 <span icon-Pink="About-40"></span>214 </body>215 </html>
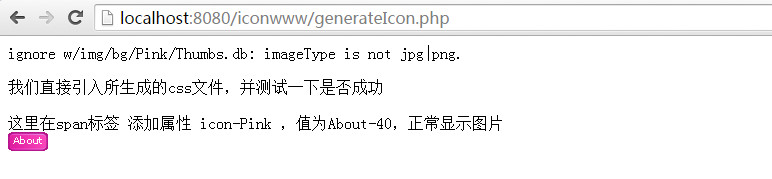
调用以上代码,我们的浏览器是这样显示的:
然后css目录生成了Pink.css文件:
img目录下生成了Pink.png文件:
看看生成的背景图是长啥样子:
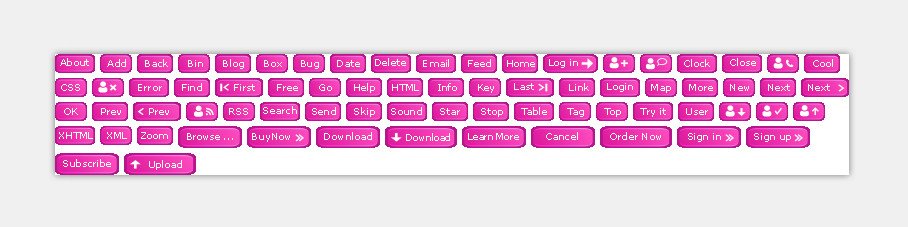
接下来我们再看一下所生成的图片大小与Pink文件夹里所有小图片总和的大小,对它们做个比较:

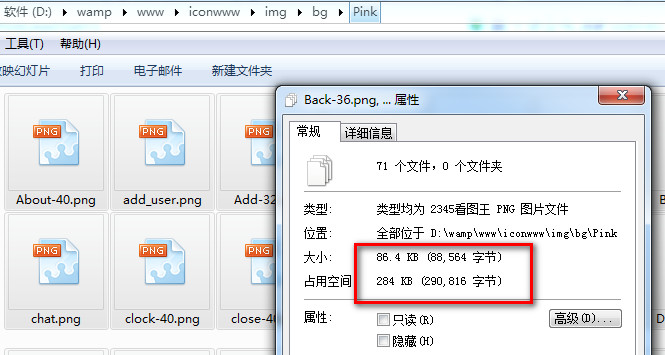
从上图可以看出,我们生成的图片的大小明显小于文件夹所有图片的大小,所以在将100个小图标下载下来的速度 会明显小于 将背景图下载下来和将CSS下载下来的速度。
当访问量大时,或者小图片的量大时,会起到很明显的优化效果!!!
代码中的每一个点都基本上有注释,很方便大家去理解,只要大家用心去看,肯定能将这一网站优化技术用到自己的项目中。
本次博文就写到这!!!
如果此博文中有哪里讲得让人难以理解,欢迎留言交流,若有讲解错的地方欢迎指出。
如果您觉得您能在此博文学到了新知识,请为我顶一个,如文章中有解释错的地方,欢迎指出。
互相学习,共同进步!
- 减少HTTP请求之合并图片详解(大型网站优化技术)
- 减少HTTP请求之合并图片详解(大型网站优化技术)
- 减少HTTP请求之合并图片详解(大型网站优化技术)
- 减少HTTP请求之合并图片详解(大型网站优化技术)
- 减少HTTP请求之合并图片详解(大型网站优化技术)
- [大型网站优化技术] -- 减少HTTP请求之合并图片详解
- 减少HTTP请求之将图片转成二进制并生成Base64编码,可以在网页中通过url查看图片(大型网站优化技术)
- 减少HTTP请求之将图片转成二进制并生成Base64编码,可以在网页中通过url查看图片(大型网站优化技术)
- 减少HTTP请求之将图片转成二进制并生成Base64编码,可以在网页中通过url查看图片(大型网站优化技术)
- [大型网站优化技术] -- 减少HTTP请求之将图片转成二进制并生成Base64编码,可以在网页中通过url查看图片
- 减少HTTP请求之将图片转成二进制并生成Base64编码,可以在网页中通过url查看图片(大型网站优化技术)+缓存
- 减少HTTP请求之将图片转成二进制并生成Base64编码,可以在网页中通过url查看图片(大型网站优化技术)
- 网站优化之减少HTTP请求
- 图片合并 减少 http 请求
- 前端性能优化--合并压缩js,减少http请求次数
- 减少请求最有效方法:CSS Sprites 图片合并技术
- 使用图片精灵优化前端 减少http请求
- Web项目性能优化之减少HTTP请求次数优化
- PAT-A1006
- mapreduce代码整理之sort
- 用数组实现线性表
- 彻底理解JavaScript原型
- 如何判断linux下物理cpu数,核数以及是否支持超线程
- 减少HTTP请求之合并图片详解(大型网站优化技术)
- Integral Channel Features
- android学习-去掉test编译
- Linux core 文件介绍
- freeimage转char*
- android studio发布和同步maven仓库aar
- 给PDF嵌入相关字体
- Linux中epoll IO多路复用机制
- Android 使用ksoap进行webservice请求