分组UITableVie
来源:互联网 发布:c 和java的三大框架 编辑:程序博客网 时间:2024/05/16 08:43
前面两篇文章讲了表格的简单使用,不过却并没有分组。为了做一个有分组的表格,我想到了树形结构的数据。记得前边在介绍Picker控件时,曾经使用过我国部分省市名称的信息,这里,我们再次使用那个信息。在那篇文章已经建好了一个plist文件,所以后面我们会直接将该文件拖放到新工程中。在文章的最后会将代码上传。
我们做的分组表格效果如下图:

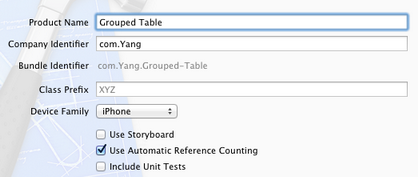
1、运行Xcode 4.2,新建一个Single View Application,名称为Grouped Table:
2、单击ViewController.xib,使用Interface Builder给视图添加一个UITableView控件,并使其覆盖整个视图:
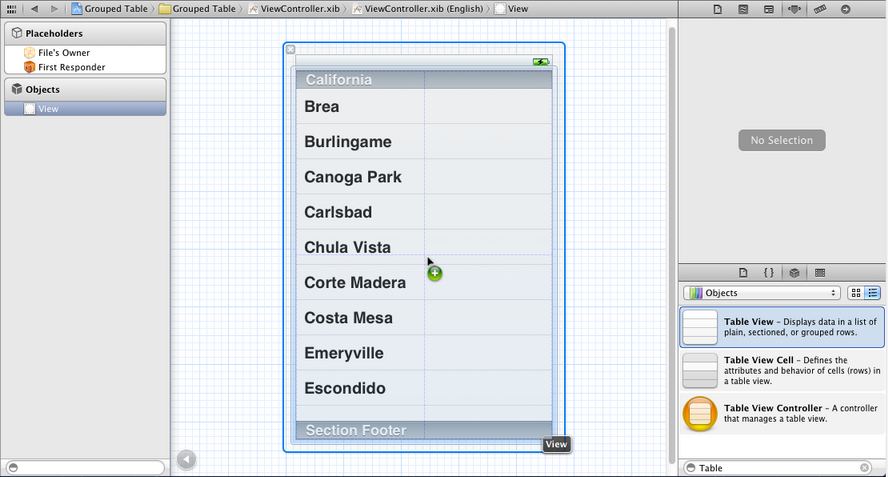
3、选中新添加的UITableView控件,打开Connection Inspector,找到delegate和datasource,从它们右边的圆圈拉线到Files Owner图标:

4、将之前用过的provinceCities.plist文件拖到当前工程中,并选中“Copy…”选项。
5、打开ViewController.h,添加代码:
#import <UIKit/UIKit.h> @interface ViewController : UIViewController <UITableViewDelegate, UITableViewDataSource>
@property (strong, nonatomic) NSDictionary *provinceCities;
@property (strong, nonatomic) NSArray *provinces; @end
6、打开ViewController.m,向其中添加代码:
6.1 在@implementation下面添加代码:
@synthesize provinces; @synthesize provinceCities;
6.2 在ViewDidLoad方法中添加代码如下:
- (void)viewDidLoad { [super viewDidLoad]; // Do any additional setup after loading the view, typically from a nib.
NSBundle *bundle = [NSBundle mainBundle];
NSURL *plistURL = [bundle URLForResource:@"provinceCities" withExtension:@"plist"];
NSDictionary *dictionary = [NSDictionary dictionaryWithContentsOfURL:plistURL];
self.provinceCities = dictionary;
NSArray *keys = [self.provinceCities allKeys];
self.provinces = keys; }
6.3 在ViewDidUnload方法中添加代码:
- (void)viewDidUnload { [super viewDidUnload];
// Release any retained subviews of the main view.
// e.g. self.myOutlet = nil;
self.provinceCities = nil;
self.provinces = nil; }
6.4 在@end之前添加代码:
#pragma mark - #pragma mark Table View Data Source Methods
- (NSInteger)numberOfSectionsInTableView:(UITableView *)tableView { //这个方法用来告诉表格有几个分组
return [provinces count];
}
- (NSInteger)tableView:(UITableView *)tableView numberOfRowsInSection:(NSInteger)section { //这个方法告诉表格第section个分组有多少行
NSString *key = [provinces objectAtIndex:section];
NSArray *cities = [provinceCities objectForKey:key];
return [cities count];
}
- (UITableViewCell *)tableView:(UITableView *)tableView cellForRowAtIndexPath:(NSIndexPath *)indexPath { //这个方法用来告诉某个分组的某一行是什么数据,返回一个UITableViewCell
NSUInteger section = [indexPath section];
NSUInteger row = [indexPath row];
//获取这个分组的省份名称
NSString *key = [provinces objectAtIndex:section];
//根据省份名称获得这个省份的城市列表
NSArray *cities = [provinceCities objectForKey:key];
static NSString *GroupedTableIdentifier = @"GroupedTableIdentifier";
UITableViewCell *cell = [tableView dequeueReusableCellWithIdentifier:
GroupedTableIdentifier];
if (cell == nil) { cell = [[UITableViewCell alloc] initWithStyle:UITableViewCellStyleDefault reuseIdentifier:GroupedTableIdentifier];
}
cell.textLabel.text = [cities objectAtIndex:row];
return cell; }
- (NSString *)tableView:(UITableView *)tableView titleForHeaderInSection:(NSInteger)section { //这个方法用来告诉表格第section分组的名称 NSString *key = [provinces objectAtIndex:section]; return key;
}
7、运行,效果如下图左:
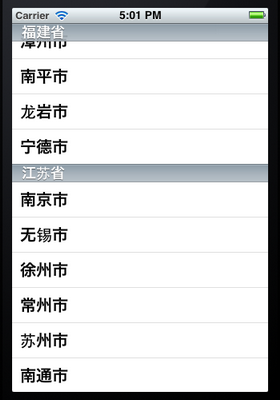

8、现在关闭模拟器,打开ViewController.xib,选中Table View控件,打开Attribute Inspector,设置其Style为Grouped:

然后再运行,效果如上图右。
9、可是,数据很多,想找到一个城市可能要花很长时间。为此,我们添加标签。标签将会在右侧显示,每个标签对应一个省份。单击一个标签就可以快速跳到那个省份的数据。
打开ViewController.m,在@end之前添加代码:
- (NSArray *)sectionIndexTitlesForTableView:(UITableView *)tableView { return provinces; }运行:

工程代码:http://www.oschina.net/code/snippet_164134_9782
- 分组UITableVie
- 分组
- 分组
- 分组.
- 分组
- 分组
- 分组
- 分组
- 分组
- 分组
- 分组
- 分组与分组函数
- 分组构造
- 分组select
- 分组菜单
- dataGrid分组
- sql 分组
- 分组查询
- iOS NSNotification的使用
- Andorid 分享组件和评论组件
- javascript 将对象数组转换为json字符串
- UVA - 10763 Foreign Exchange(vector的使用)
- 泛型技巧系列:如何提供类型参数之间的转换
- 分组UITableVie
- 求符合条件的最大子串的长度
- ACE的线程
- 临时对象传递给non-const reference 参数是不允许的
- 修改pppd,提高openwrt中pppoe多拨成功率
- RegexKitLite in IOS5
- 完全卸载oracle11g步骤
- 关于nagios的一篇很不错的文章
- CentOS 6.3 切换桌面模式和命令行模式探索